![enginehire logo thin dark 1.0.png]](https://learn.enginehire.io/hs-fs/hubfs/enginehire%20logo%20thin%20dark%201.0.png?height=40&name=enginehire%20logo%20thin%20dark%201.0.png)
Let’s get started 🚀
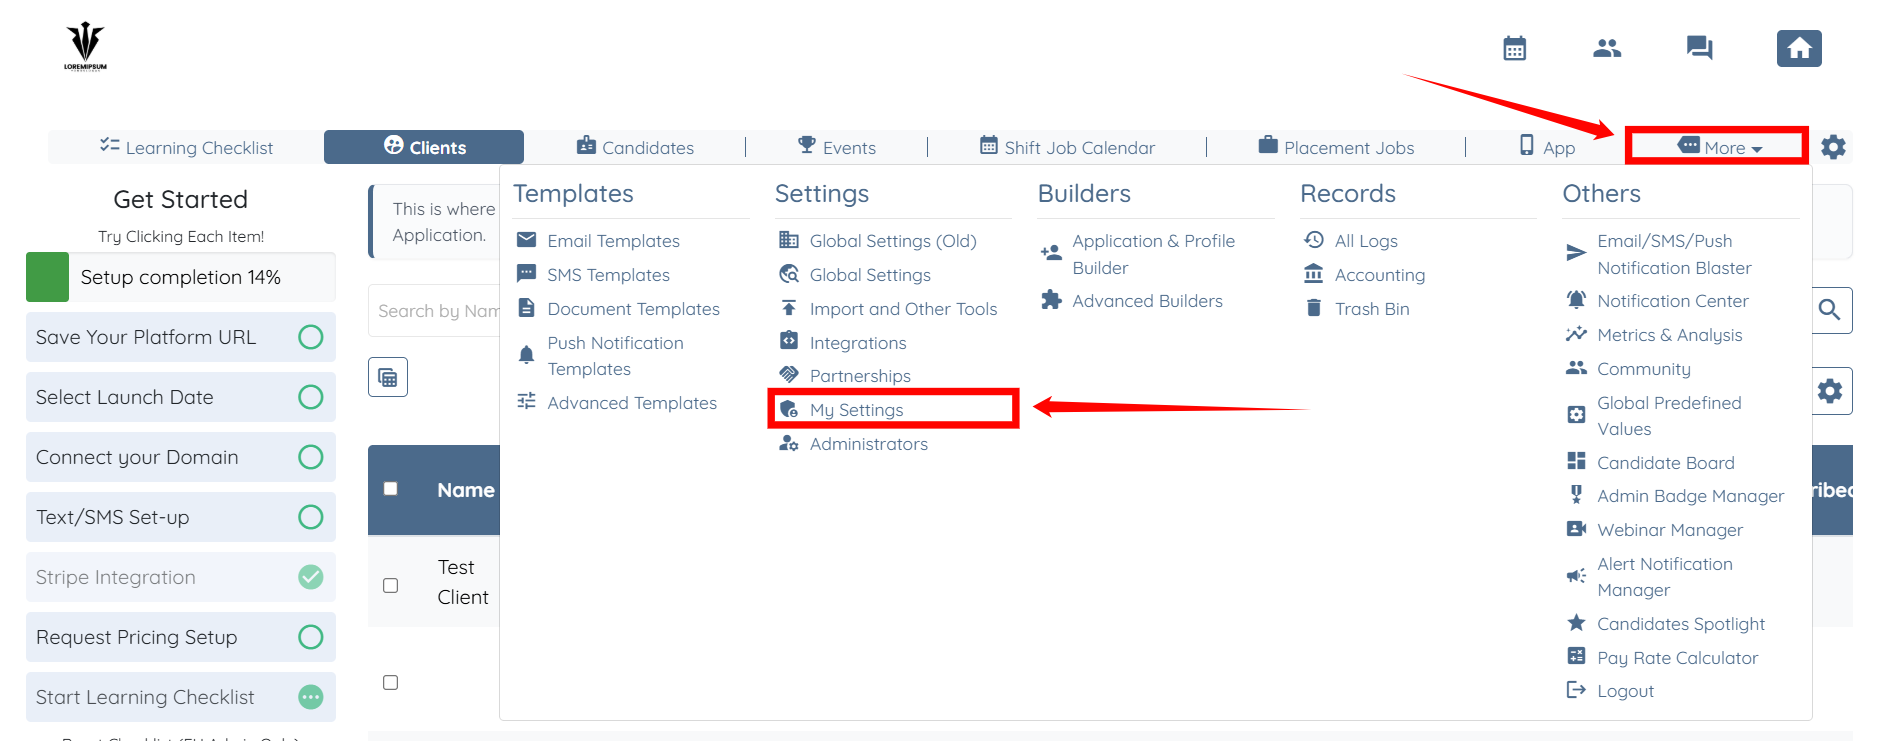
Step 1: Log in to your agent dashboard, then click More > My Settings, as shown in the screenshot below.
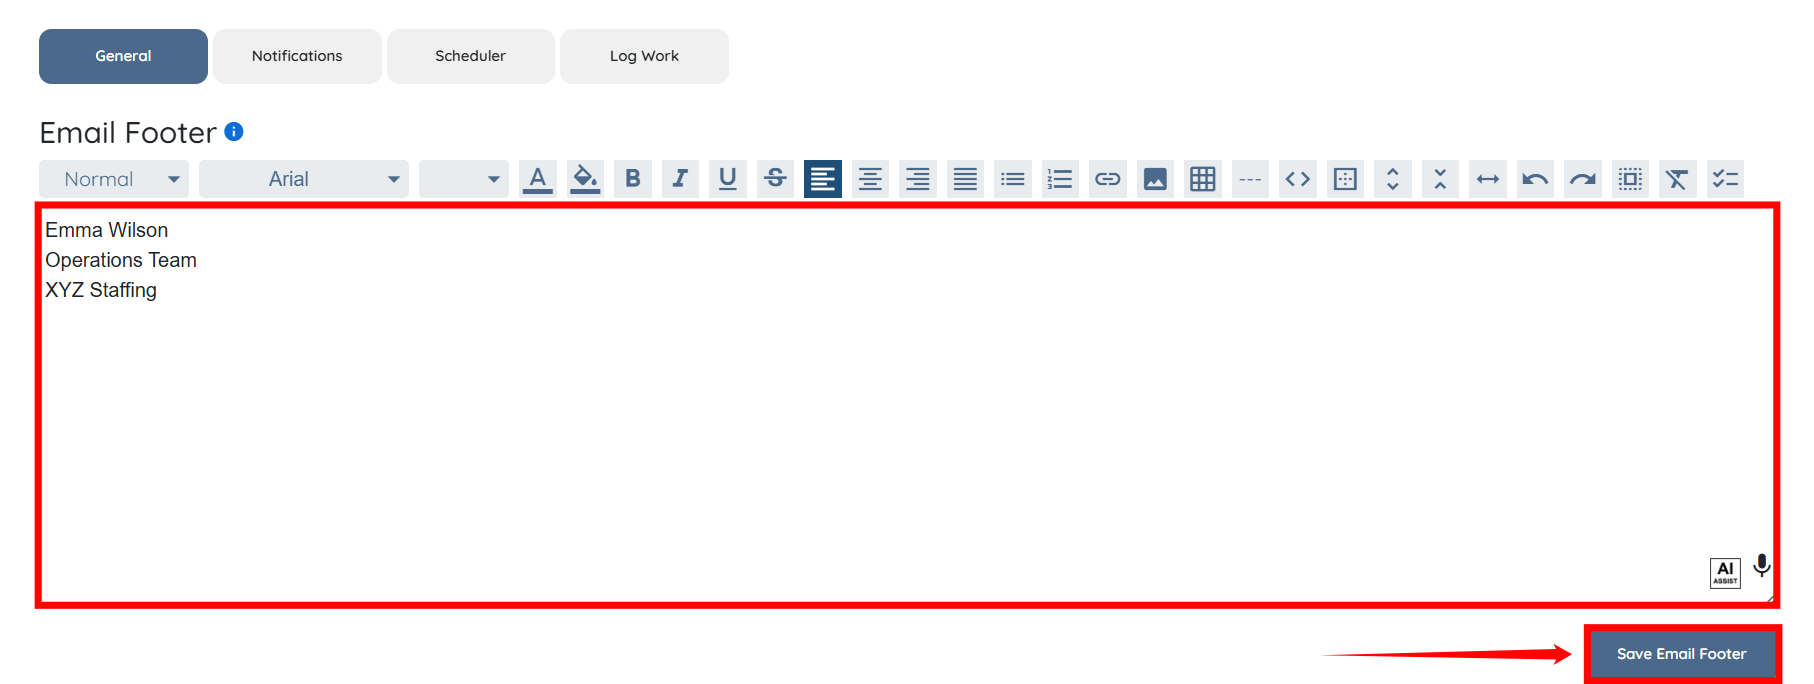
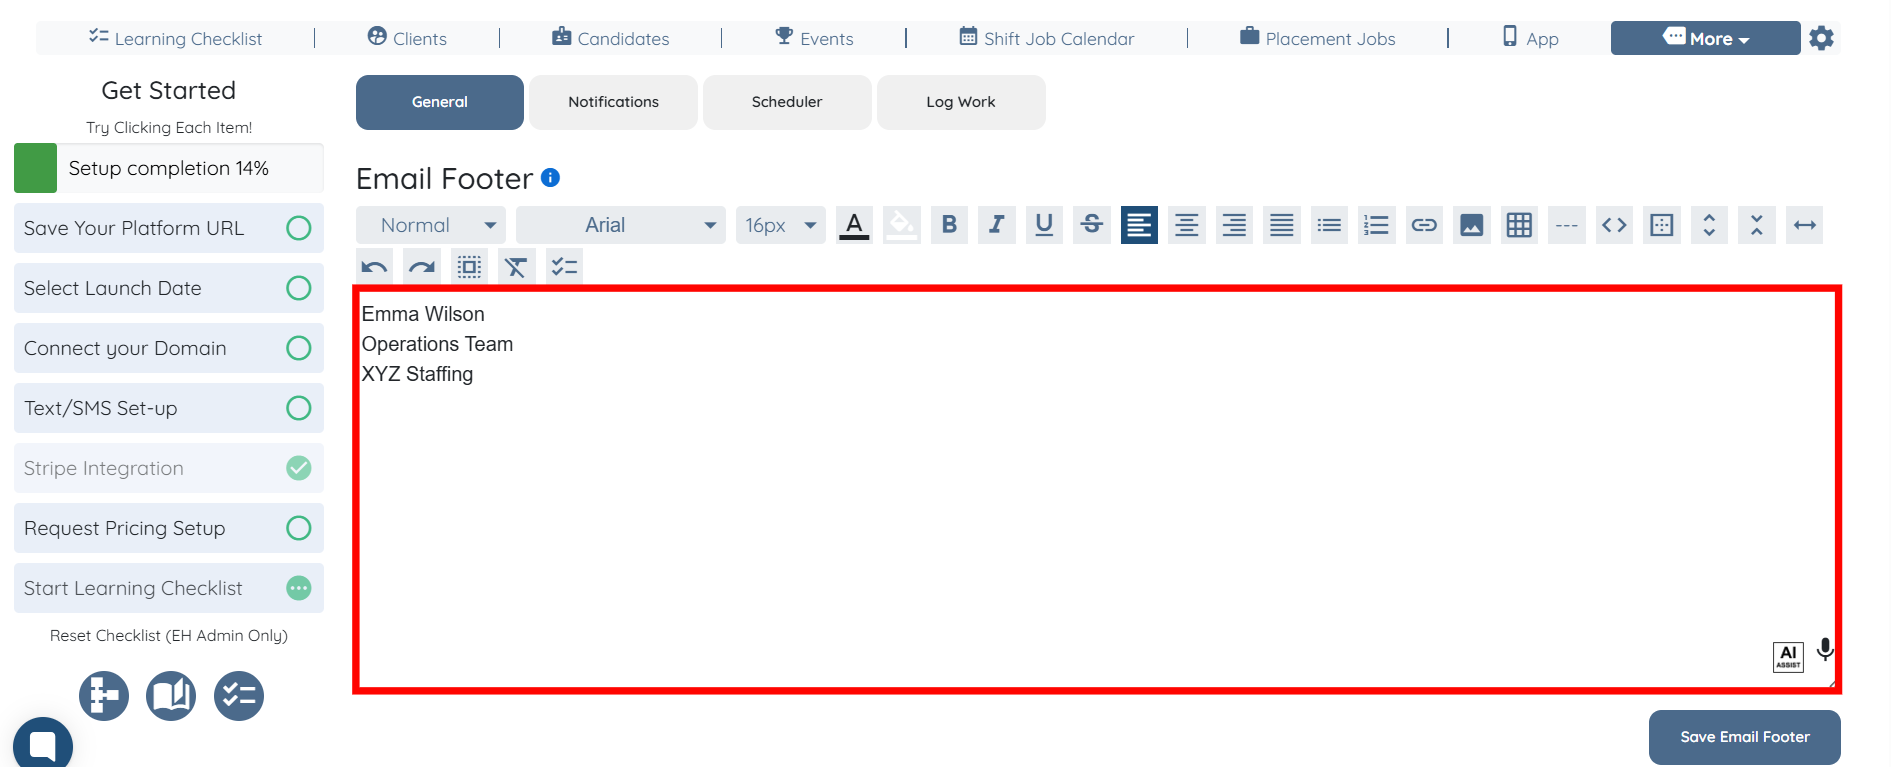
Step 2: Enter the content for your email footer by using the text editor.
You may also make use of the AI ASSIST feature to enhance the quality of the text. To learn how to use it, refer to the Use AI ASSIST Feature document.
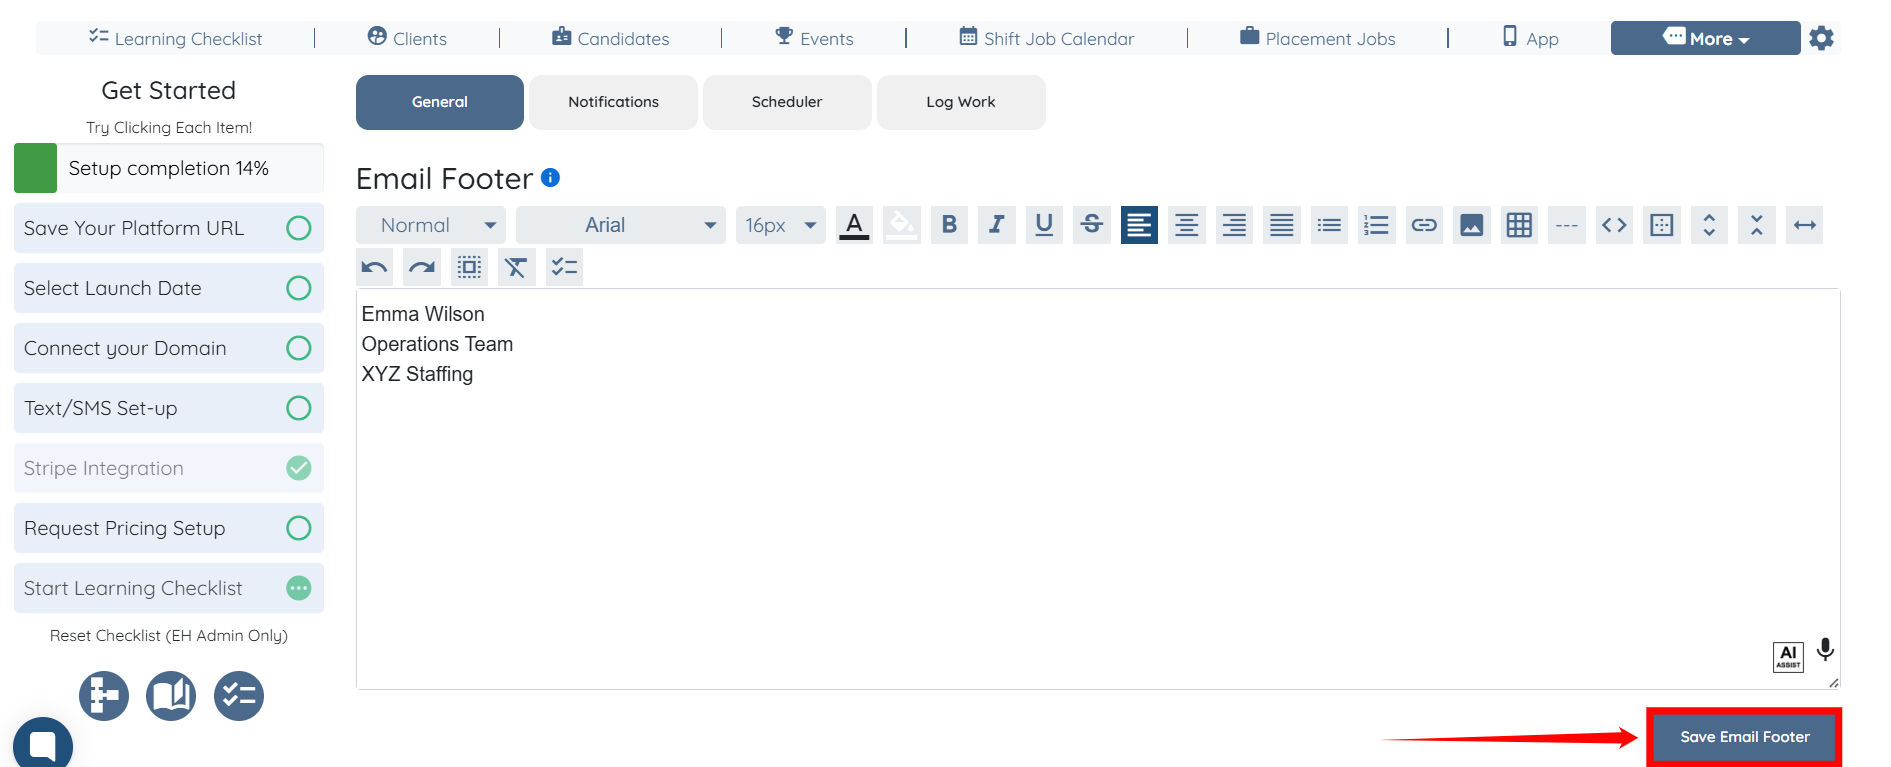
Step 3: Click the Save Email Footer button.
Please note that every admin has a unique footer!
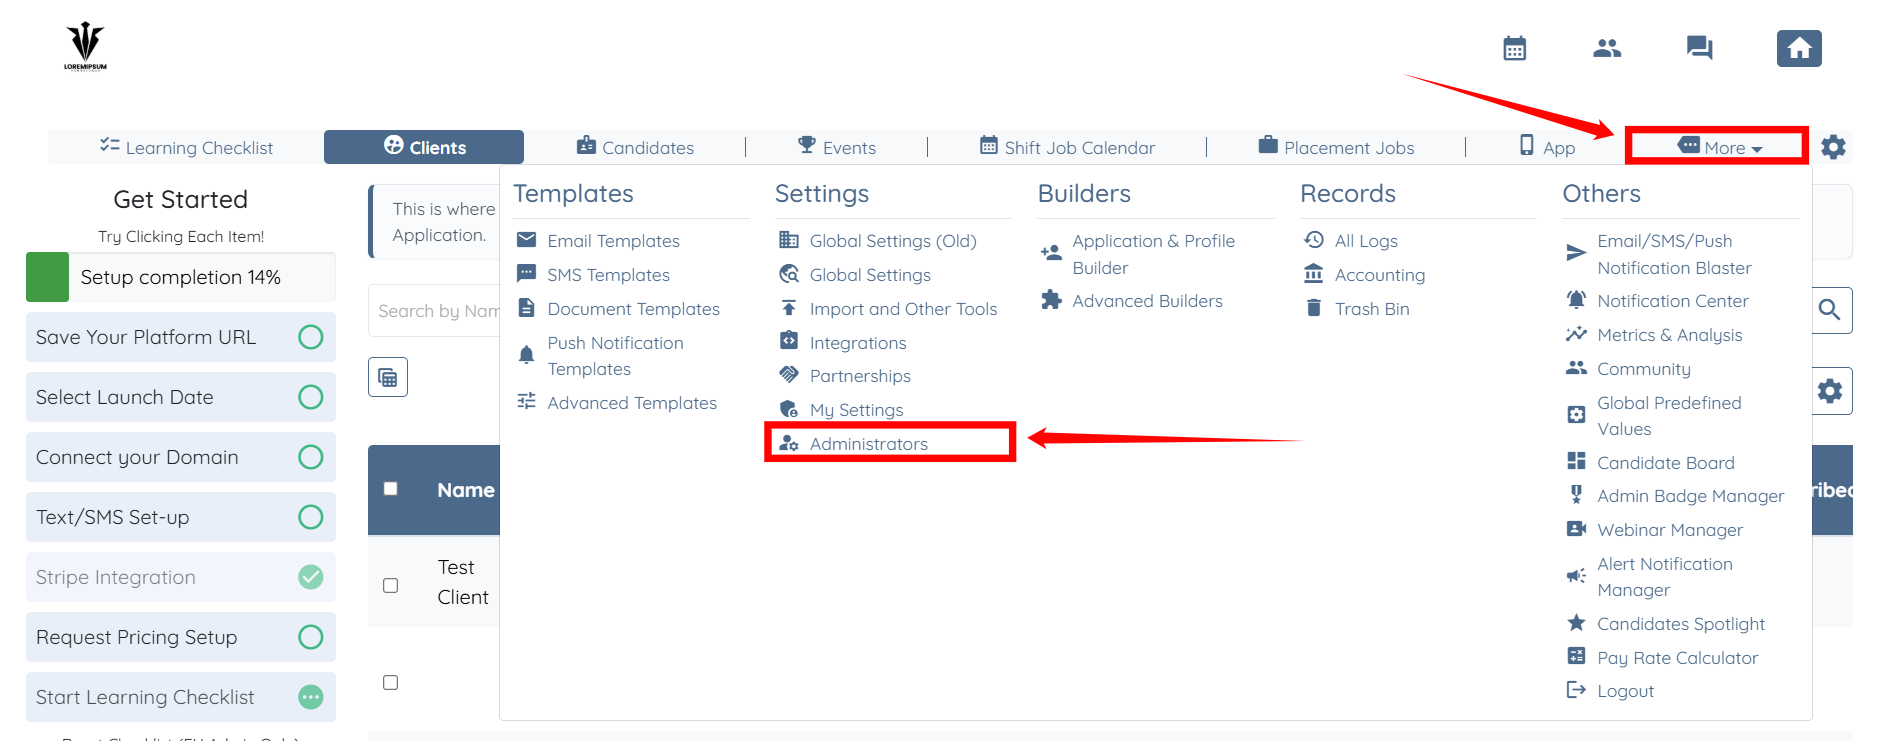
Step 4: You can also edit the email footer for a team member. To do this, click More > Administrators, as shown in the screenshot below.
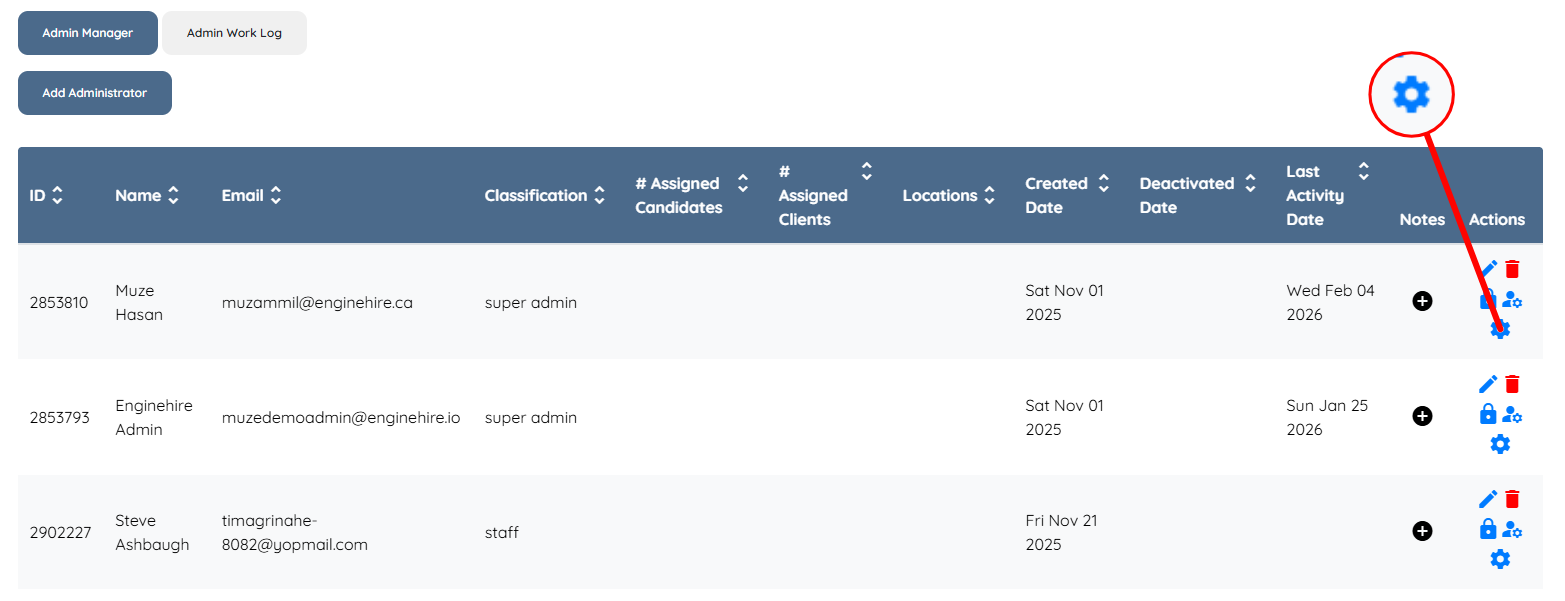
Step 5: Click the corresponding Gear icon to open the Admin Setting for the admin whose email footer you want to edit.
Step 6: Edit the email footer as needed, and then click the Save Email Footer button to confirm your changes.