Let’s get started 🚀
Create a Template
Step 1: Log in to your agent dashboard and click More > Document Templates as shown in the screenshot below.

Step 2: Click the Add Template button to start creating a template.

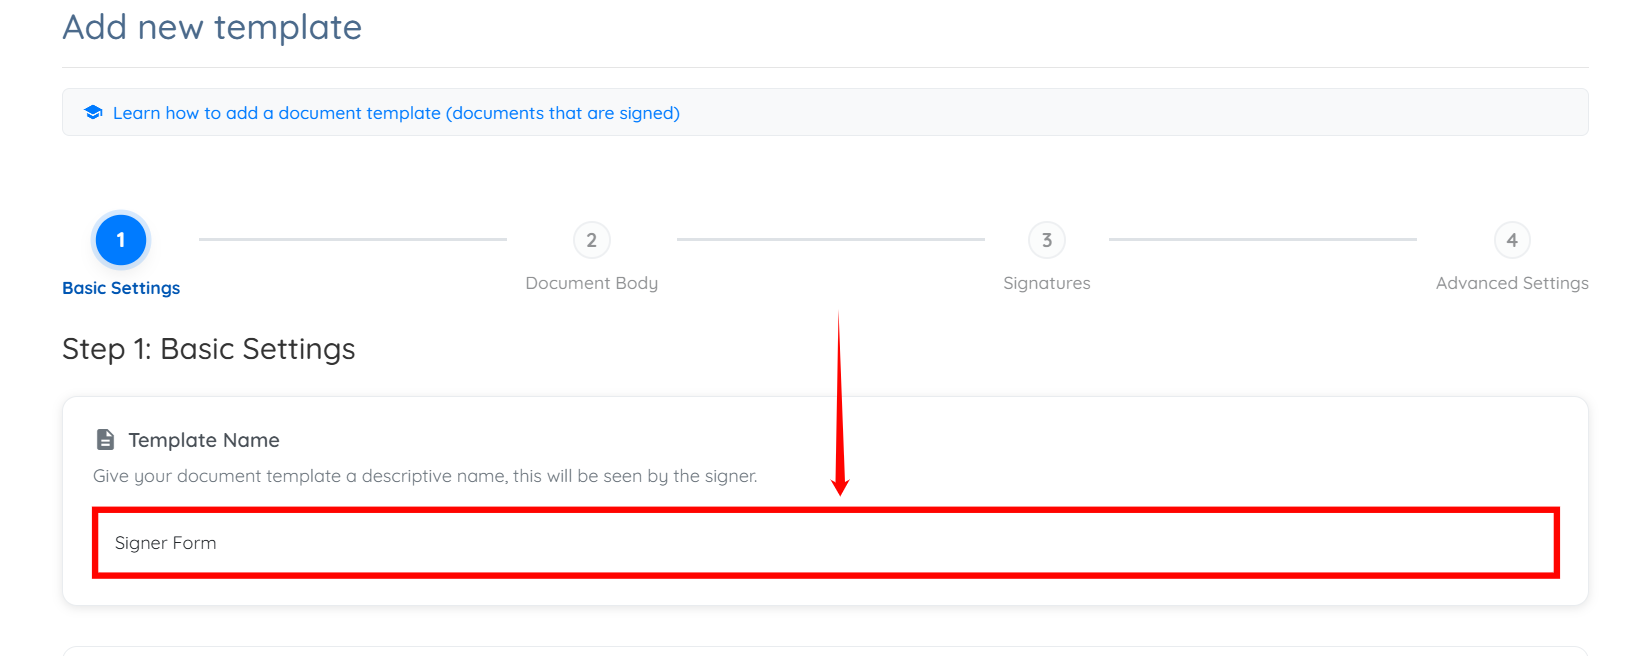
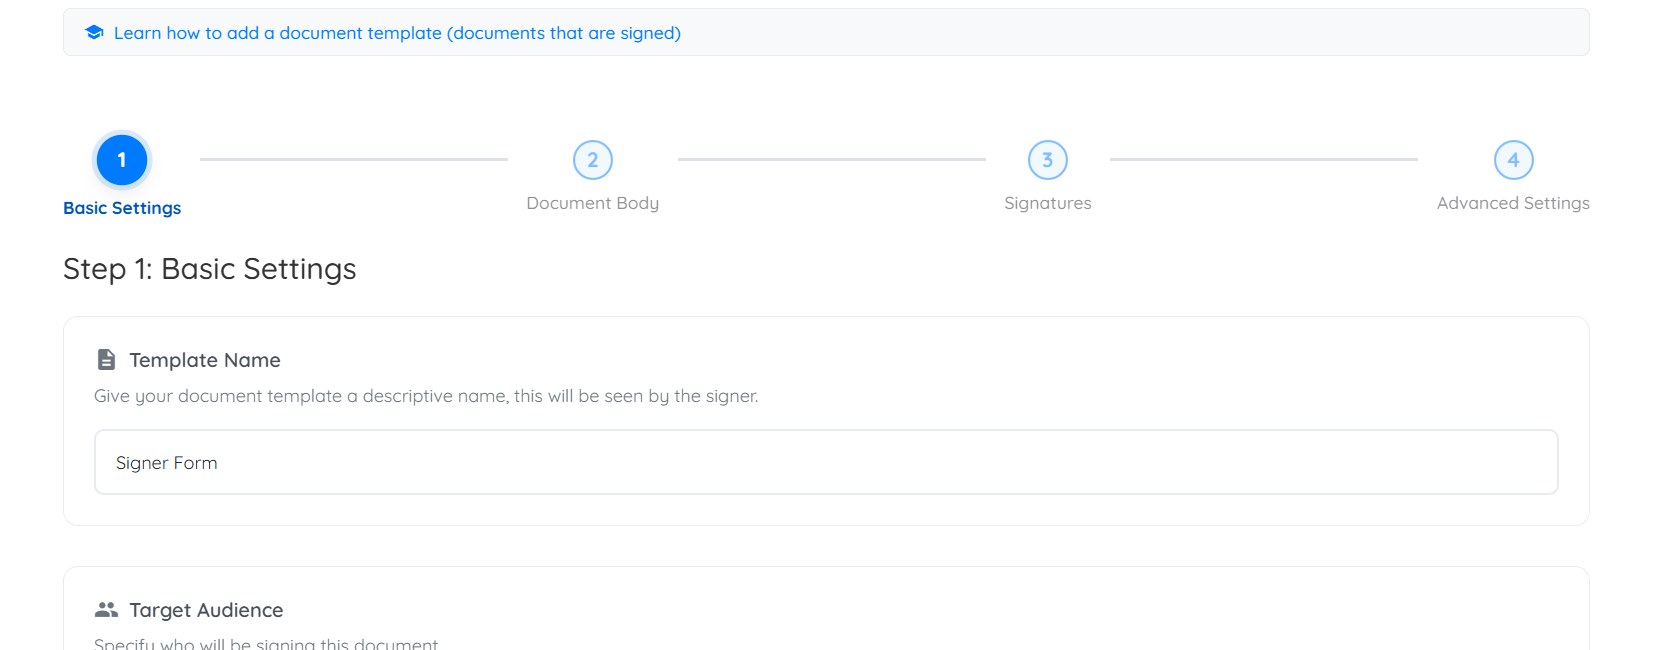
Step 3: Enter a name for your template.
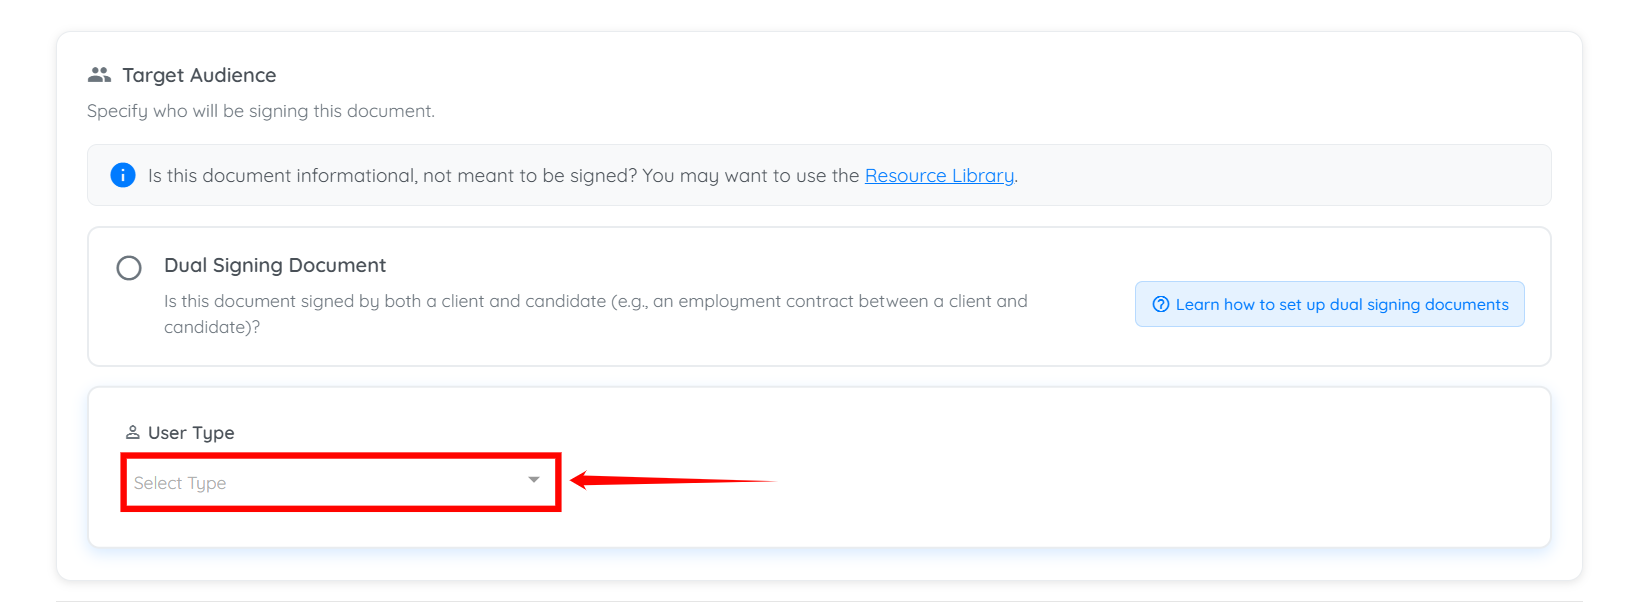
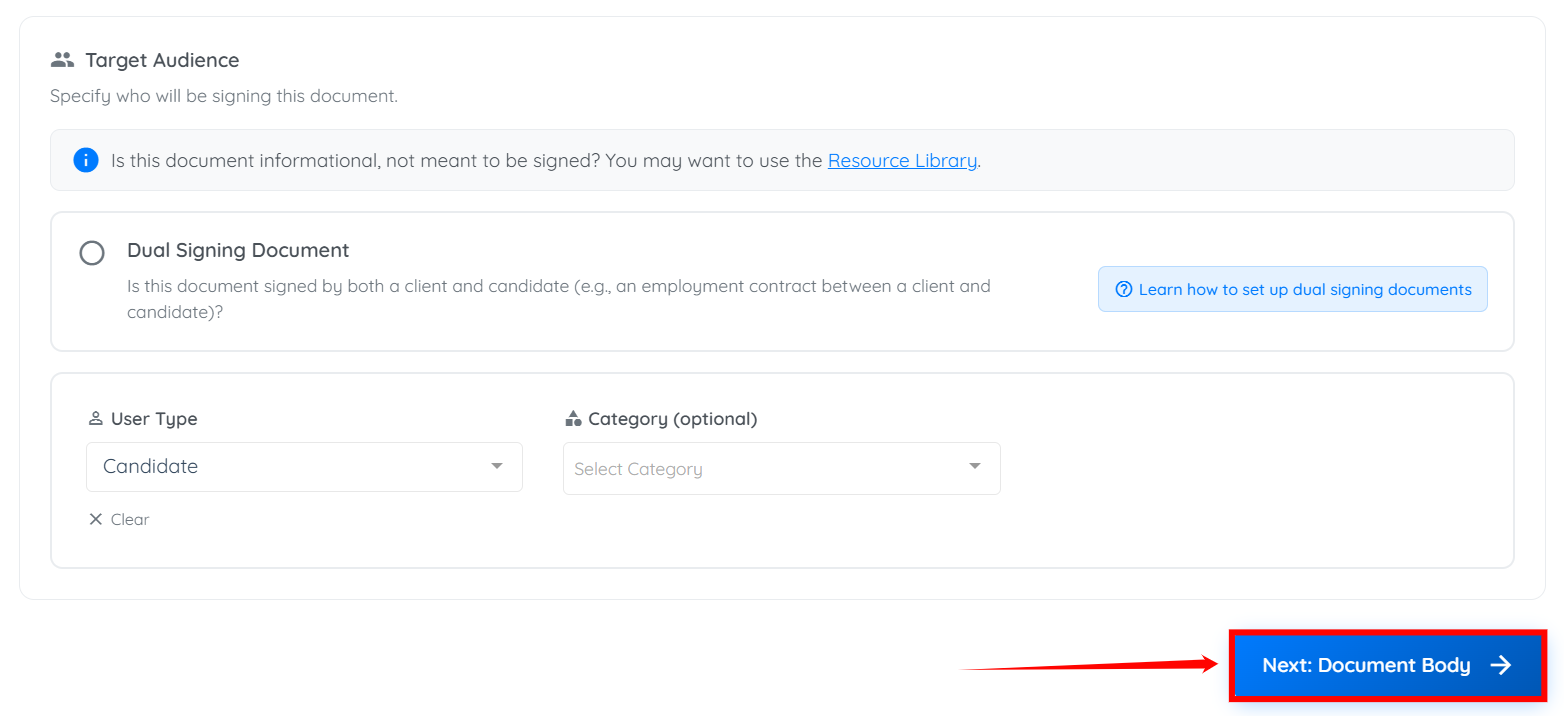
Step 4: Select the box under the User Type heading to open the dropdown list.
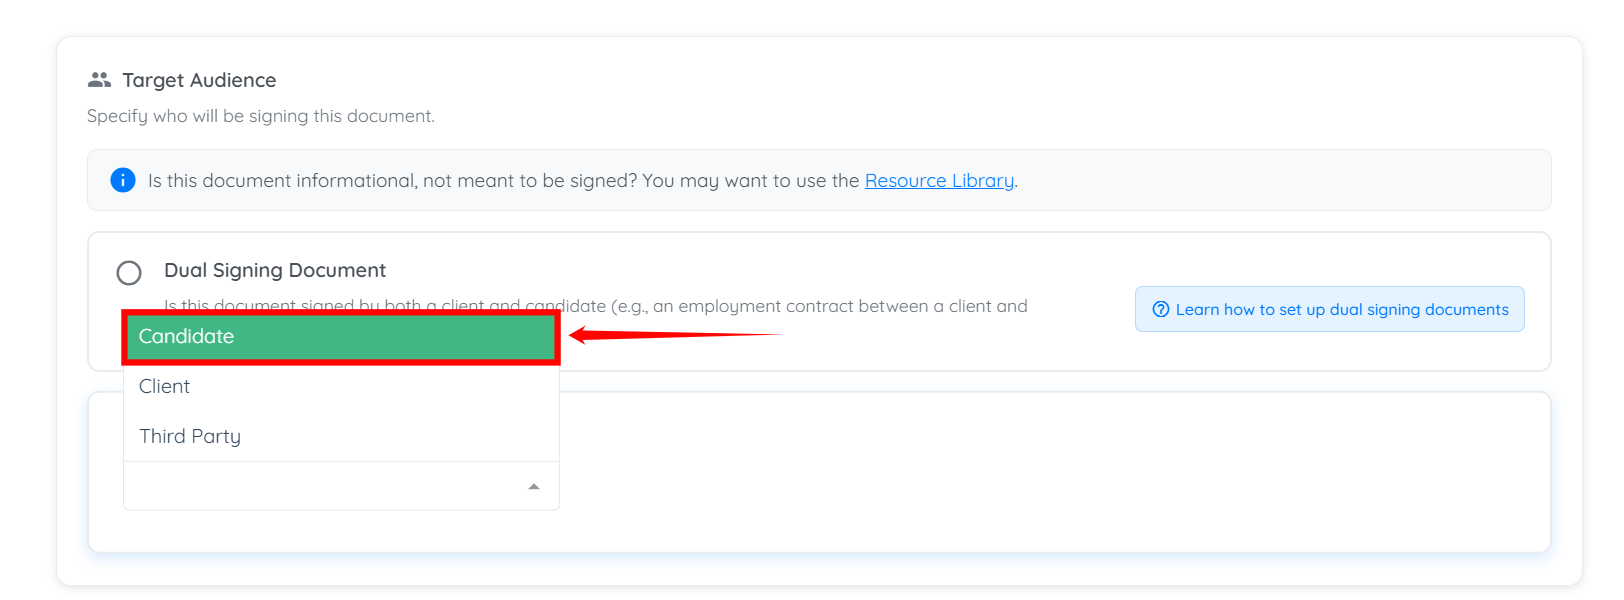
Step 5: Select the required option to define who needs to sign this document. For demonstration purposes, we select Candidate from the dropdown list.
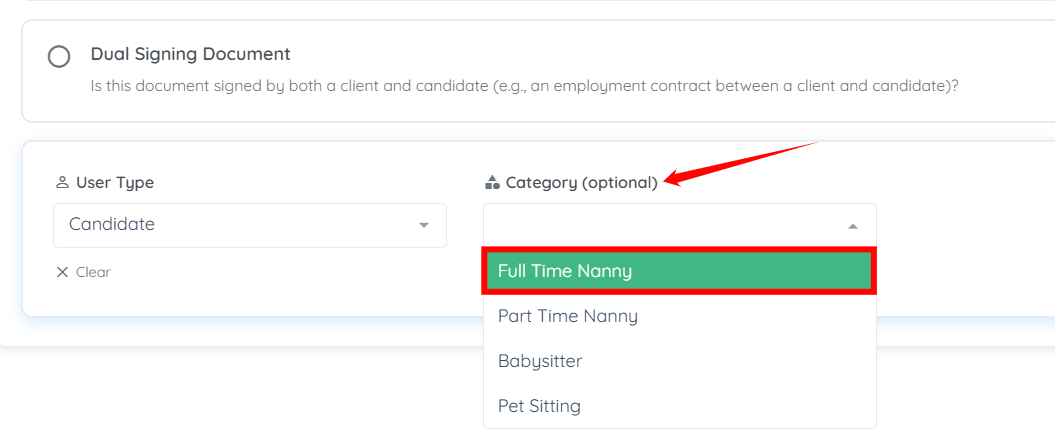
Step 6: (Optional) You can select the category of the user to make the document applicable to specific users, if you want to.
Step 7: Click the Next: Document Body button to continue.
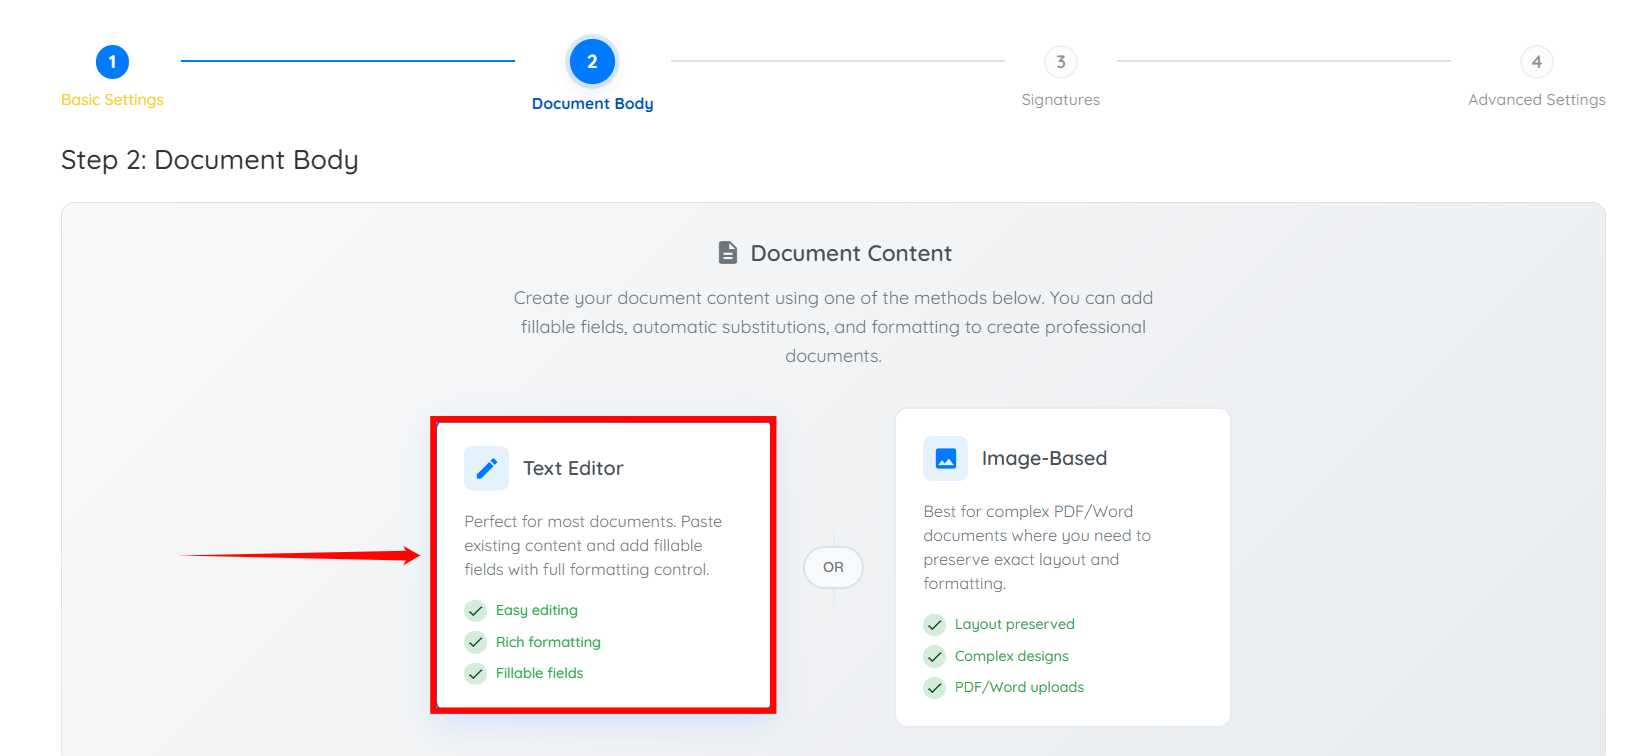
Step 8: Select any of the methods below to create your document. For demonstration purposes, we will use the Text Editor option.
- Text Editor is great for most documents. You can paste your existing content and add fillable fields with full formatting control.
- Image-Based is best for complex PDF/Word documents where you need to preserve the exact layout and formatting.
Step 9: Enter content for your document template here, or copy and paste any content you already have.
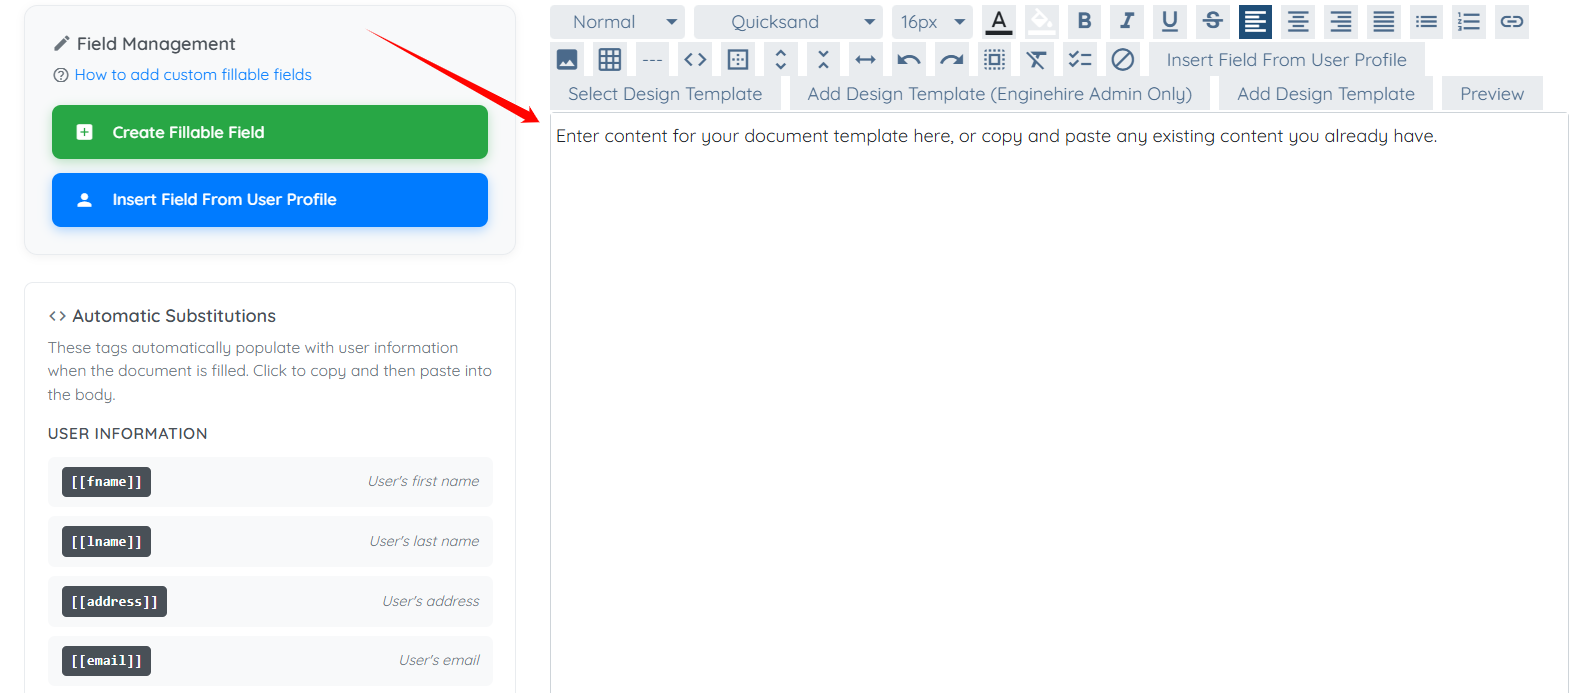
To use Automatic Substitutions, which automatically pull information from a client or candidate profile, click the desired field to copy it, and then paste it into the document body.
Create Fillable Fields
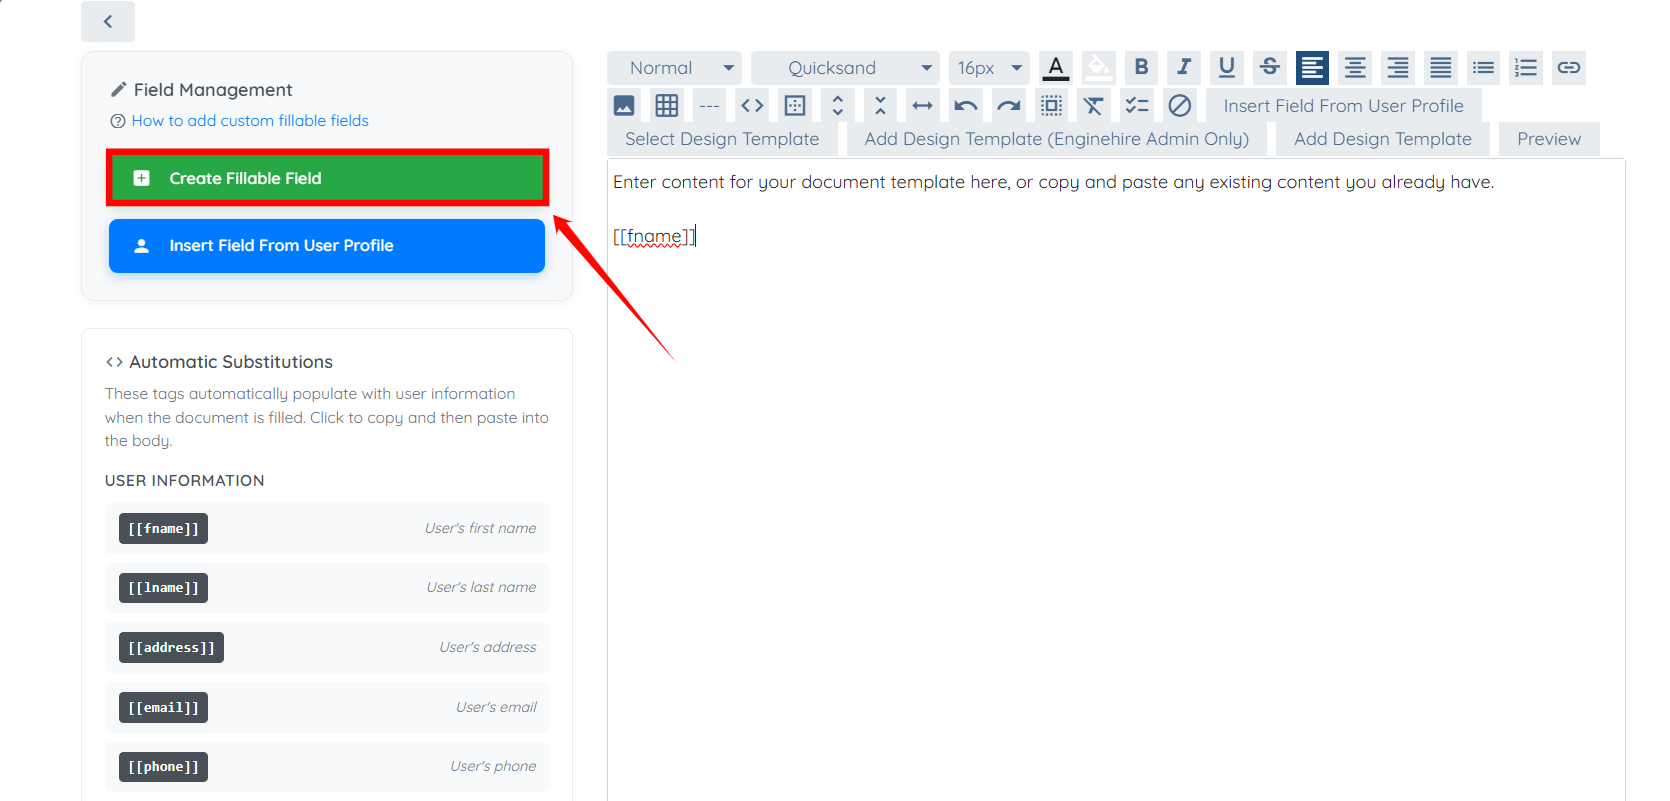
Step 1: Click the Create Fillable Field button under the Field Management heading.
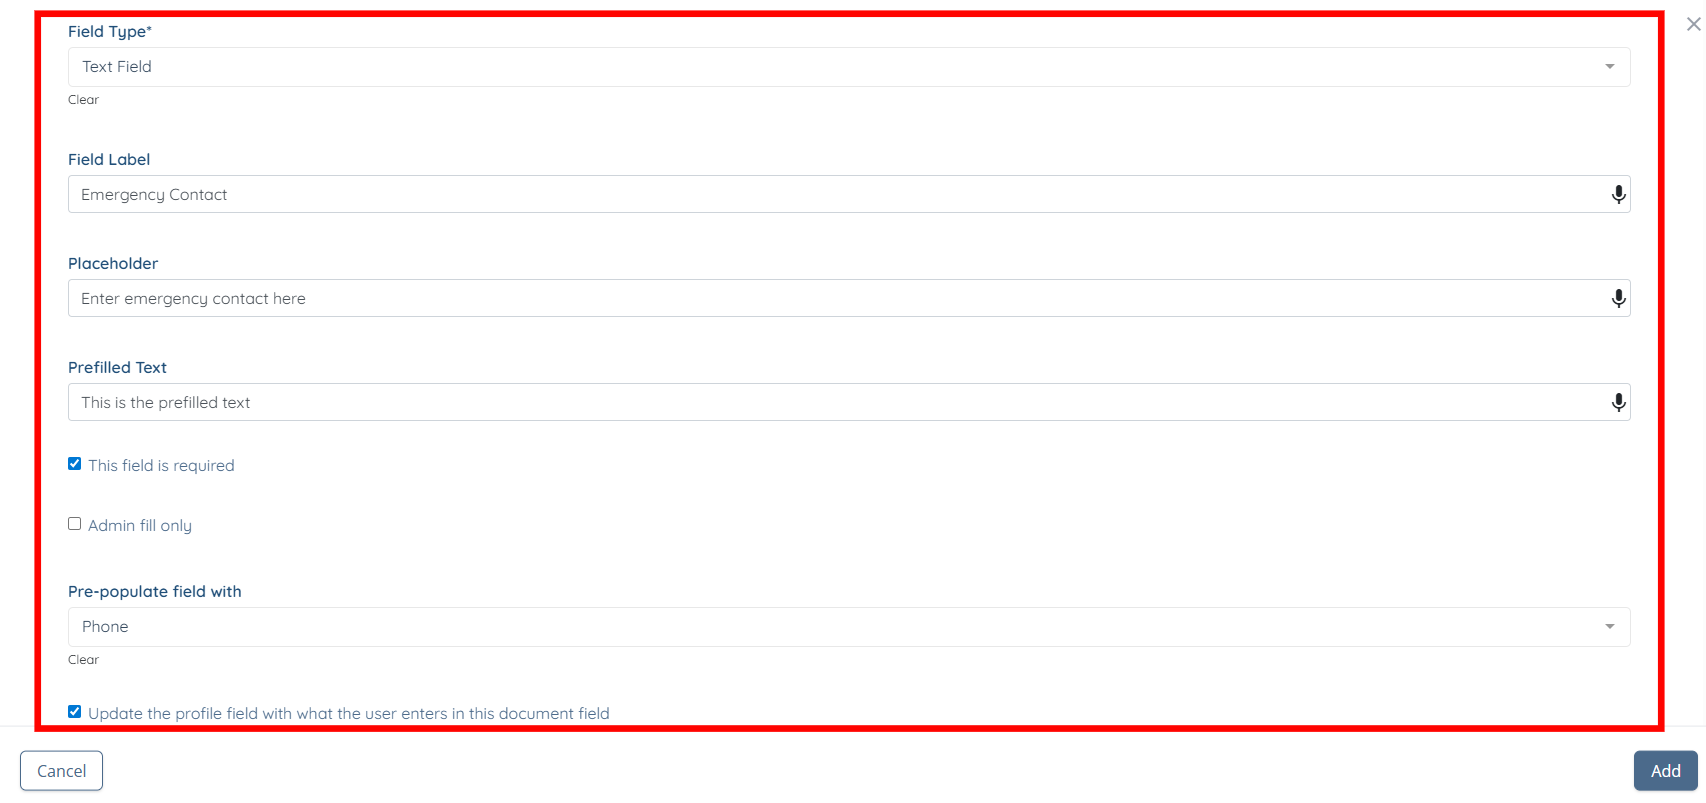
Step 2: Enter the following information to add a fillable field.
|
Field |
Description |
|
Field Type |
Select the type of field you want to add (e.g., text, dropdown, checkbox). |
|
Field Label |
Enter the name of the field as it will appear in the document. |
|
Placeholder |
Add a hint or example text to guide users on what to enter. |
|
Prefilled Text |
Enter default text that will appear before the user fills the field. |
|
This field is required |
Enable this option to make the field mandatory before completing the document. |
|
Admin fill only |
Enable this option to restrict the field so only admins can fill it. |
|
Pre-populate field with |
Select an existing data field to automatically fill this field. |
|
Update the profile field with what the user enters in this document field |
Enable this option to update the corresponding profile field with the entered value. |
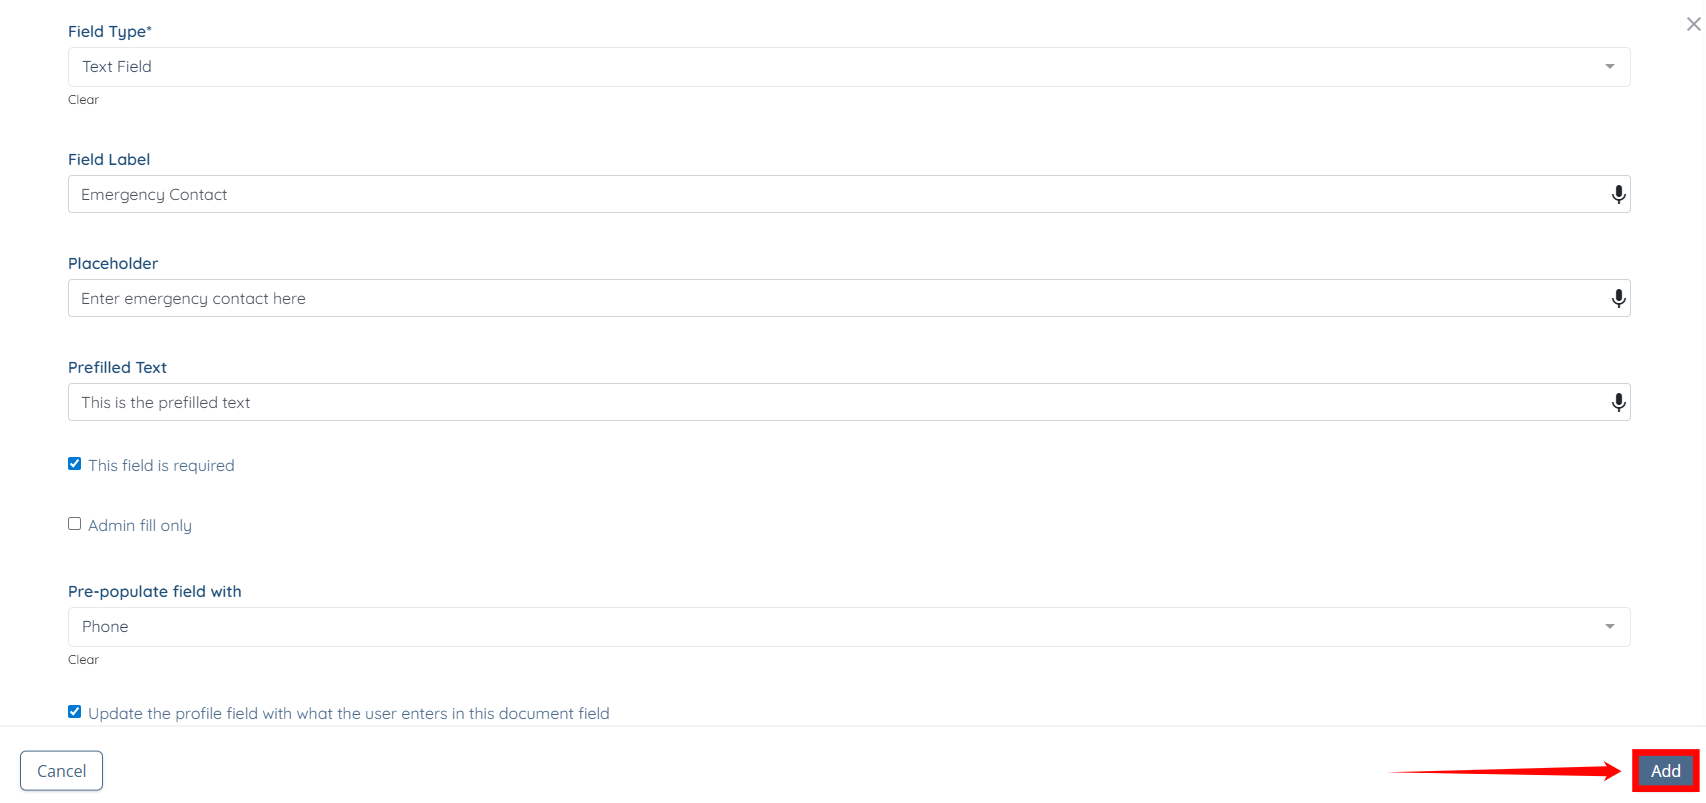
Step 3: Click on the Add button to proceed.
Step 4: The fillable field appears under the Created Fields heading on the left-hand side. To use it in the document body, click to copy it, then paste it into the document body as needed.
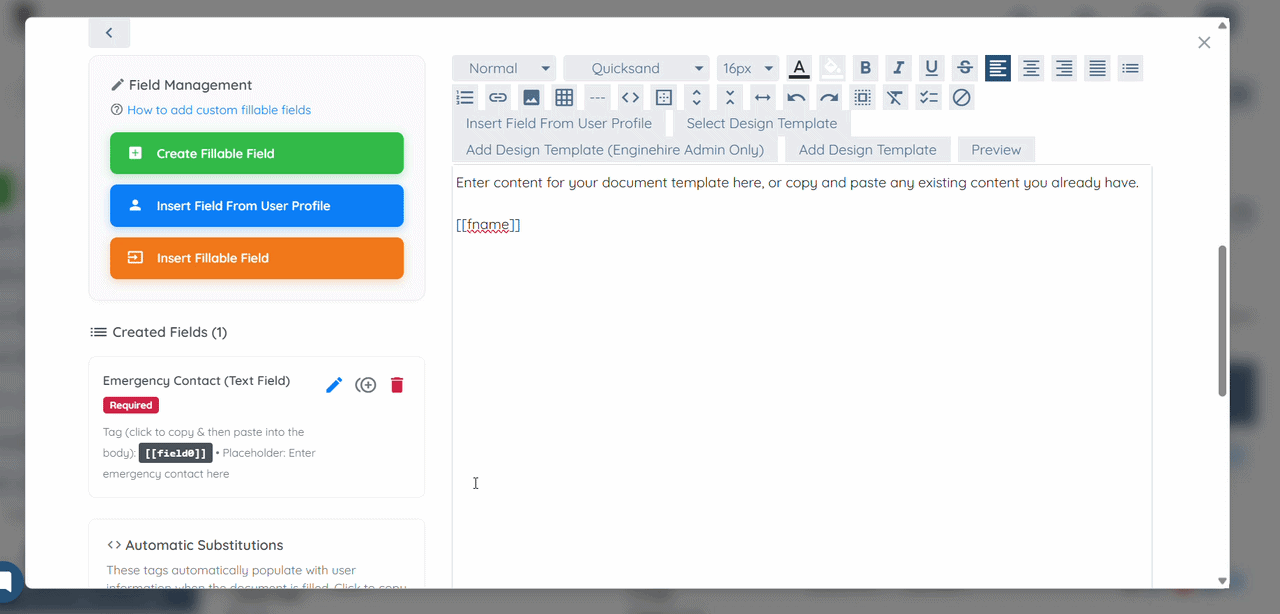
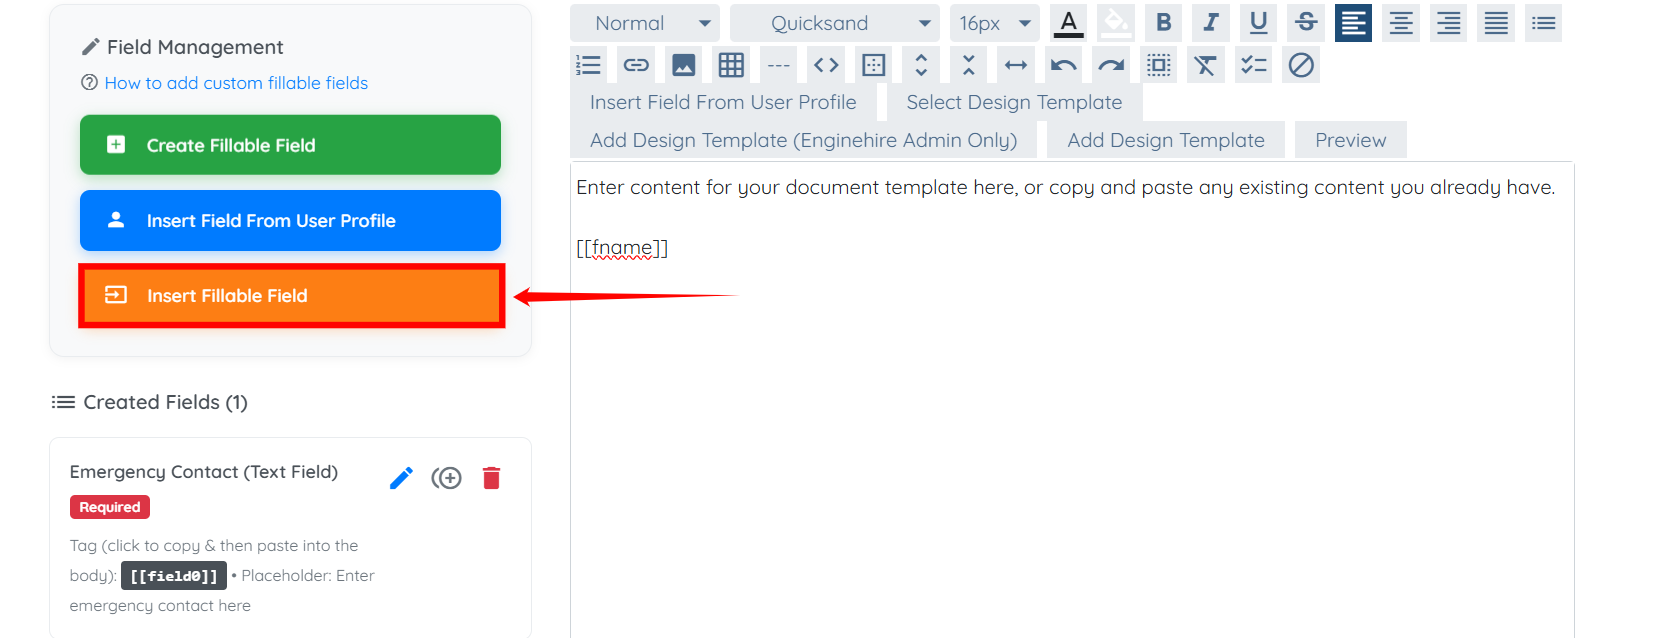
If you have created multiple fillable fields and want to select one from them, click the Insert Fillable Field button on the left-hand side.
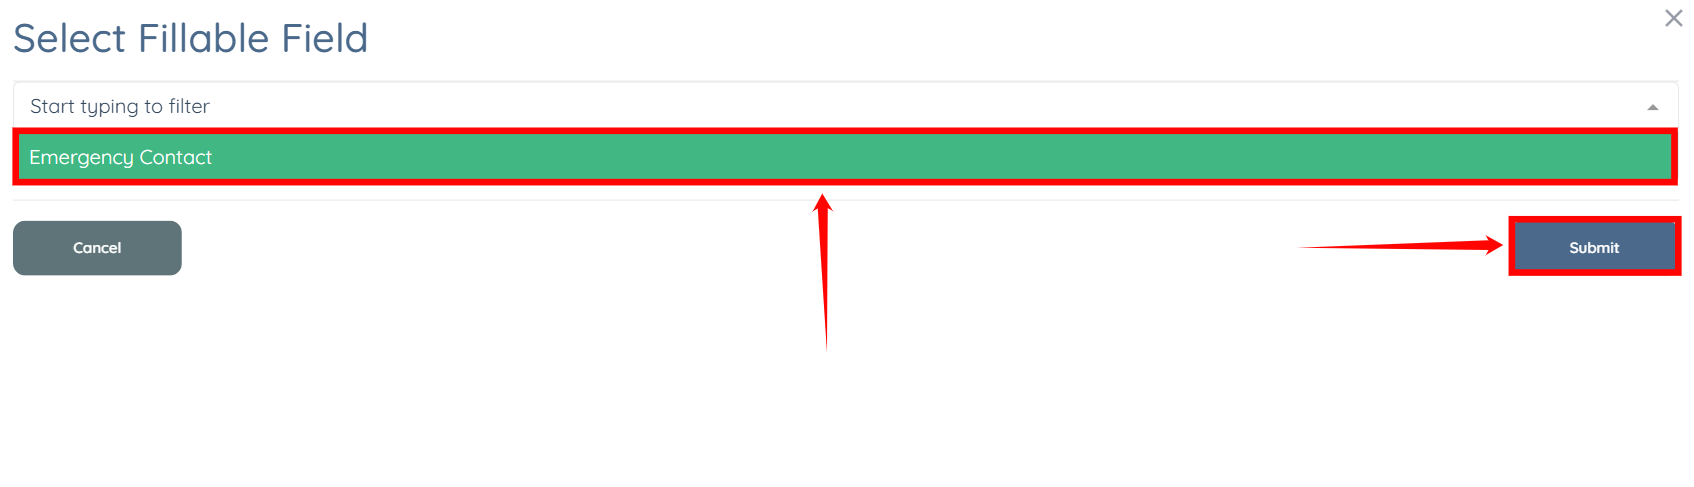
Select the field you want to add to the document template body from the dropdown list, then click the Submit button.
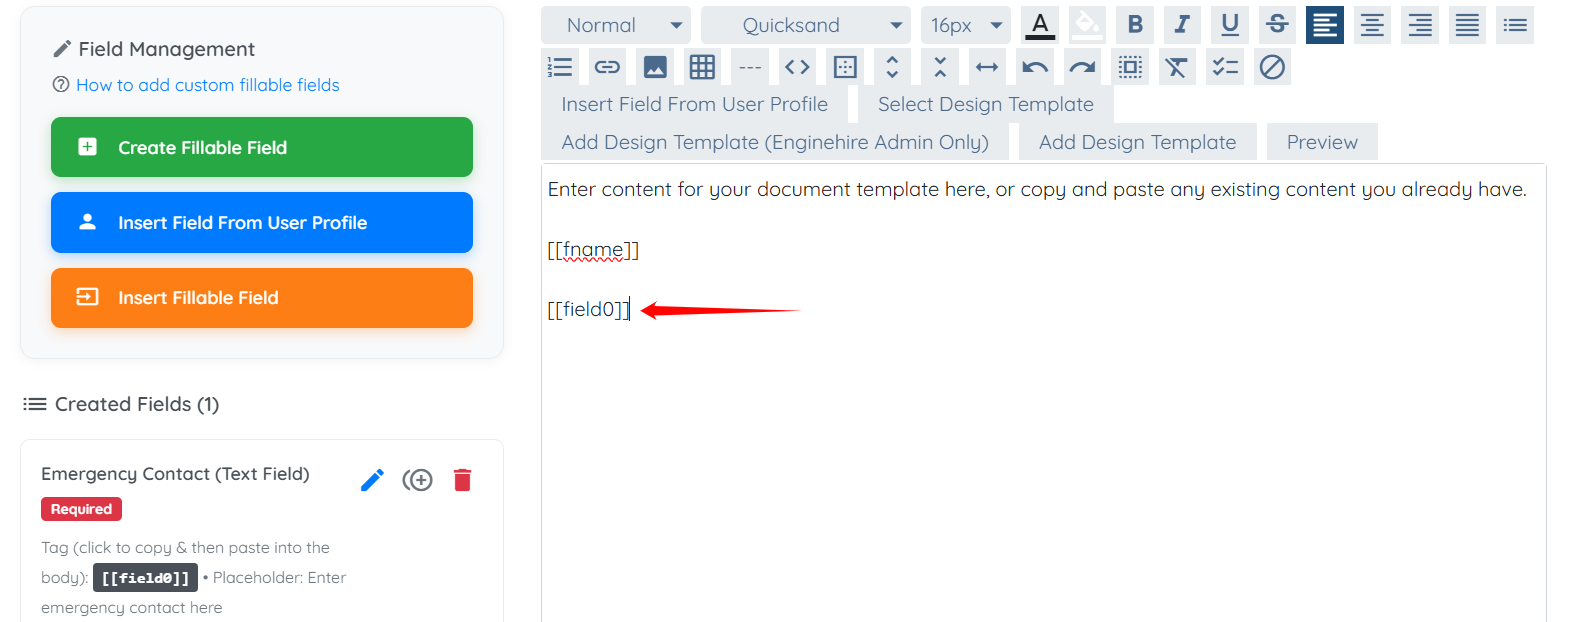
The selected field will be successfully added to the body of the document template.
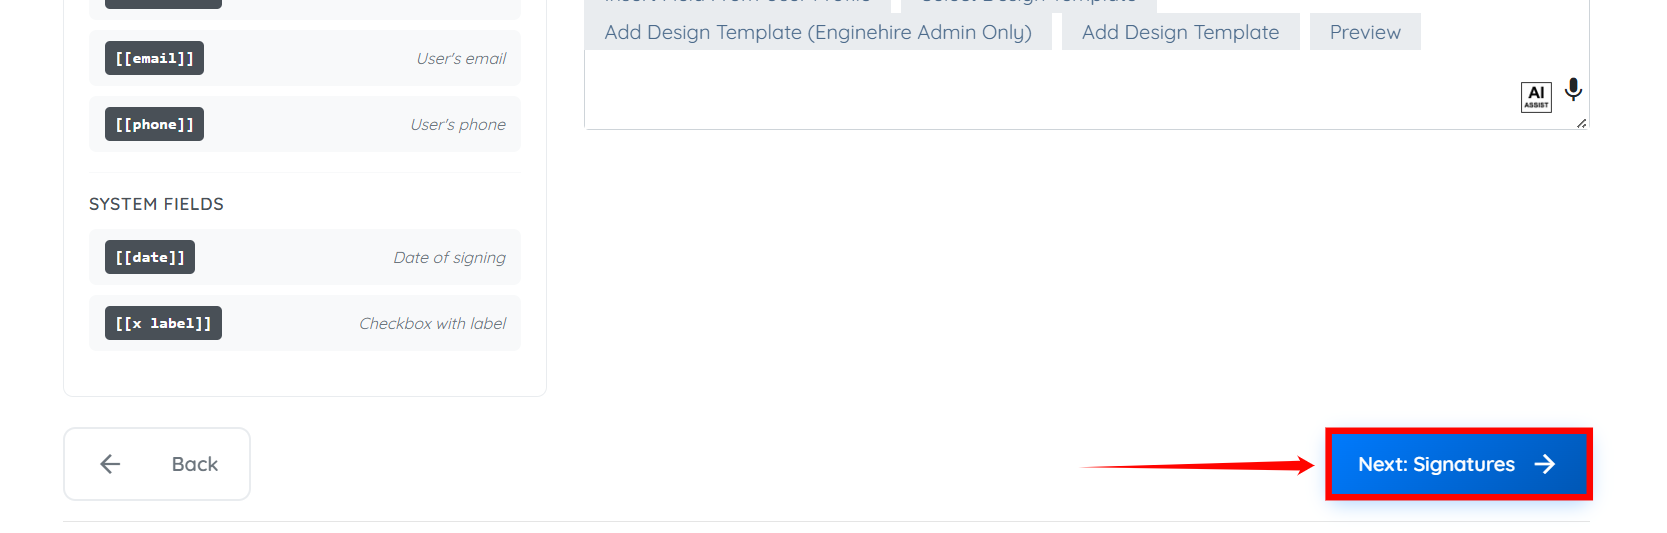
Step 5: After you create your content for the document template, scroll down and click the Next: Signatures button to proceed.
Define the Signer
Define who will sign the document and configure how the signature will be captured.
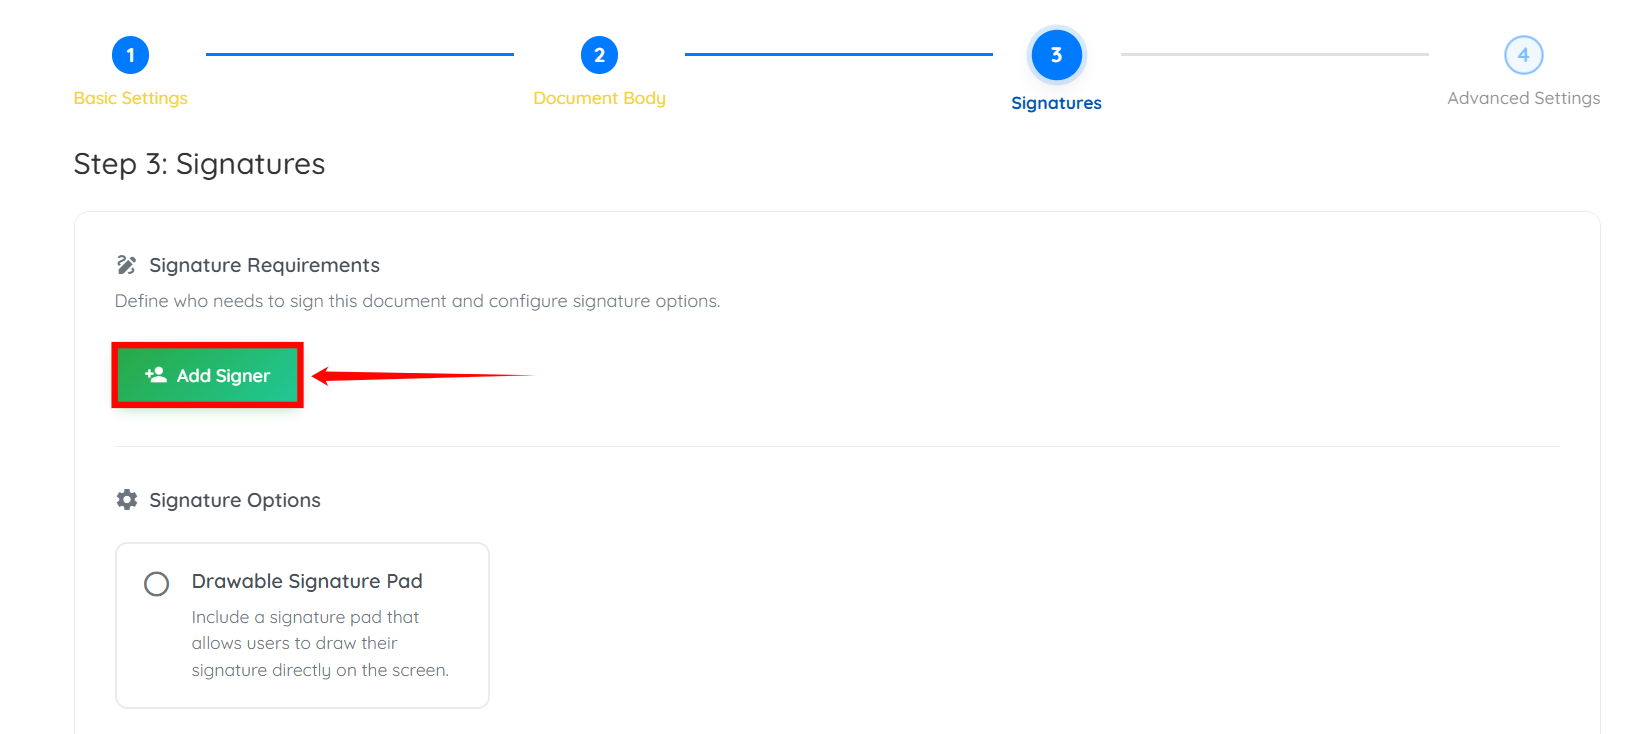
Step 1: Click on the Add Signer button.
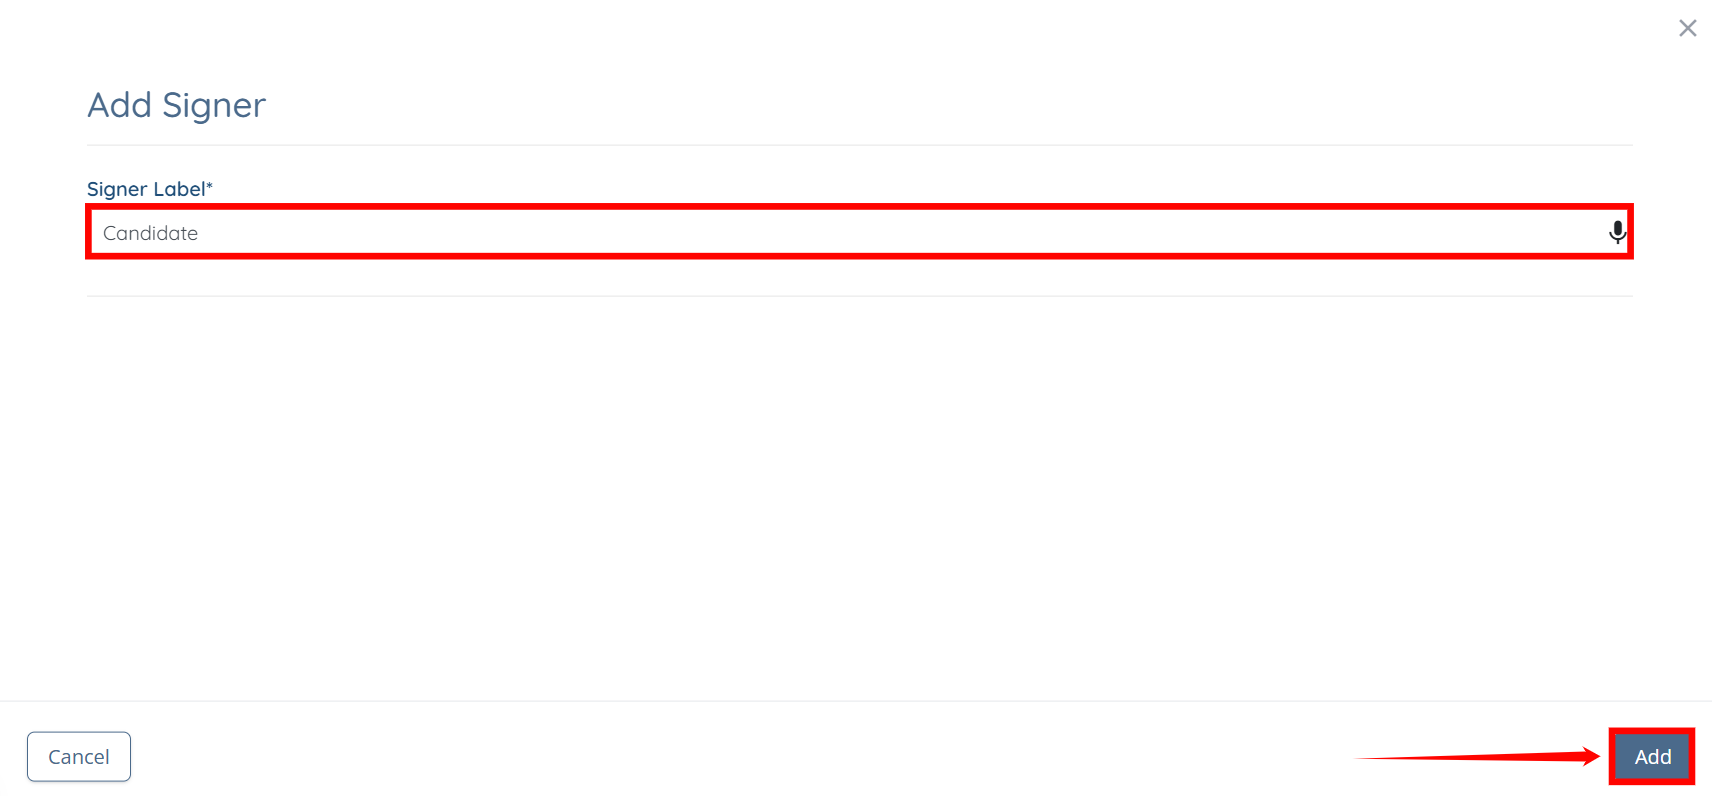
Step 2: Enter the Signer Label, then click the Add button.
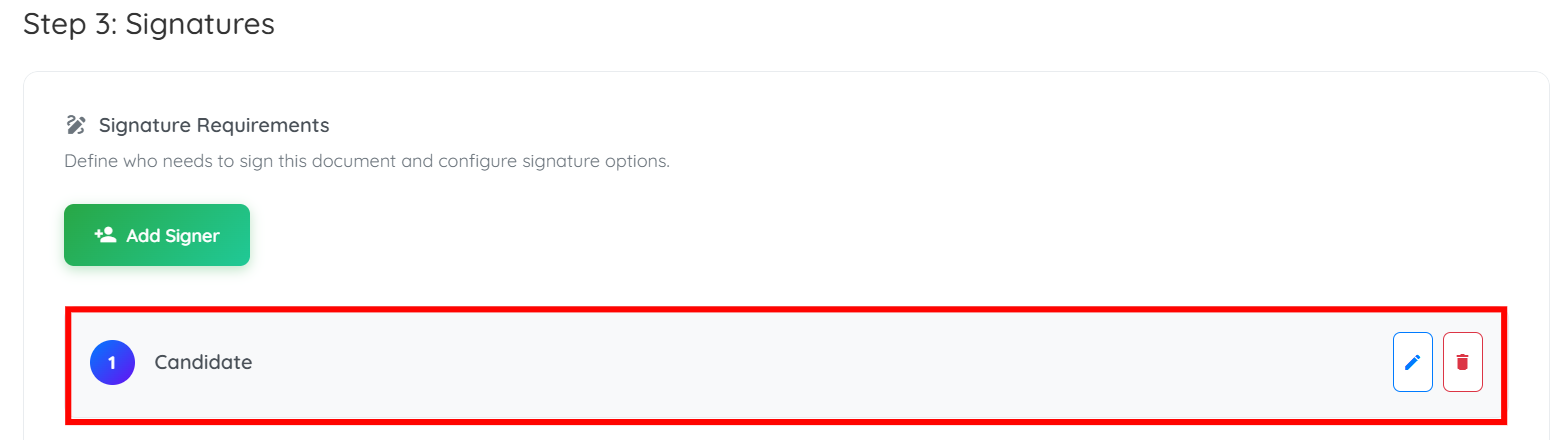
The signer will be added successfully.
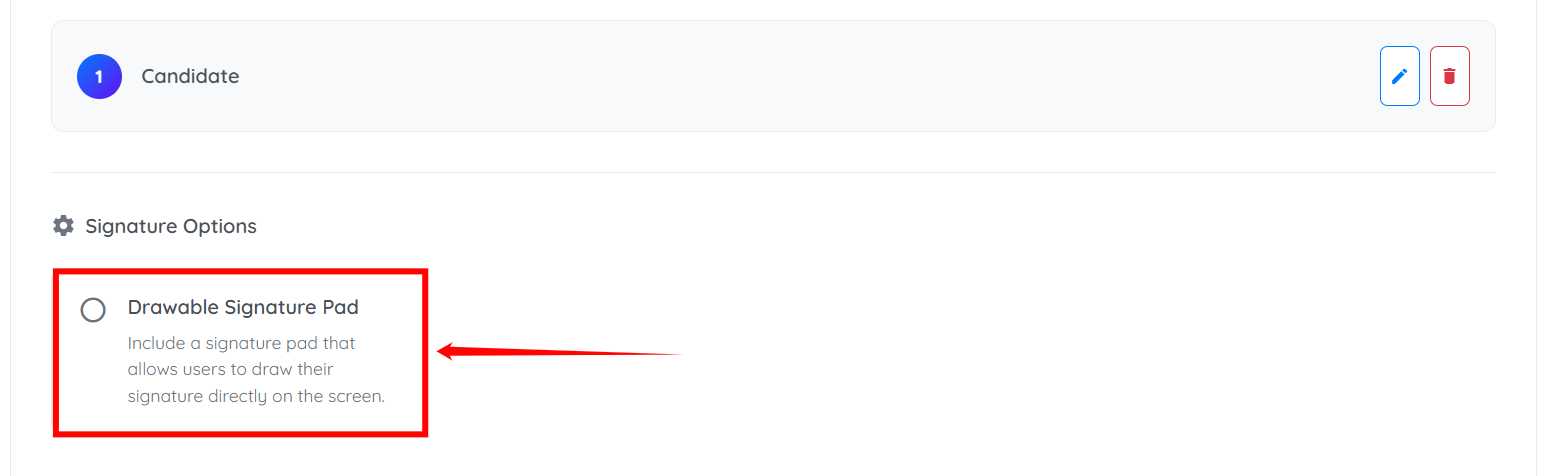
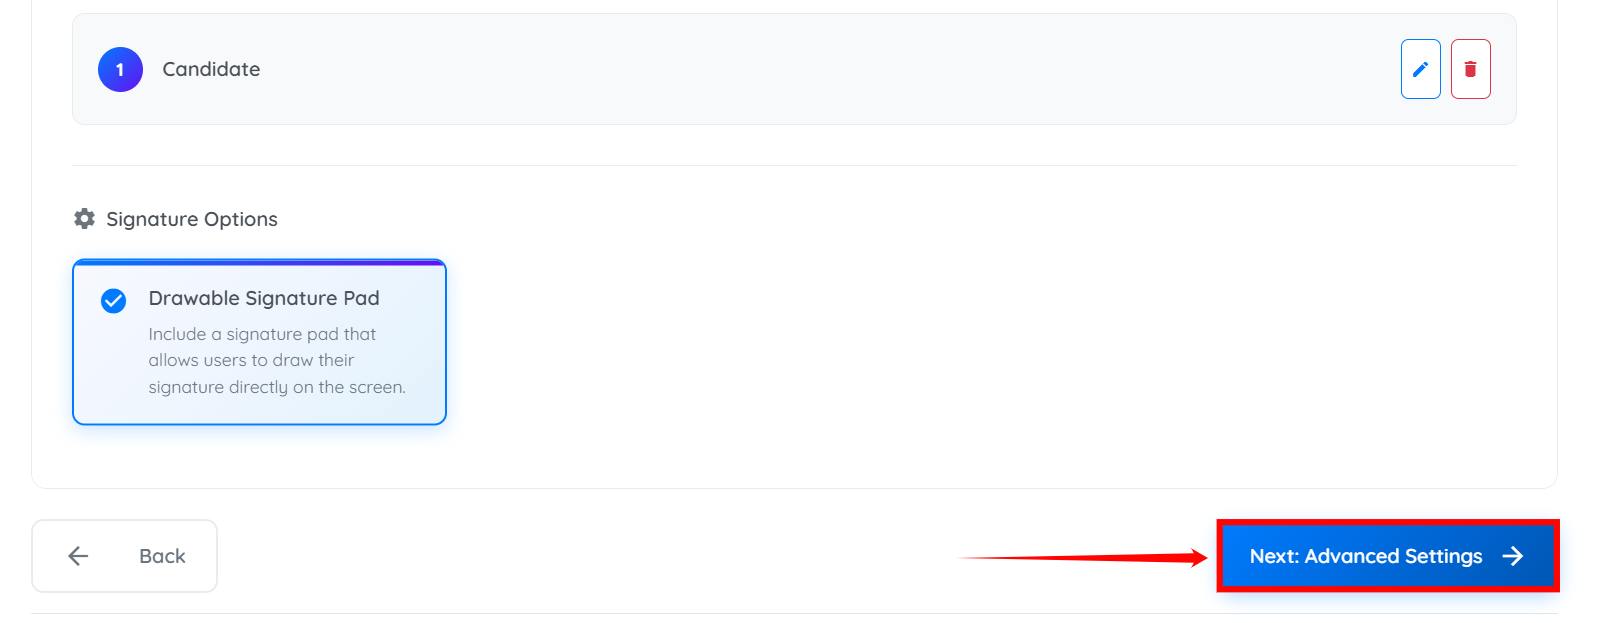
Step 3: Check the Drawable Signature Pad radio button to add a drawing signature pad for the user.
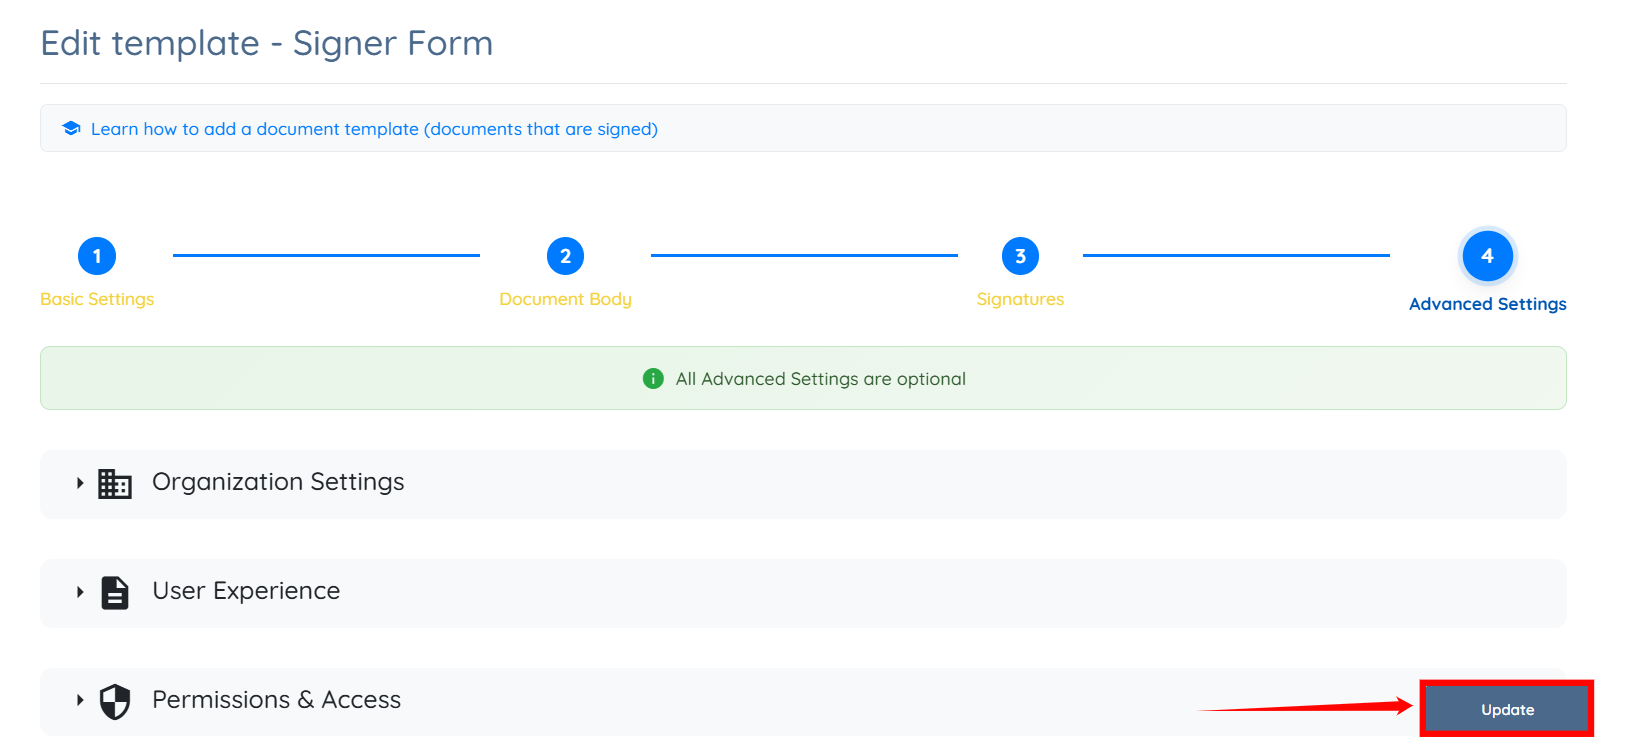
Step 4: Click the Advanced Settings button to proceed.
Advanced Settings
All Advanced Settings are optional.
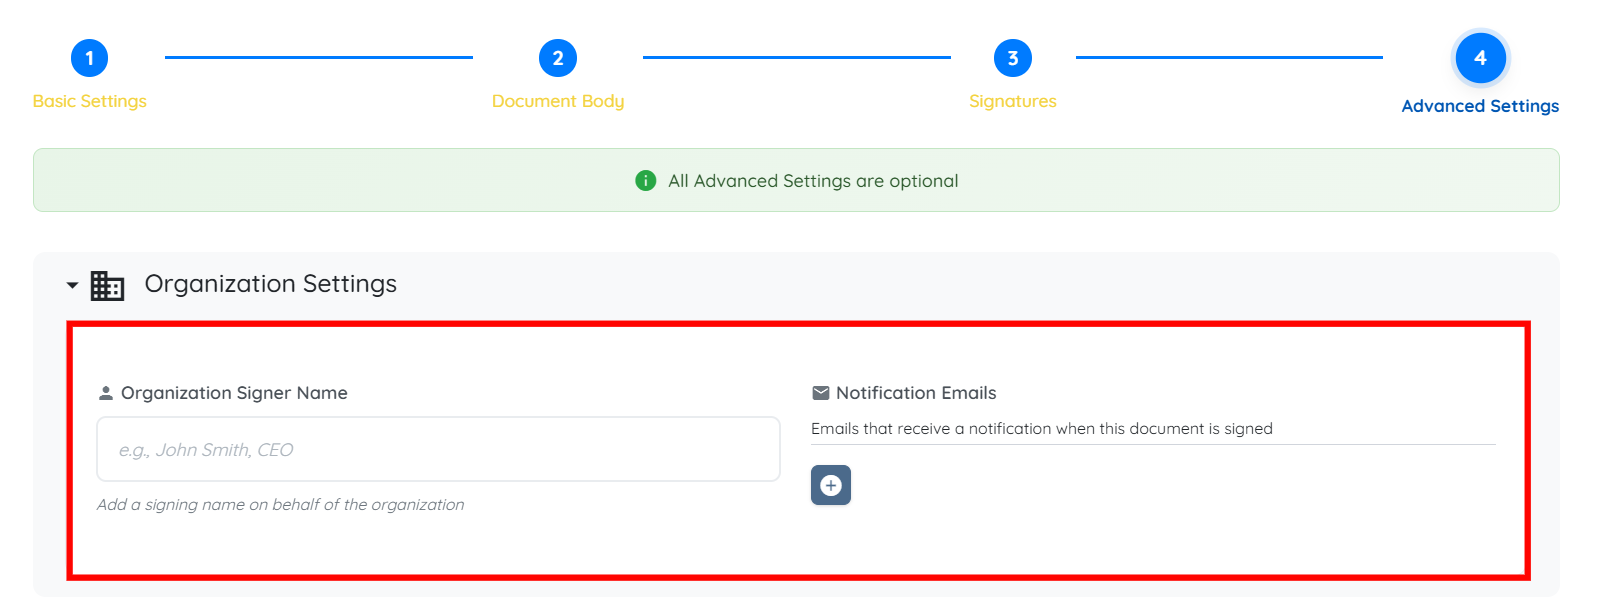
Organization Settings
-
Organization Signer Name: Enter the name that will appear as the signer on behalf of your organization in the document.
-
Notification Emails: Add email addresses that should receive a notification when the document is signed.
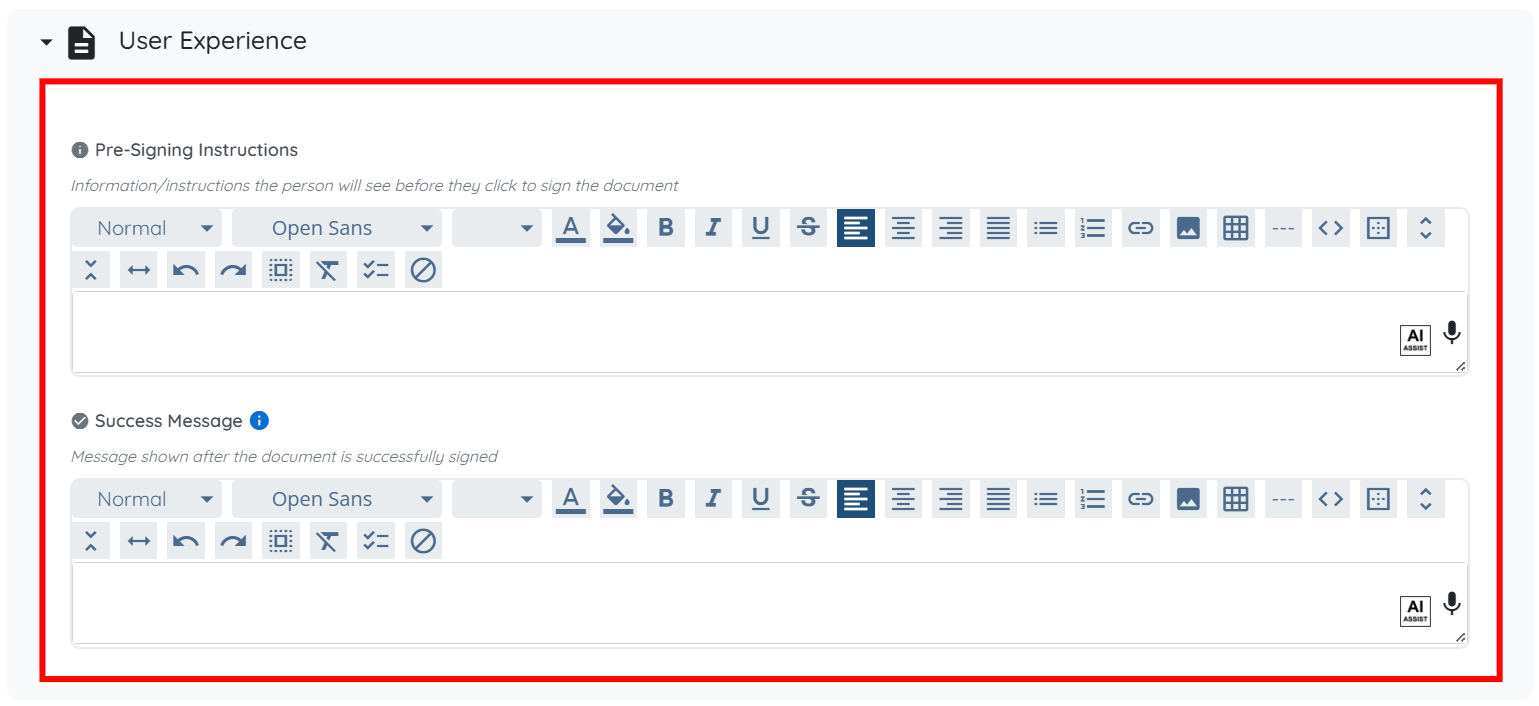
User Experience
-
Pre-Signing Instructions: Add instructions or information that users will see before they sign the document.
-
Success Message: Define the message shown to users after they successfully sign the document.
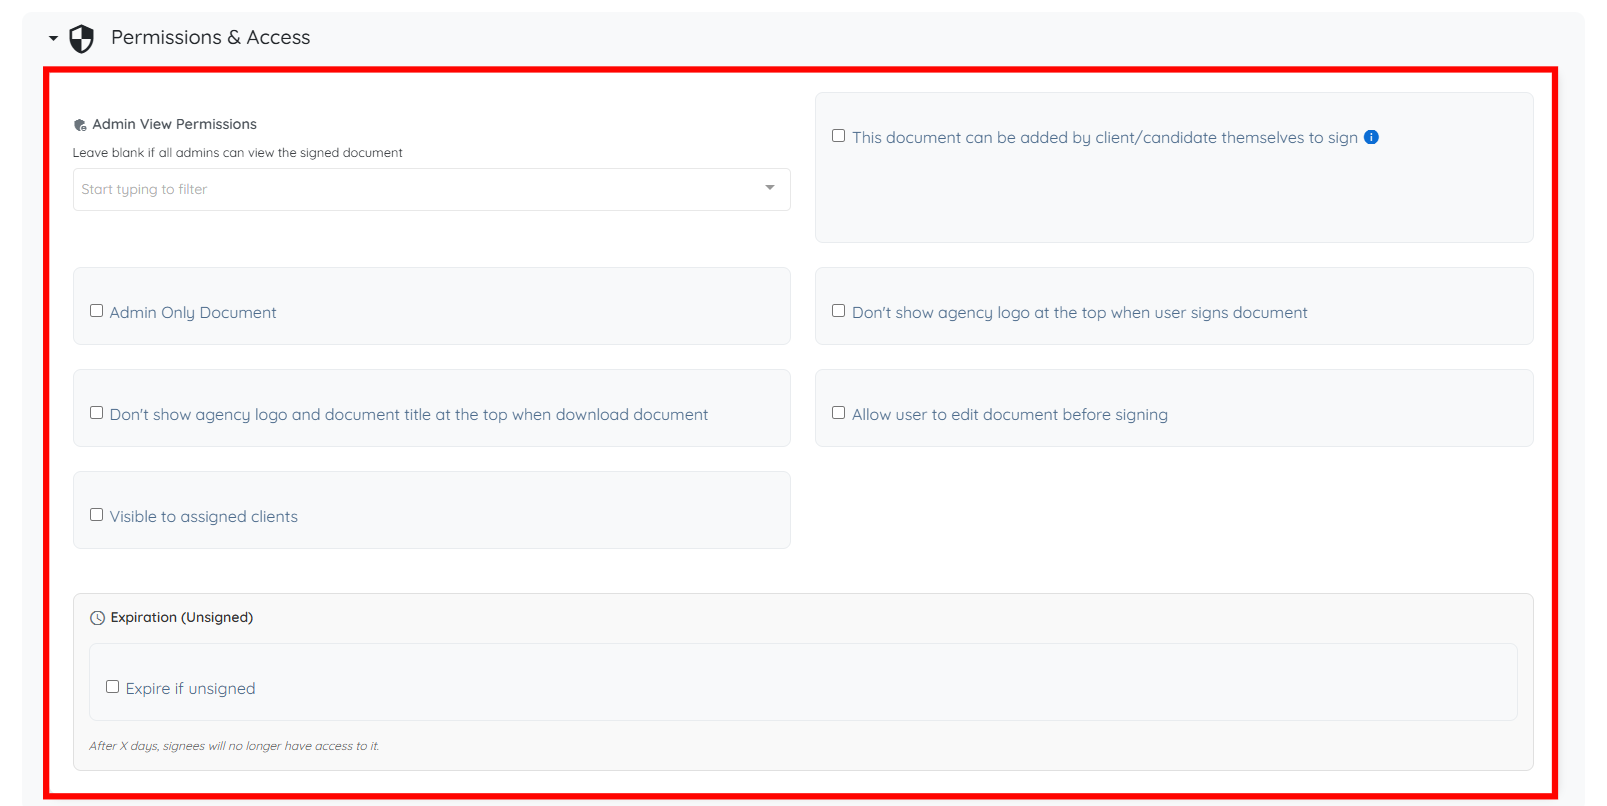
Permissions & Access
-
Admin View Permissions: Select which admins can view the signed document.
-
This document can be added by client/candidate themselves to sign: Enable this option to allow users to add and sign this document on their own.
-
Admin Only Document: Enable this option to restrict access so only admins can view or manage the document.
-
Don’t show agency logo at the top when user signs document: Enable this option to hide the agency logo during the signing process.
-
Don’t show agency logo and document title at the top when download document: Enable this option to hide the agency logo and document title in the downloaded document.
-
Allow user to edit document before signing: Enable this option to allow users to modify the document before signing.
-
Visible to assigned clients: Enable this option to make the document visible to assigned clients.
-
Expire if unsigned: Enable this option to set an expiration for unsigned documents, after which users will no longer be able to access or sign them.
Location & Language Settings
-
Locations: Select the locations where this document should be available. Leave empty to apply to all locations.

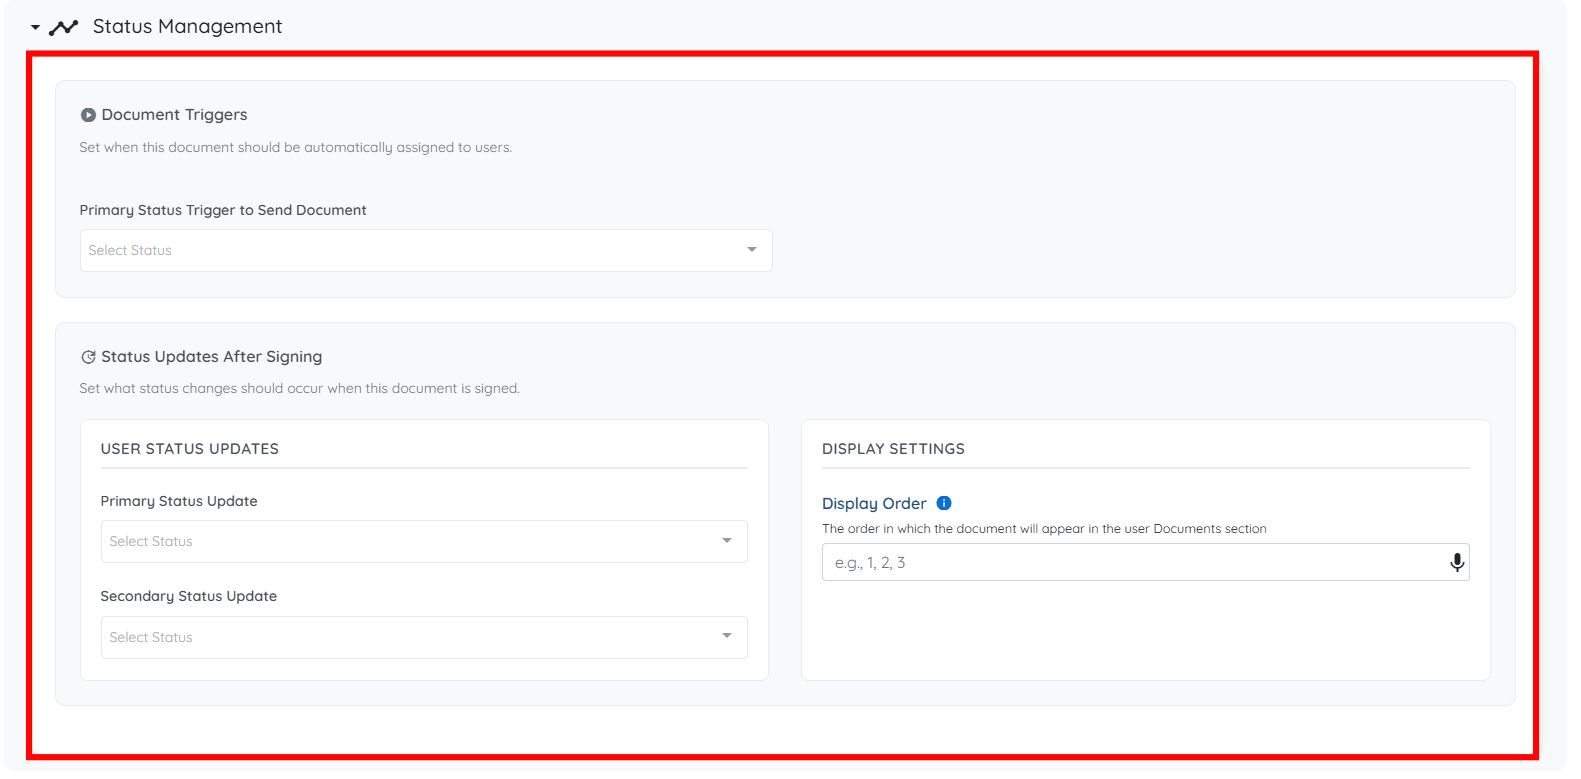
Status Management
-
Primary Status Trigger to Send Document: Select the status at which the document will be automatically sent to users.
Status Updates After Signing
-
Primary Status Update: Select the status that will be applied after the document is signed.
-
Secondary Status Update: Select an additional status to be applied after signing, if required.
Display Settings
-
Display Order: Set the order in which the document appears in the user’s Documents section.
After you configure the advanced settings as needed, click the Create button.
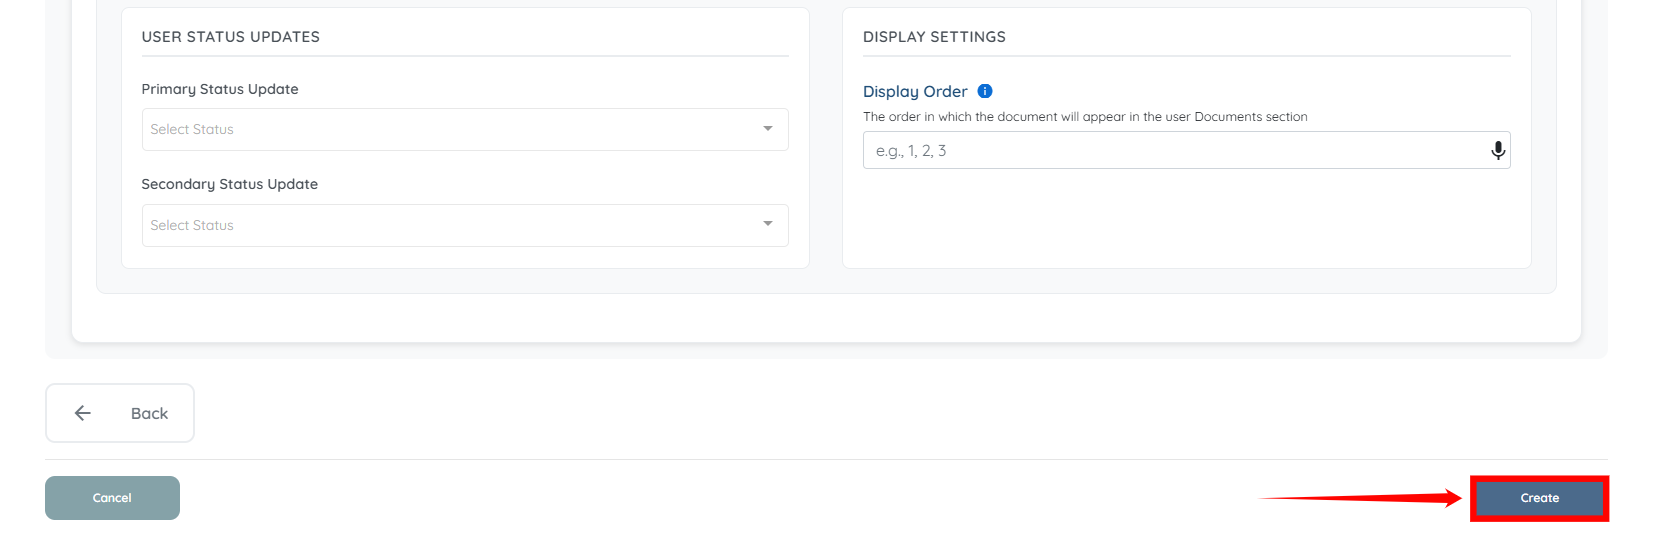
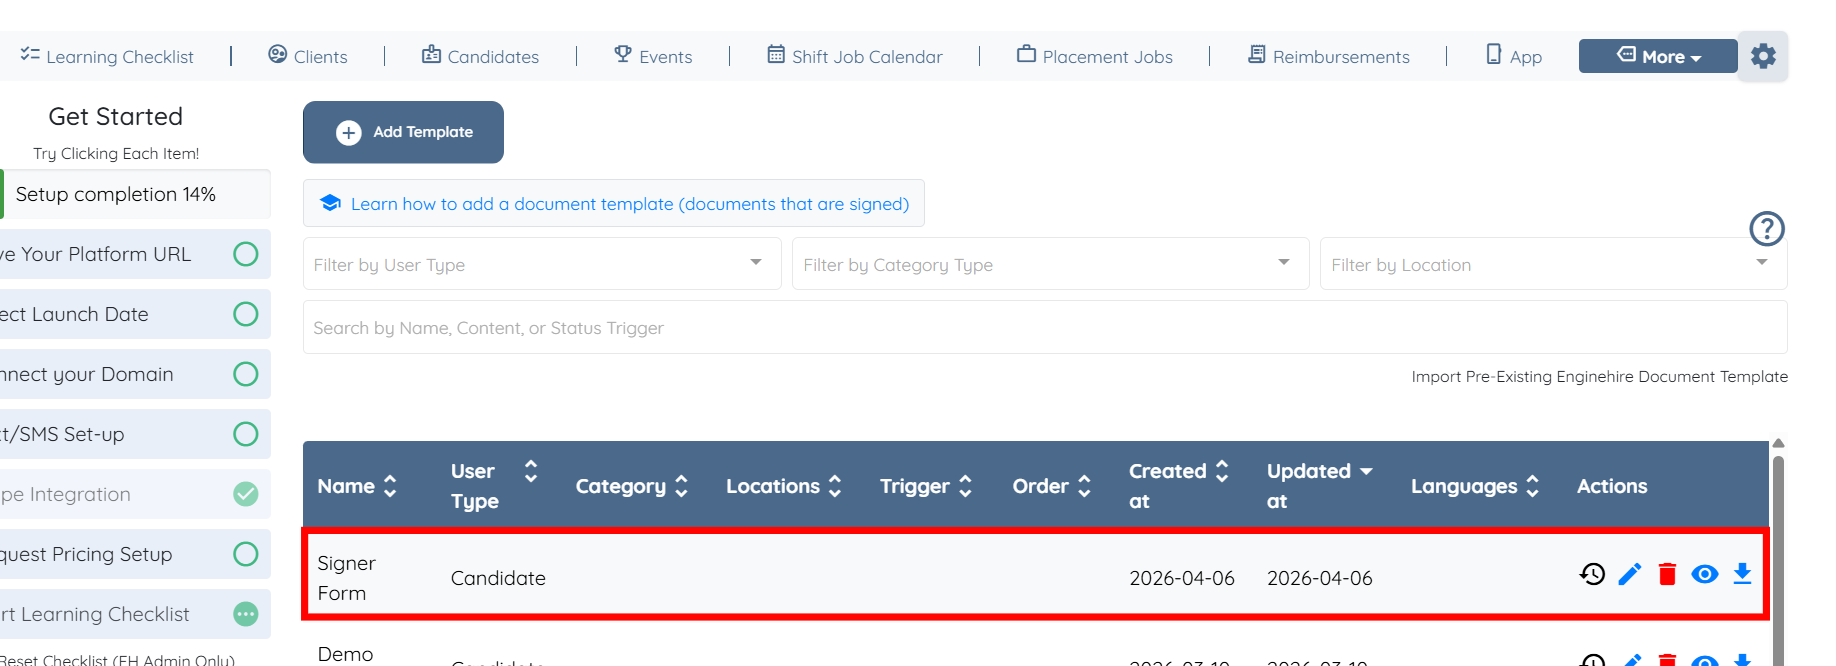
The document template will be created successfully.
Adjust a Template
Signed documents cannot be edited after signing. To make an adjustment, you must send a new document with the edits.
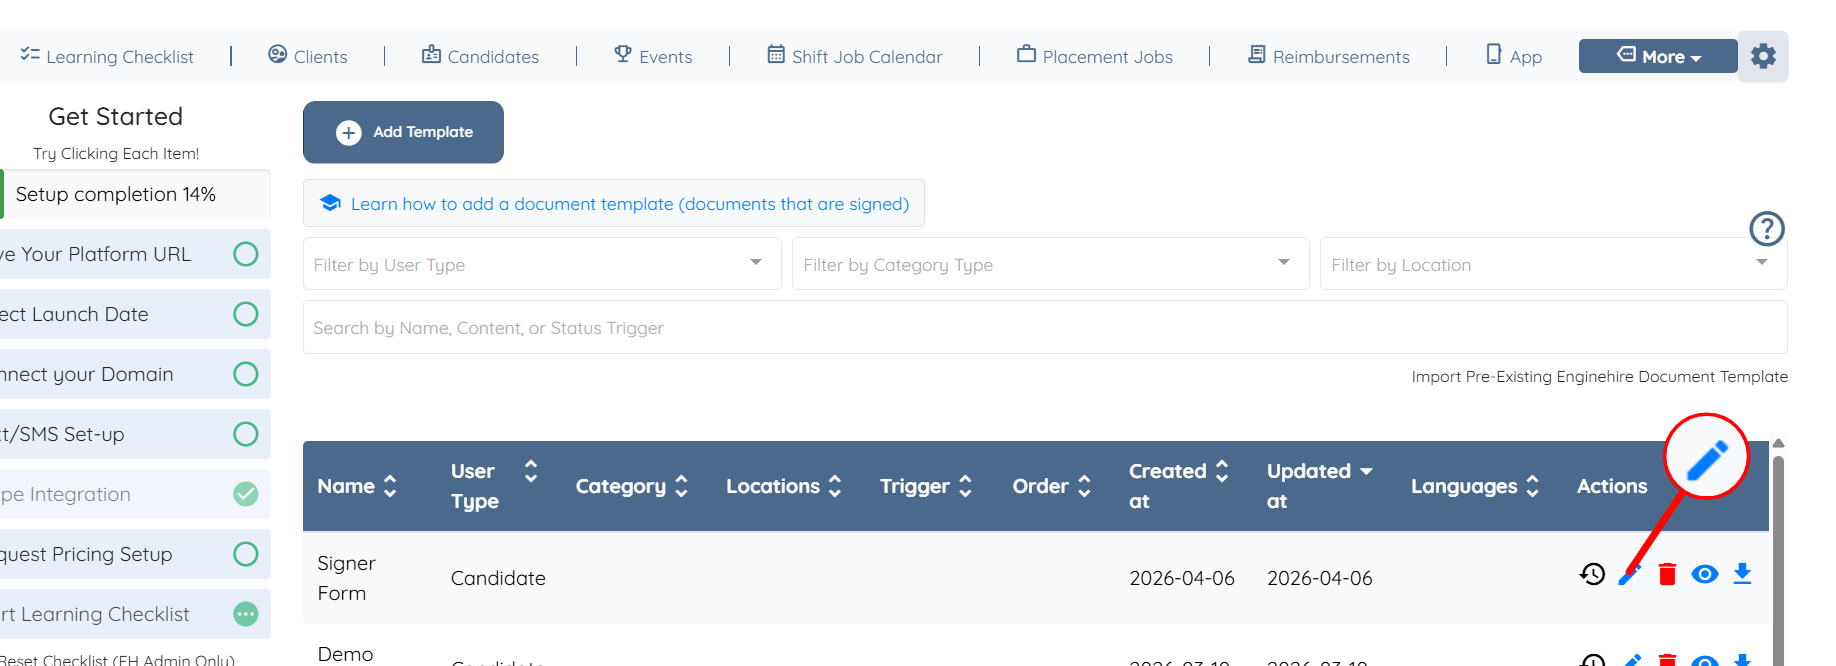
Step 1: Click the pencil icon corresponding to the template you want to adjust to make changes to that template.
Step 2: Make the required changes in any section of the template.
Step 3: After making all the edits, click the Update button to proceed. The template will be updated successfully.
Preview Template
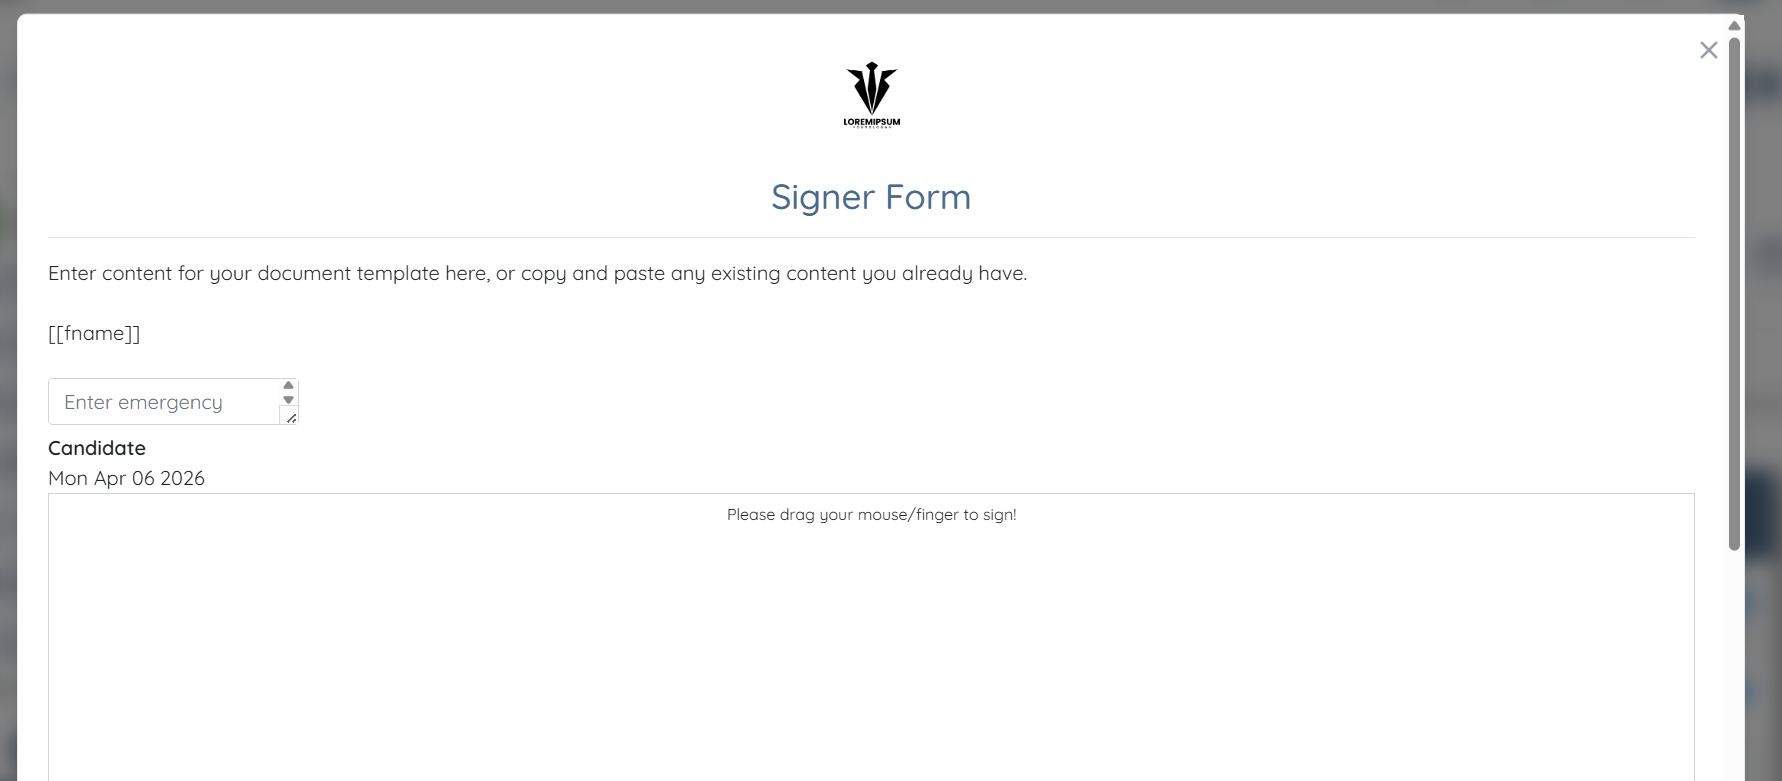
Click the corresponding eye icon to preview how the template will look to the user it is created for.
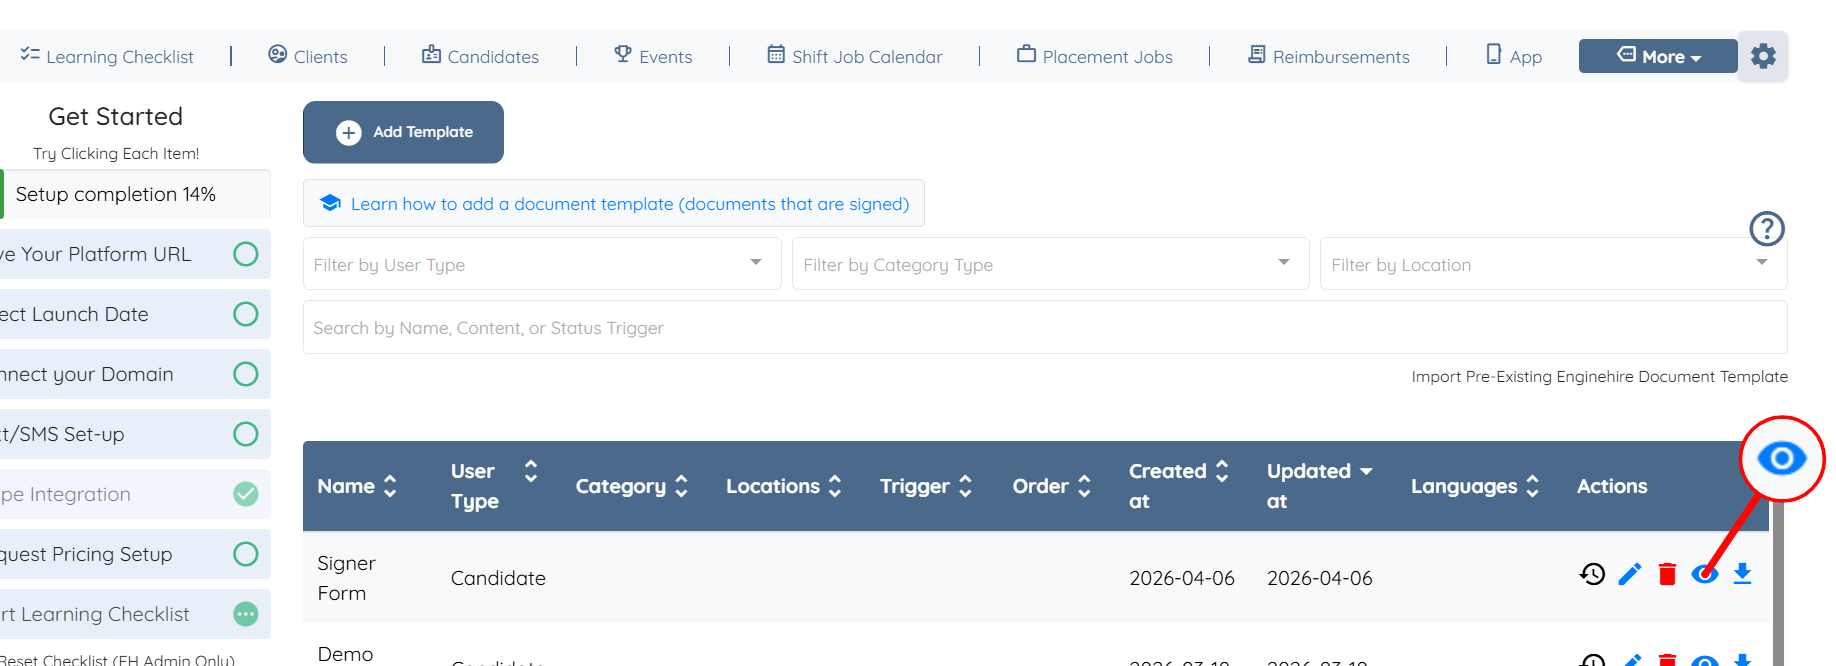
You can successfully preview the template from the user’s point of view.
Now It's Your Turn. Try it out.
Go into a Document Template.
Create a new document.
If you have created a test profile with your own email address, you can see how the email will be received through your own email.
Understanding Documents and Document Templates
See all Document Templates to learn more.