![enginehire logo thin dark 1.0.png]](https://learn.enginehire.io/hs-fs/hubfs/enginehire%20logo%20thin%20dark%201.0.png?height=40&name=enginehire%20logo%20thin%20dark%201.0.png)
Let’s get started 🚀
Get the Zapier Token
First, generate the Zapier token from Enginehire. You will use this token to connect your Enginehire account with Zapier.
Step 1: Log in to your agent dashboard and click More > Integrations, as shown in the screenshot below. 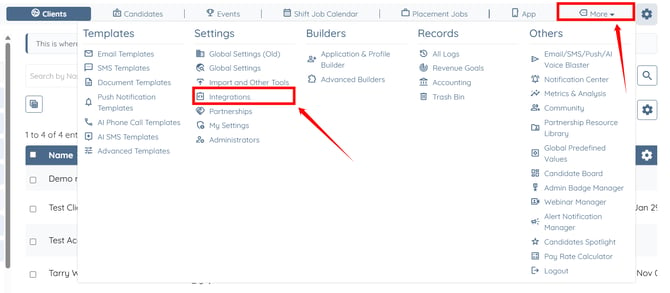
Step 2: Click the Zapier Integration option to expand and view its details.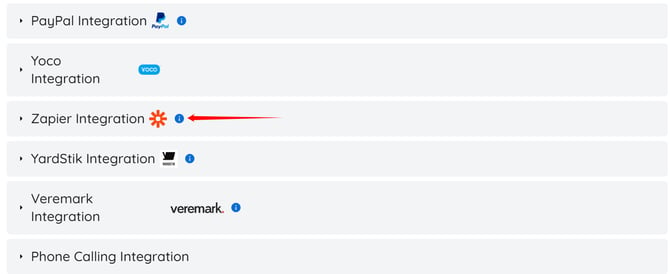
Step 3: Click the Get Zapier Token button.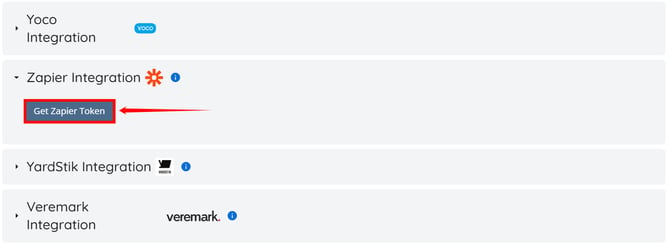
Step 4: Click the Copy icon to copy the token, then save it securely on your system, such as in a Notepad file. 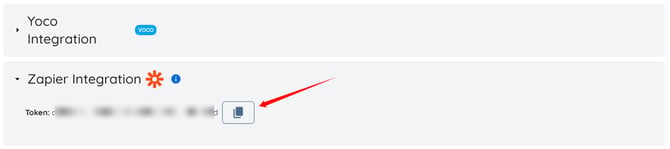
Connect Zapier With Enginehire
Add Enginehire as an app connection in Zapier and use the token to establish the connection.
Step 1: On your Zapier dashboard, click App connections from the left-hand navigation menu. 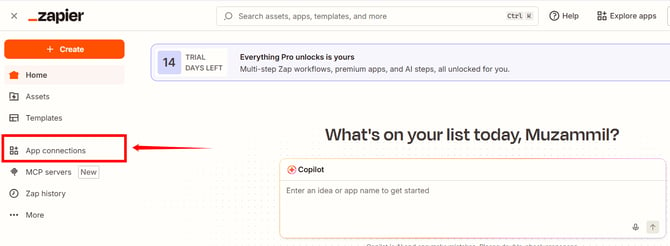
Step 2: Click the Create connection button.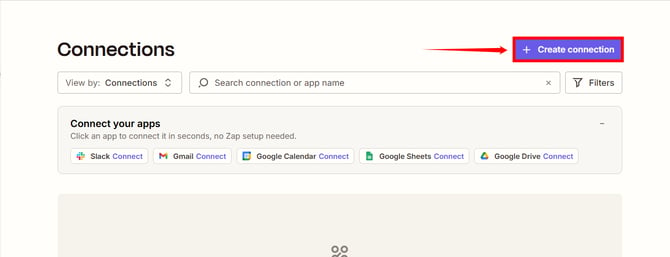
Step 3: Search for and select Enginehire from the list.
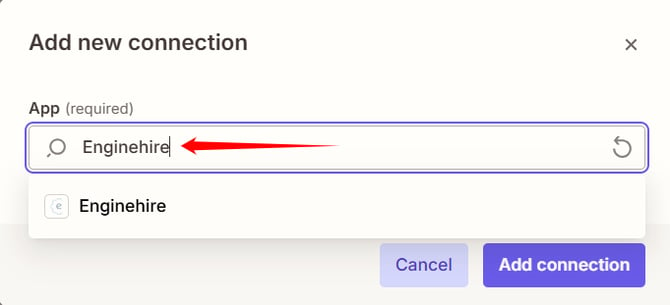
Step 4: Click the Add connection button.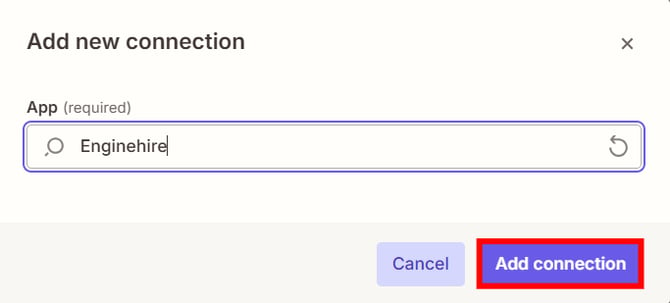
Step 5: Enter the token you saved earlier, then click Connect. 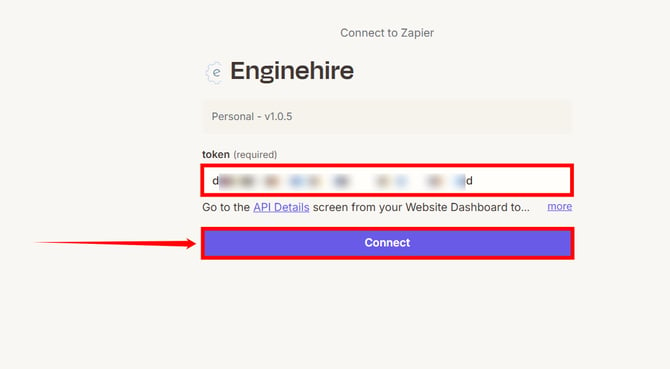
Your Zapier account will be successfully connected with Enginehire. 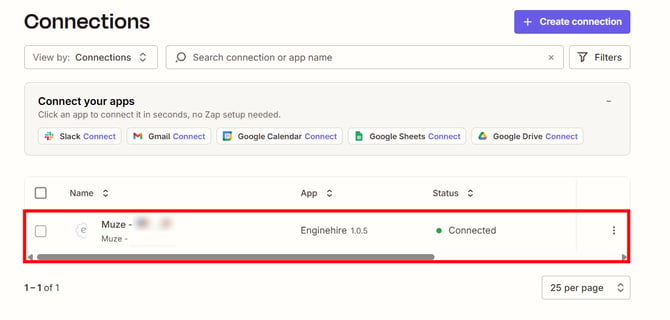
Create a Zap
Once Enginehire is connected, create a Zap by selecting an Enginehire event as the trigger and an action app to receive or process the information.
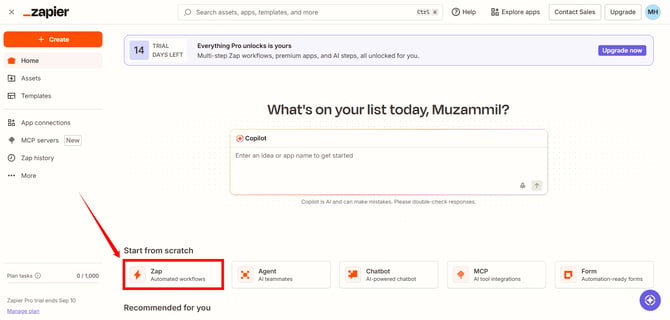
Step 1: On your Zapier dashboard, click Zap, as shown in the screenshot below.
Step 2: Click the Trigger option to begin creating the Zap. 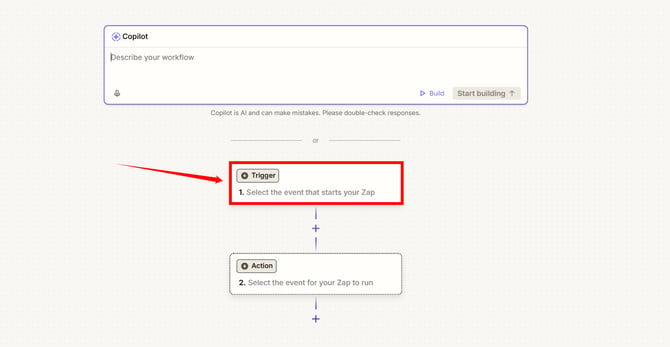
Step 3: Select Enginehire as the trigger app. 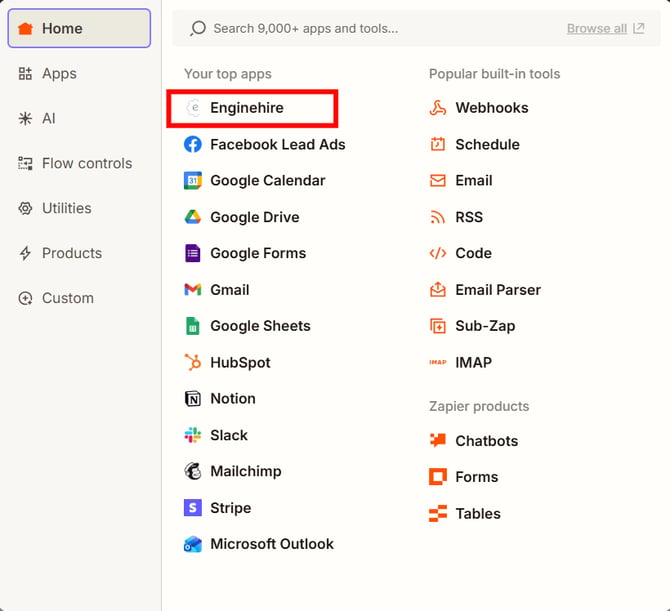
Step 4: Click the box under Trigger event to view the available events.
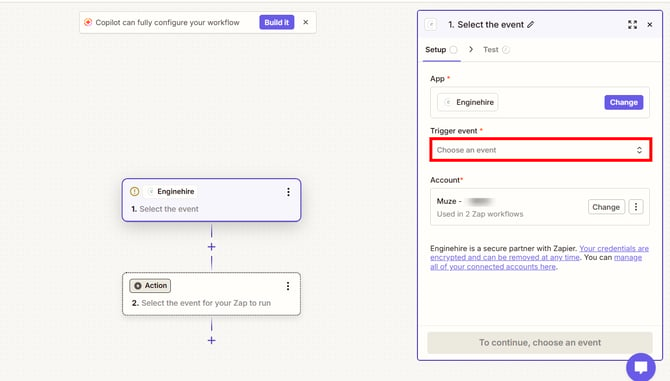
Step 5: Select the event you want to use as the trigger.
For demonstration purposes, we are selecting the New Job Post event. 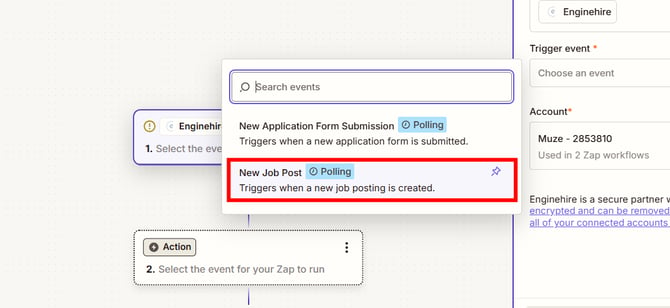
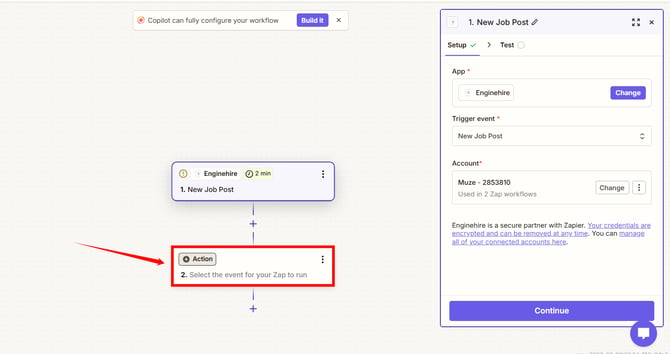
Step 6: Select the Action button in the Zap workflow.
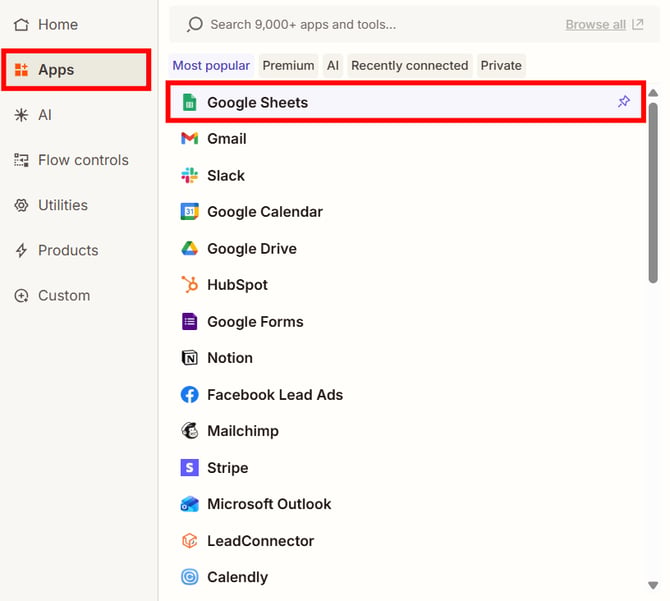
Step 7: Under Apps, select the app where you want to send or use the information from Enginehire. For demonstration purposes, we are selecting Google Sheets.
Step 8: Enter the remaining fields required for the Action Setup. 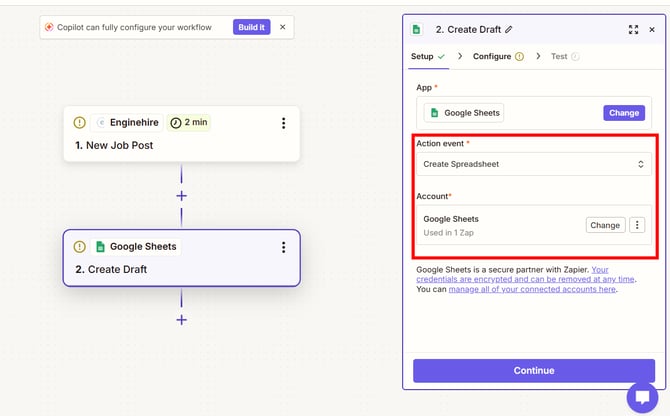
Step 9: Click the Continue button.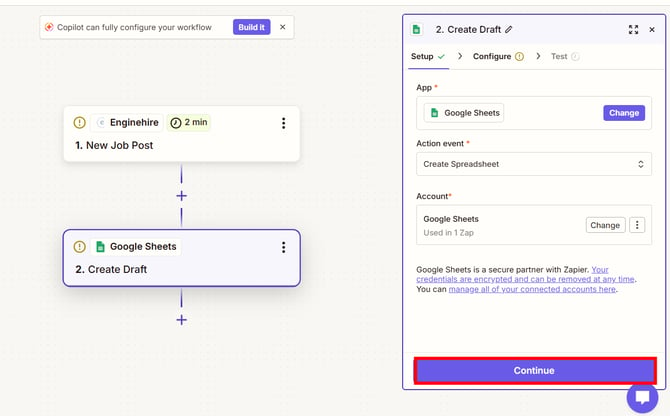
Step 10: Fill in all the details as required, then click the Continue button.
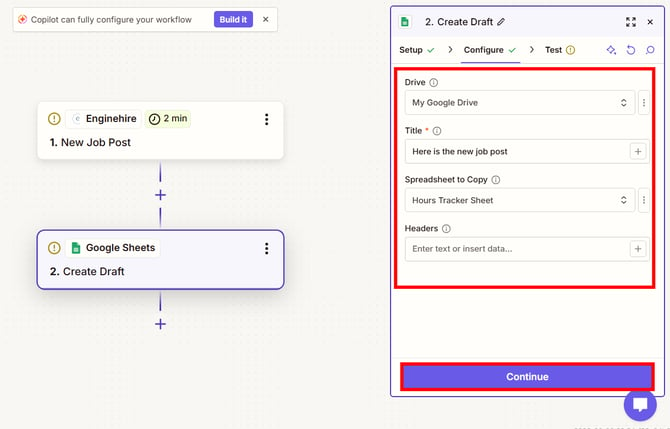
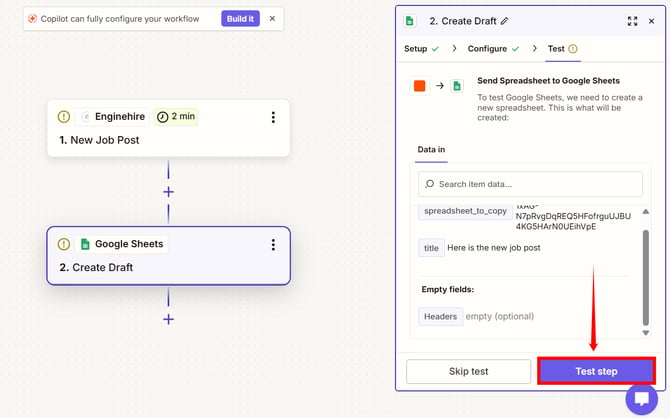
Step 11: Click the Test step button to test your zap.
A successful test message will appear, confirming that the information was sent to Google Sheets.
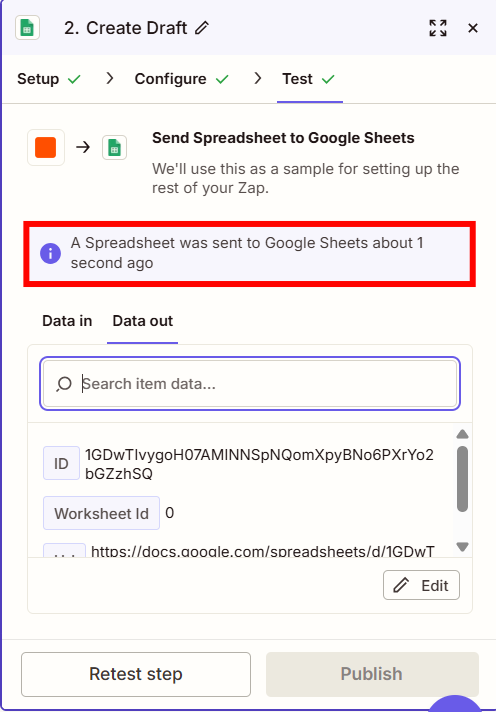
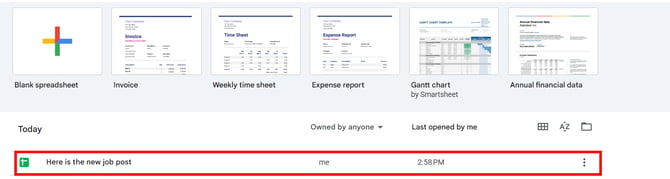
You can also verify that the corresponding spreadsheet or data was successfully created in Google Sheets.