For demonstration purposes, this article uses a candidate profile. The same steps apply when configuring visibility for a client profile.
Let’s get started 🚀
Hide an Entire Section
Hide a full section based on relationship or application status to control when it becomes visible to the clients.
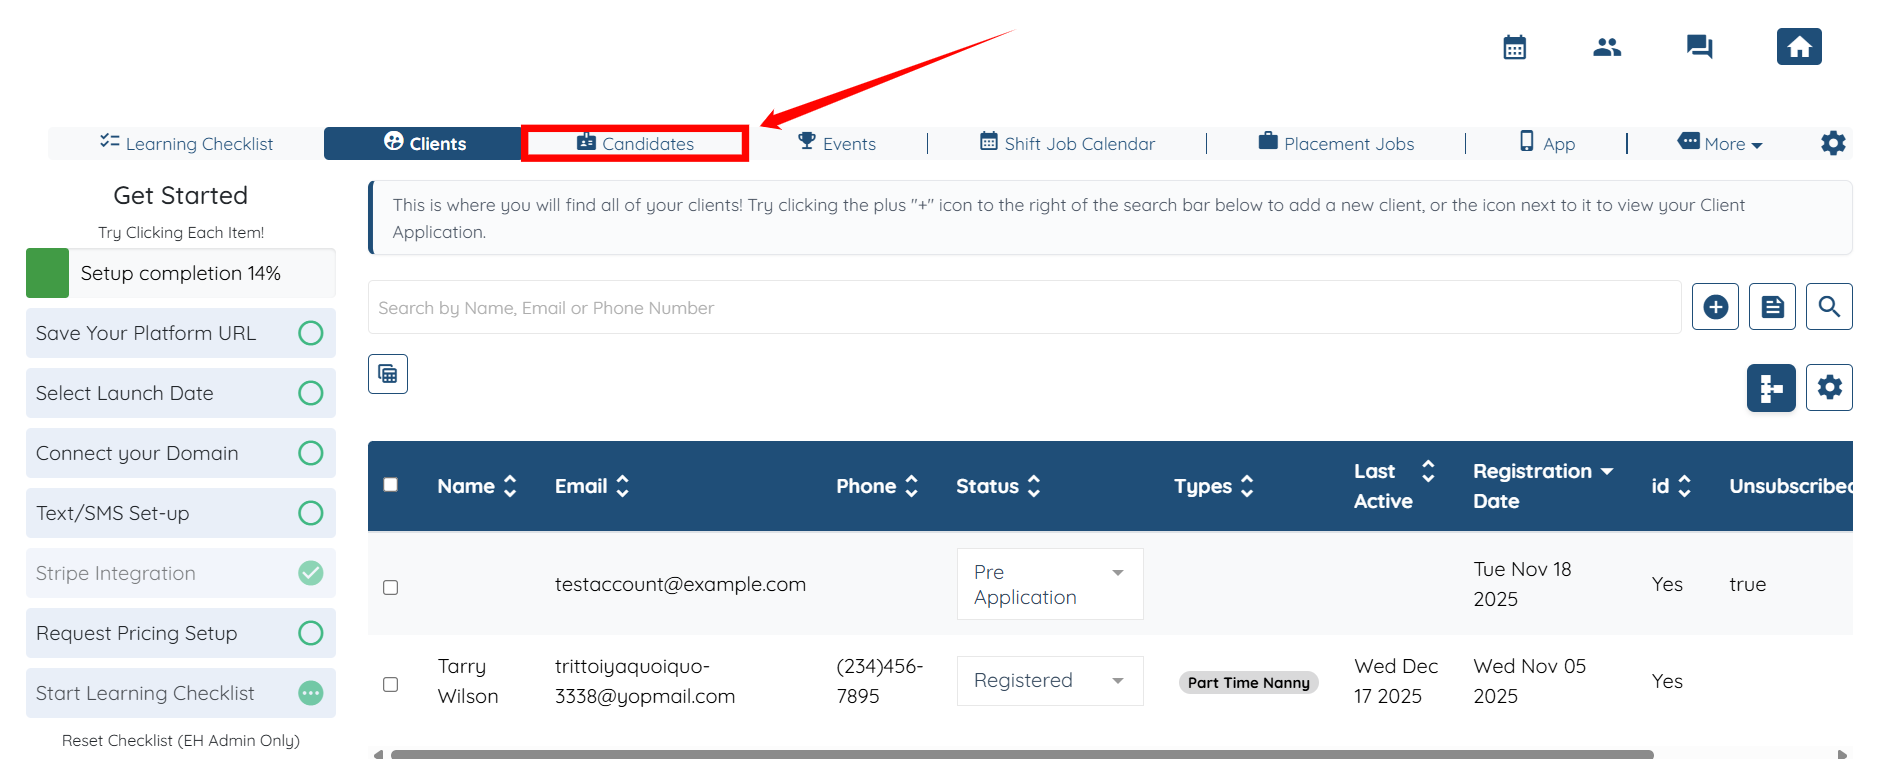
Step 1: Log in to your agent dashboard, then click Candidates in the top navigation bar.
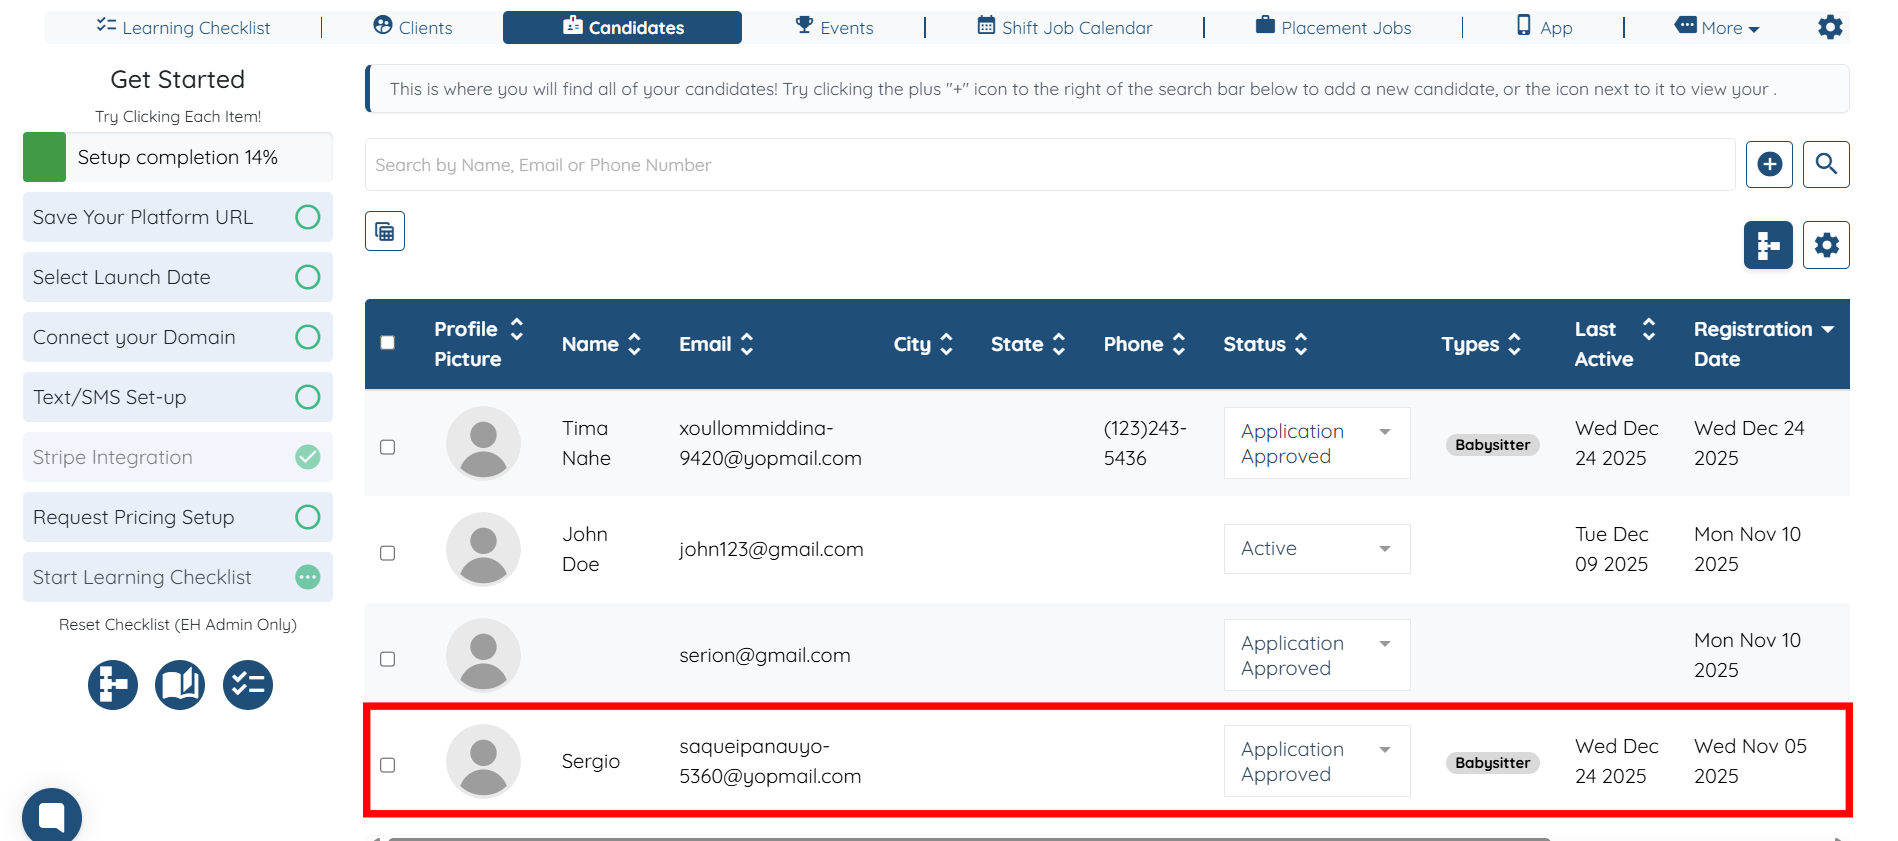
Step 2: Click to open the candidate profile for which you want to hide specific sections or questions.
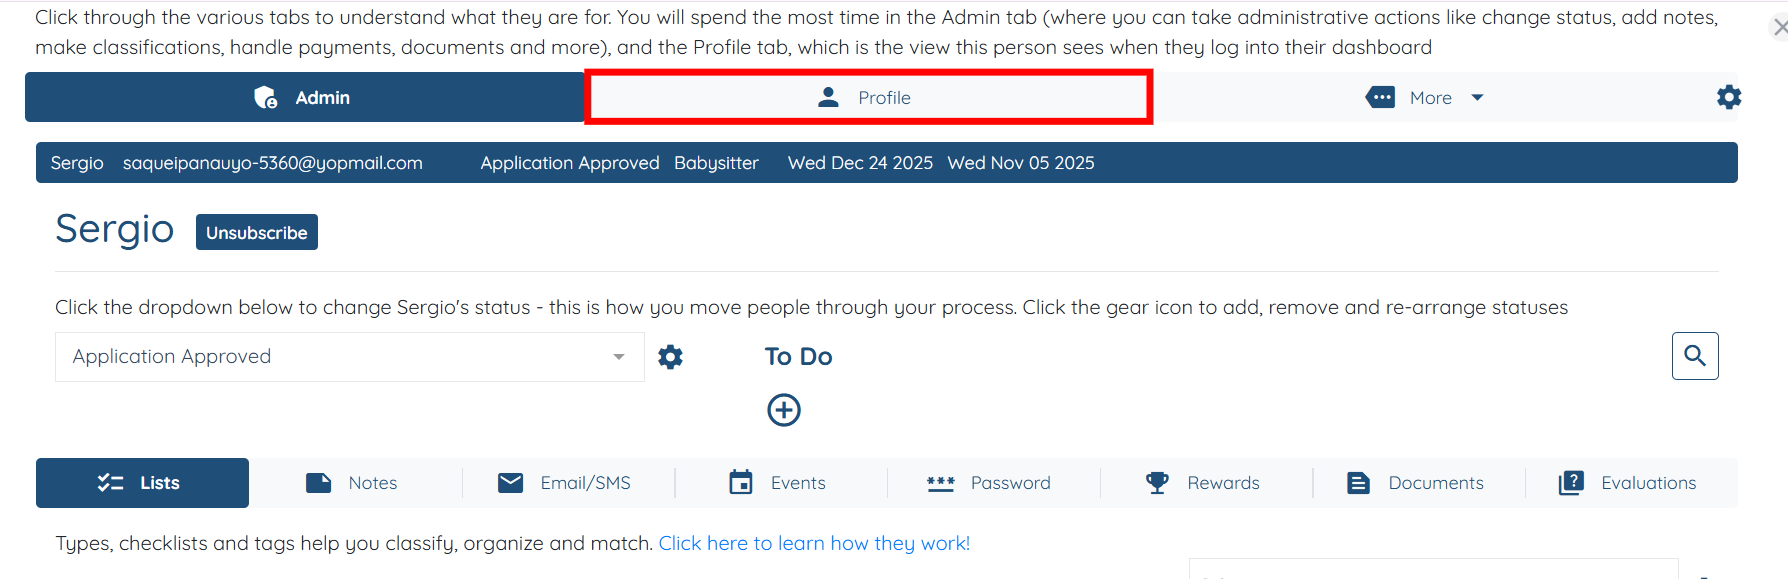
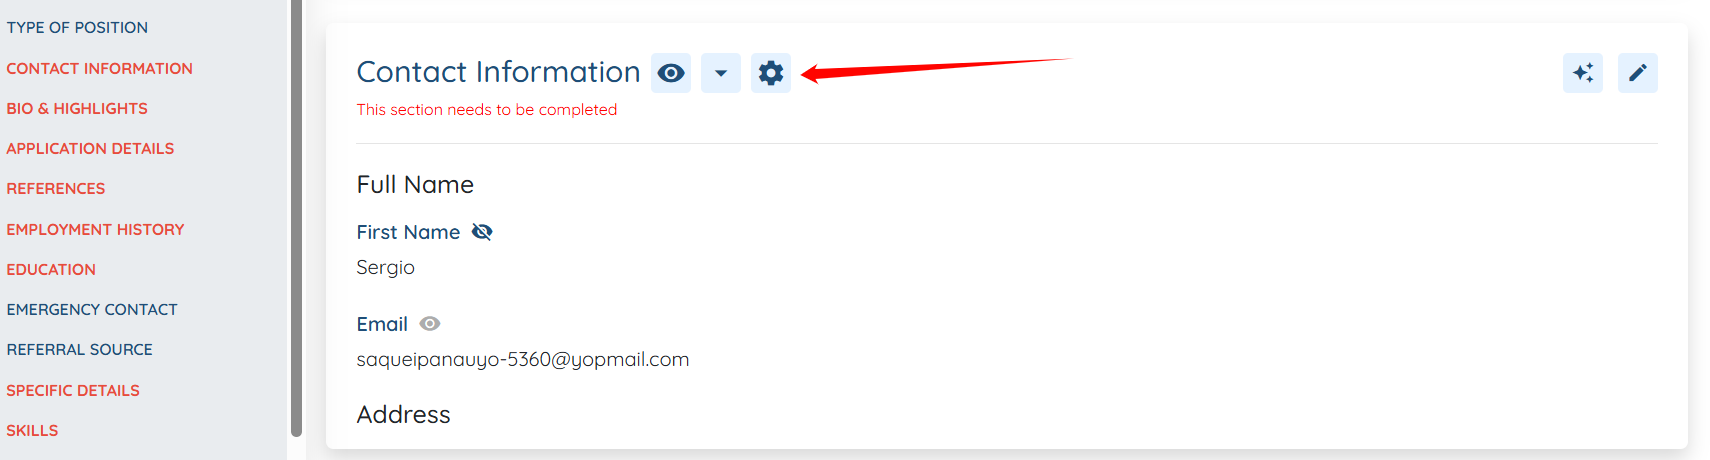
Step 3: Navigate to the Profile section as shown in the screenshot.
Step 4: Click the Gear icon located next to the name of the section that you want to hide.
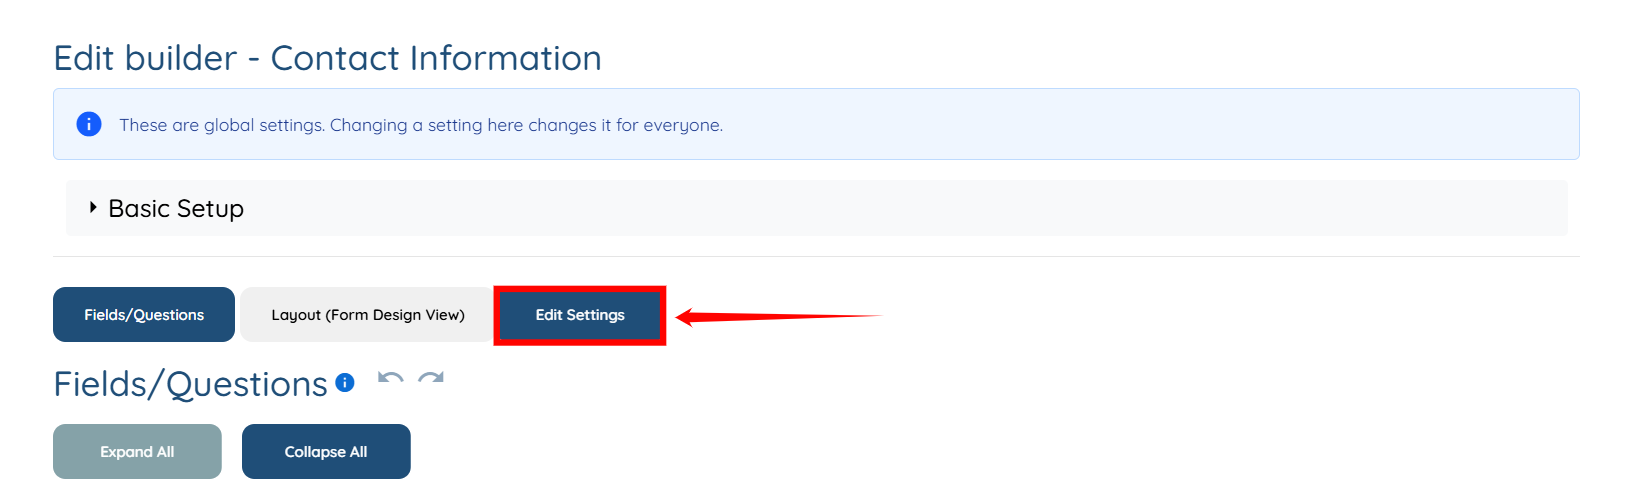
Step 5: Click the Edit Settings button.
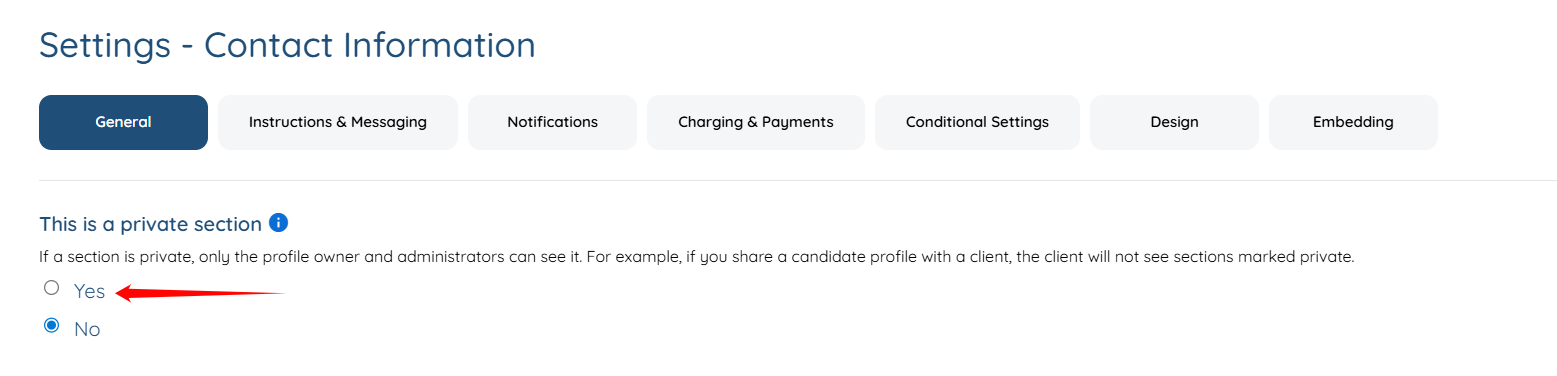
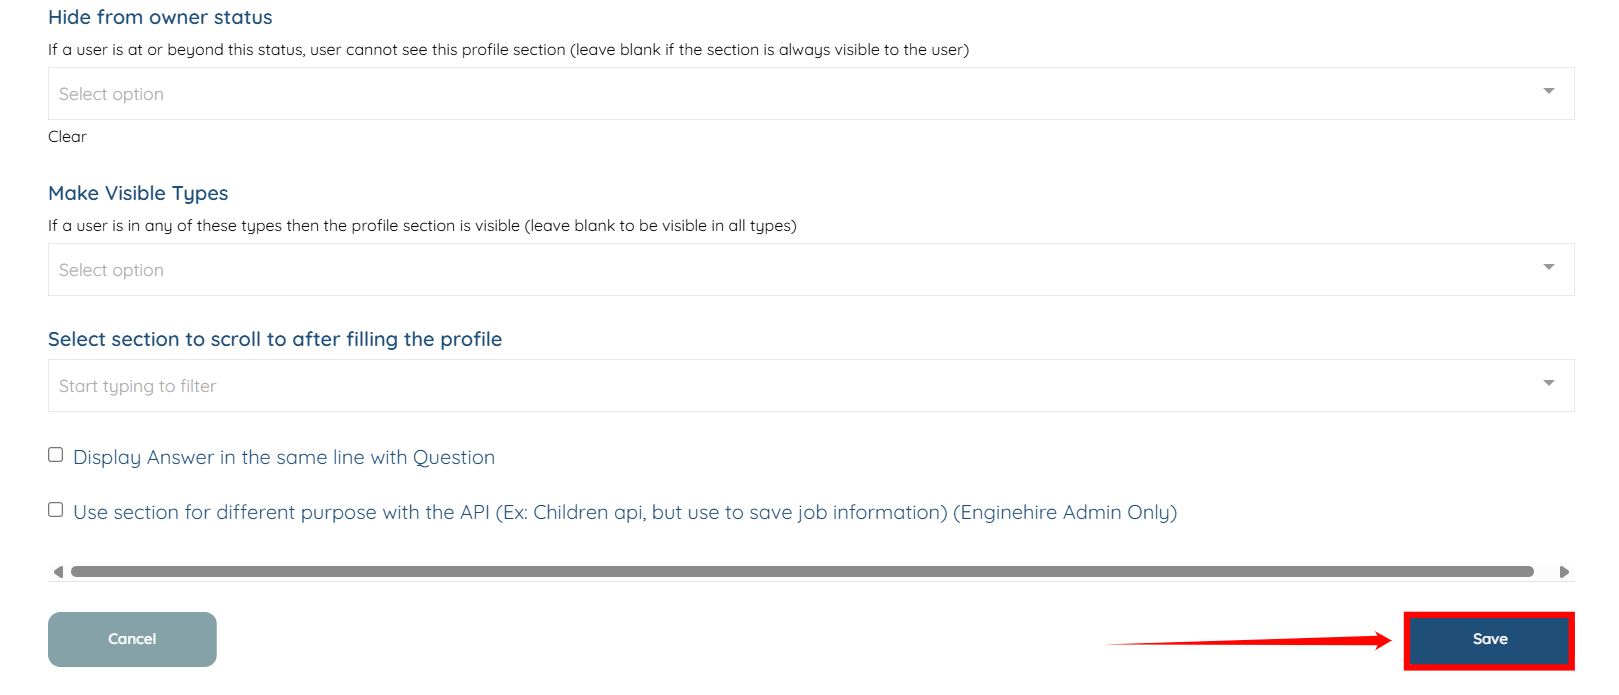
Step 6: Click the Yes radio button under the “This is a private section“ field.
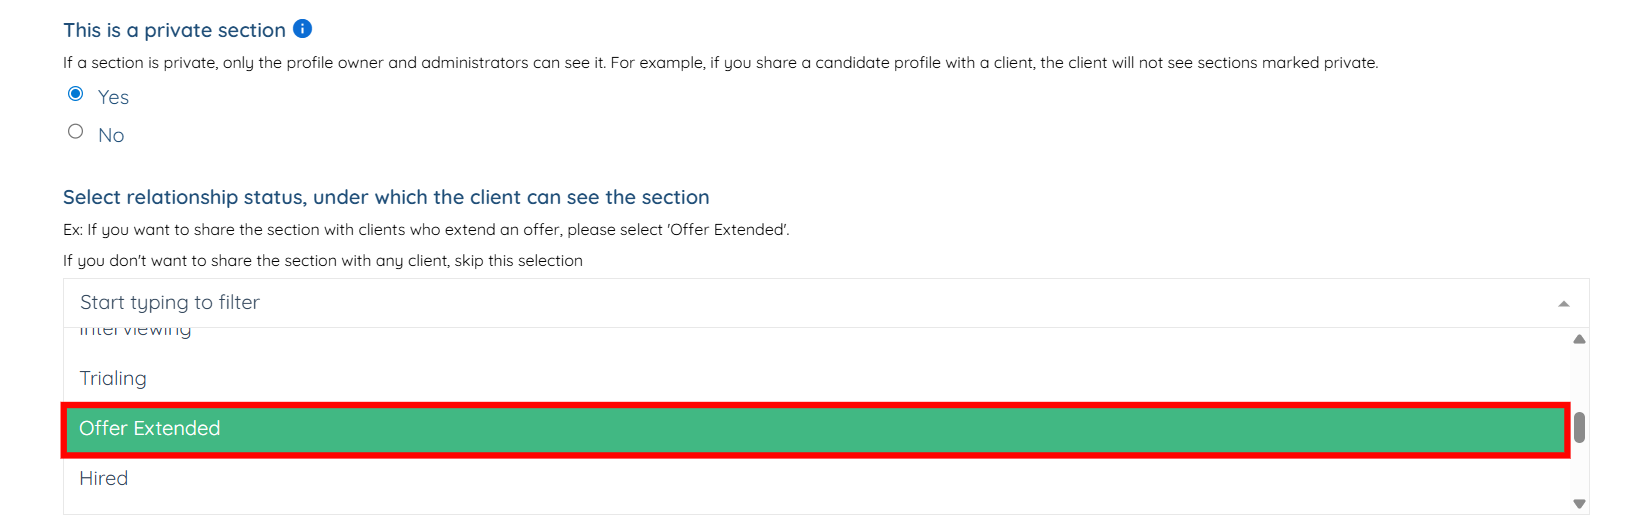
Step 7: Select the relationship status under which the client can view the section. For example, if you want to share the section with clients who have extended an offer, you can select “Offer Extended.”
If you don't want to share the section with any client, skip this selection.
Step 8: Click on the Save button to confirm the changes.
Hide Individual Questions
Hide specific questions within a section until the required relationship or application status is reached.
Step 1: Follow the same steps (steps 1–4) that are provided in the Hide an Entire Section part.
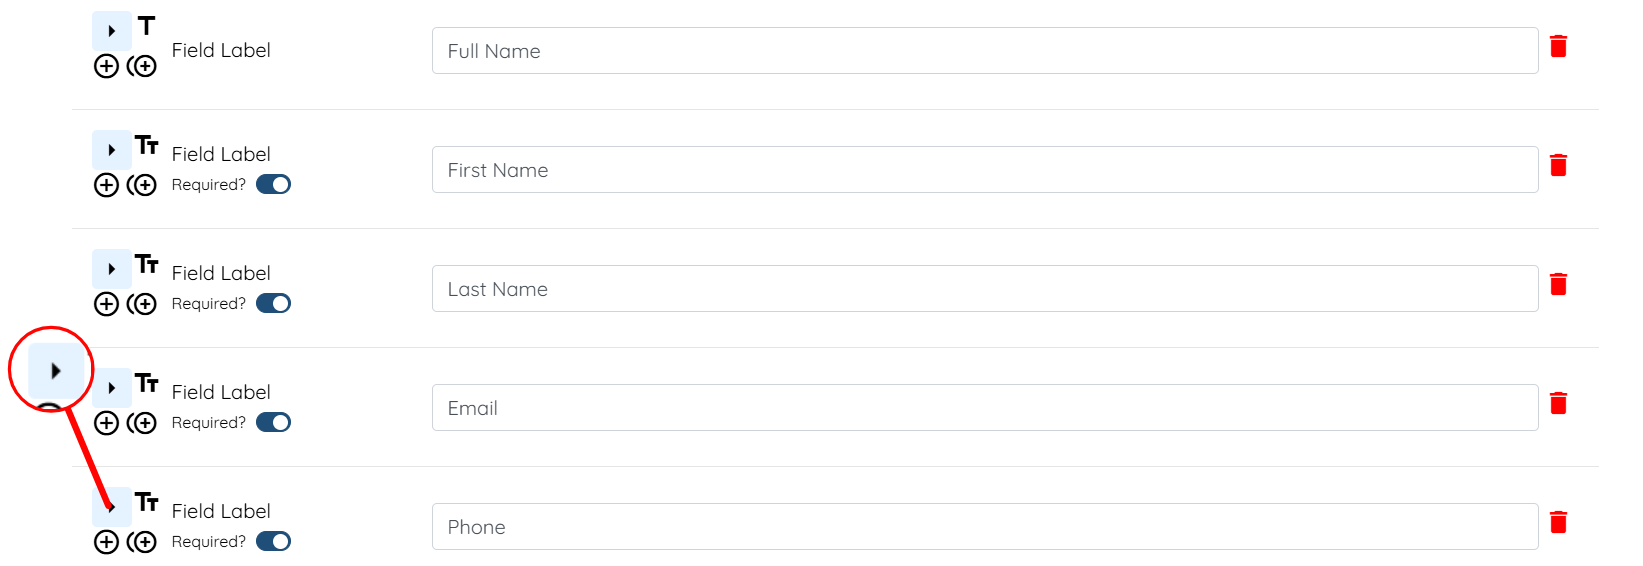
Step 2: Locate the field you want to hide, and then click the arrow button, as shown in the screenshot, to expand the field details.
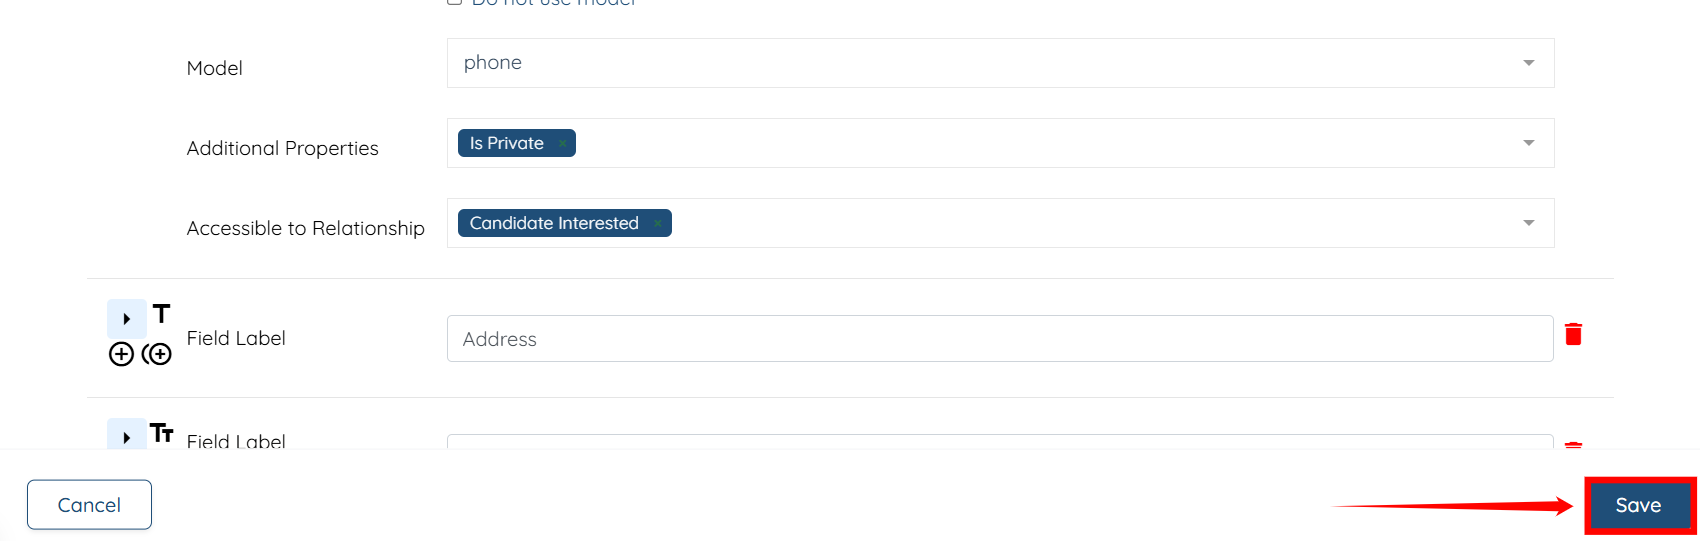
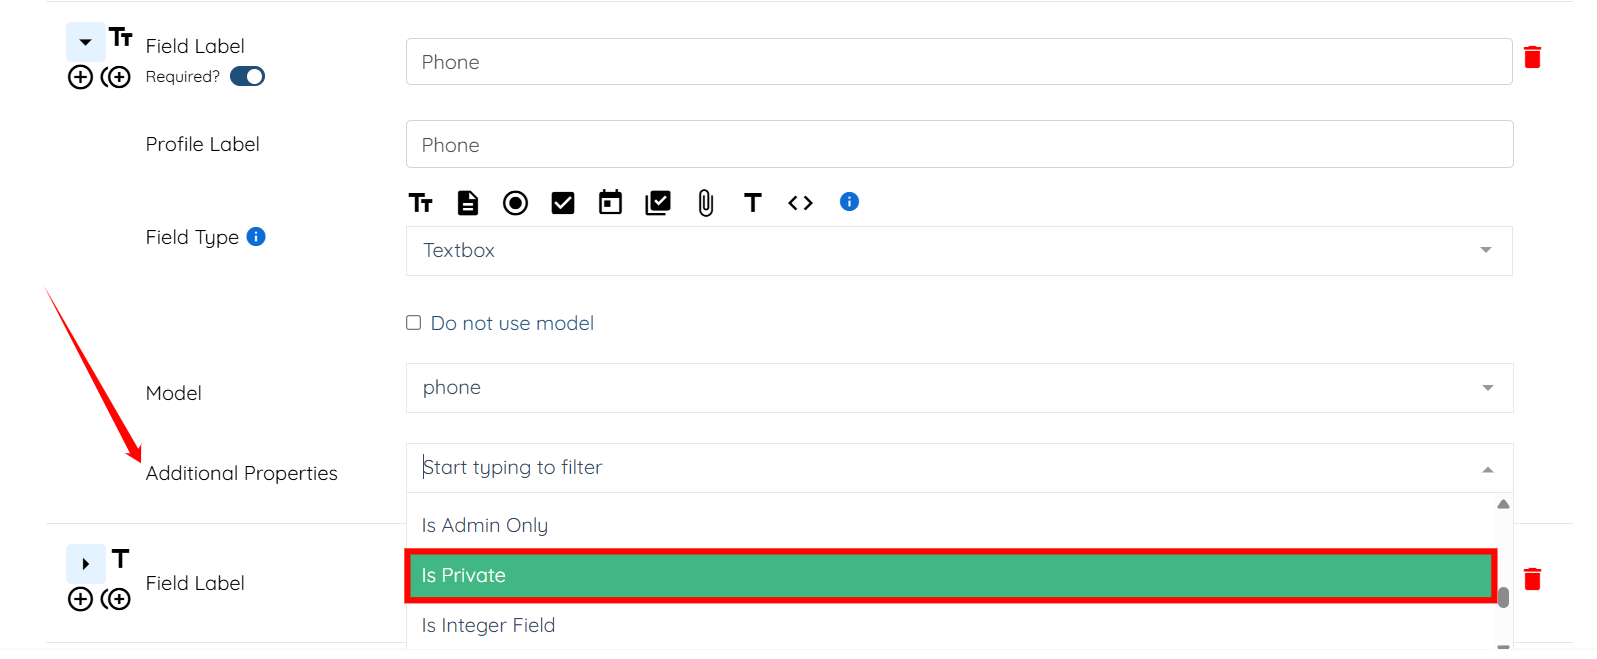
Step 3: In the Additional Properties field, select the Is Private property from the dropdown list.
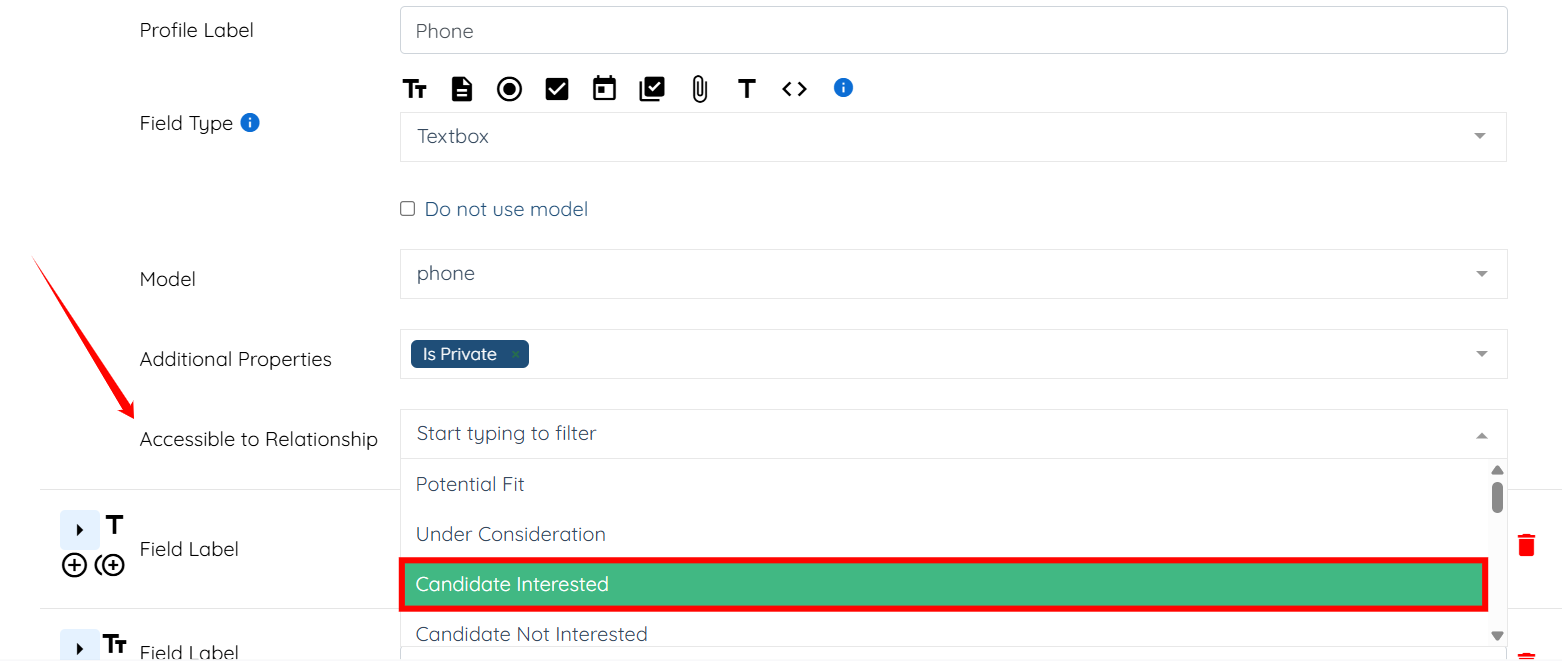
Step 4: In the Accessible to Relationship field, select the relationship status, under which the client can view the question. For example, Candidate Interested.
Step 5: Click the Save button to confirm the changes.