![enginehire logo thin dark 1.0.png]](https://learn.enginehire.io/hs-fs/hubfs/enginehire%20logo%20thin%20dark%201.0.png?height=40&name=enginehire%20logo%20thin%20dark%201.0.png)
Let’s get started 🚀
Step 1: Log in to your agent dashboard and click Candidates in the navigation bar.

Step 2: Select any candidate from the list.
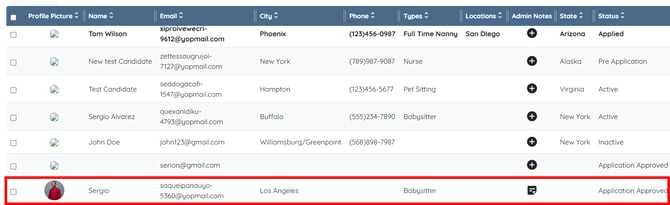
Step 3: Click the Profile tab, as shown in the screenshot below.

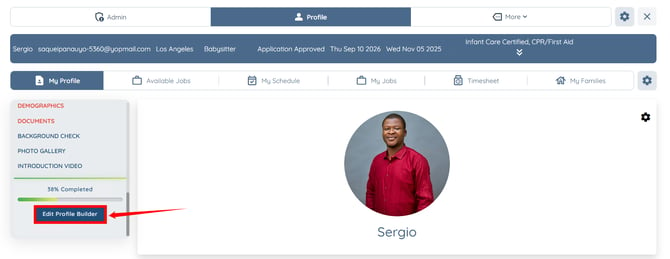
Step 4: Scroll the navigation bar on the left-hand side to the bottom and click the Edit Profile Builder button.
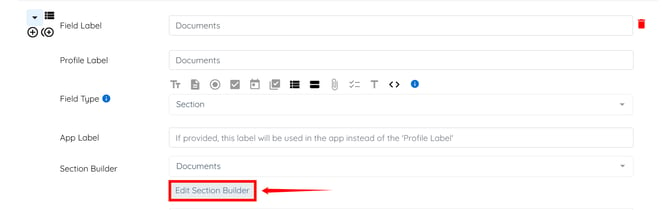
Step 5: Open the Documents field and click the Edit Section Builder button. You will be redirected to the Documents section in the Candidate Profile Builder.
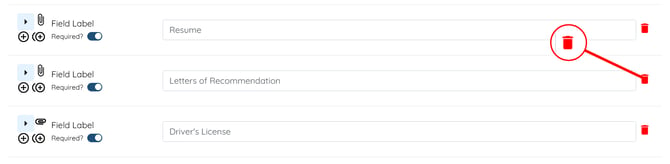
Step 6: Click the Trash icon to remove a field from the Documents section.
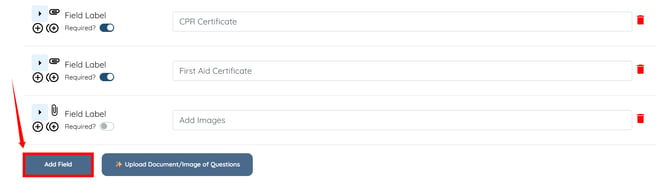
Step 7: To add a new field to the Documents section, click the Add Field button.
Step 1: Log in to your agent dashboard and click Candidates in the navigation bar.
Step 2: Select any candidate from the list.
Step 3: Click the Profile tab, as shown in the screenshot below.
Step 4: Scroll the navigation bar on the left-hand side to the bottom and click the Edit Profile Builder button.
Step 5: Open the Documents field and click the Edit Section Builder button. You will be redirected to the Documents section in the Candidate Profile Builder.
Step 6: Click the Trash icon to remove a field from the Documents section.
Step 7: To add a new field to the Documents section, click the Add Field button.
You can also edit an existing field in the Documents section if needed.
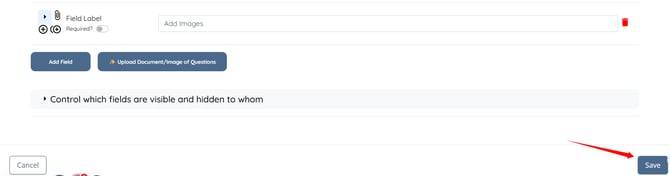
Step 8: After making the required changes, click the Save button.