![enginehire logo thin dark 1.0.png]](https://learn.enginehire.io/hs-fs/hubfs/enginehire%20logo%20thin%20dark%201.0.png?height=40&name=enginehire%20logo%20thin%20dark%201.0.png)
Let’s get started 🚀
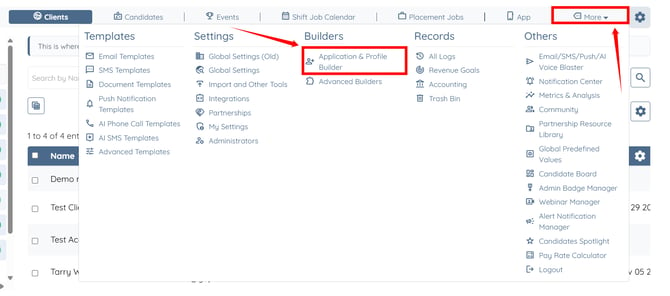
Step 1: Log in to your agent dashboard and click More > Application & Profile Builder, as shown in the screenshot below.
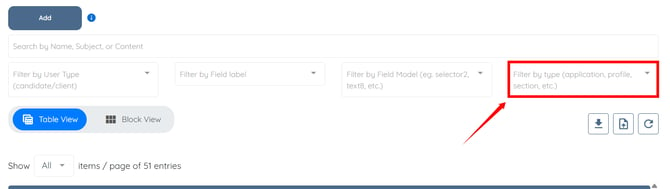
Step 2: Click the Filter by type box to open the dropdown list.
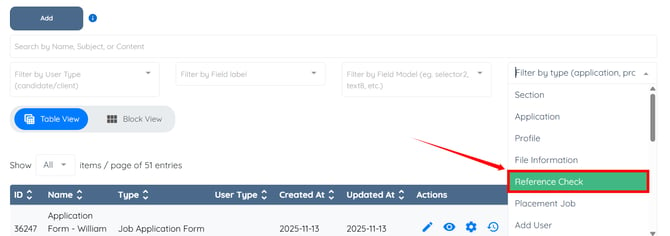
Step 3: Select the Reference Check option from the dropdown list.
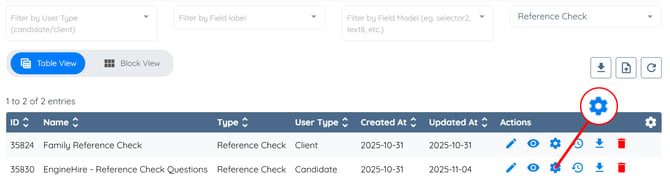
Step 4: Click the gear icon under the Actions column next to the Reference Check builder for the Candidate user type.
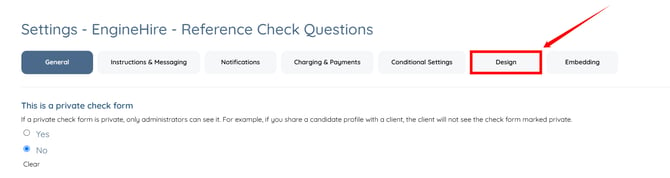
Step 5: Click the Design tab from the available tabs.
Step 6: Upload your logo under the Customize Logo field.

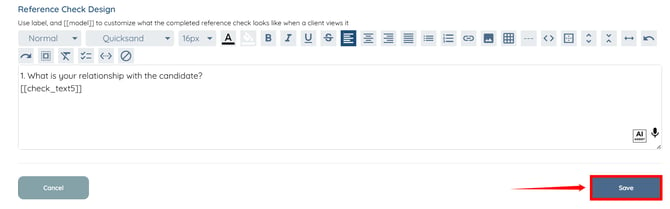
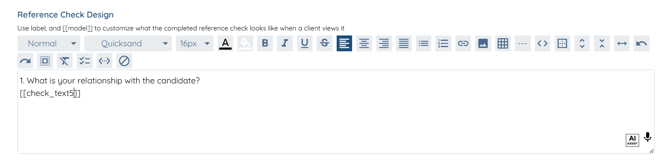
Step 7: In the Reference Check Design field, enter the questions as you want them to appear and add the corresponding model for each question.
Step 1: Log in to your agent dashboard and click More > Application & Profile Builder, as shown in the screenshot below.
Step 2: Click the Filter by type box to open the dropdown list.
Step 3: Select the Reference Check option from the dropdown list.
Step 4: Click the gear icon under the Actions column next to the Reference Check builder for the Candidate user type.
Step 5: Click the Design tab from the available tabs.
Step 6: Upload your logo under the Customize Logo field.
Step 7: In the Reference Check Design field, enter the questions as you want them to appear and add the corresponding model for each question.
To identify which model to add for each question, open the Reference Check builder and check the questions there.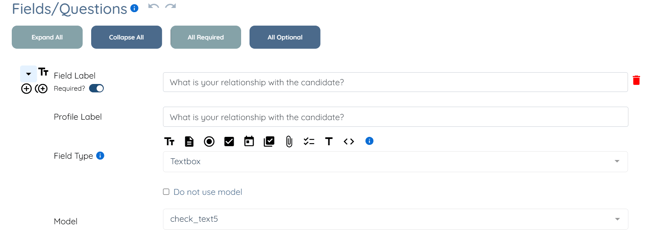
Step 8: Click the Save button to confirm your changes.