![enginehire logo thin dark 1.0.png]](https://learn.enginehire.io/hs-fs/hubfs/enginehire%20logo%20thin%20dark%201.0.png?height=40&name=enginehire%20logo%20thin%20dark%201.0.png)
Let’s get started 🚀
Change the Login Screen Background Color
Choose a custom background color for your agency's login screen to match your branding preferences.
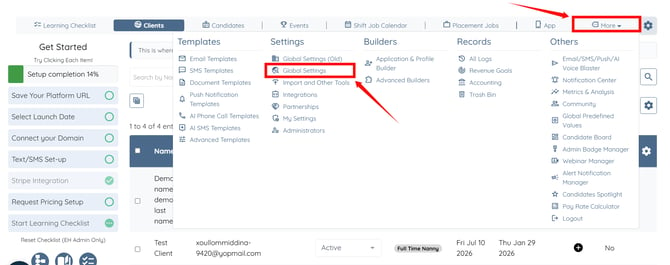
Step 1: Log in to your agent dashboard and click More > Global Settings, as shown in the screenshot below.
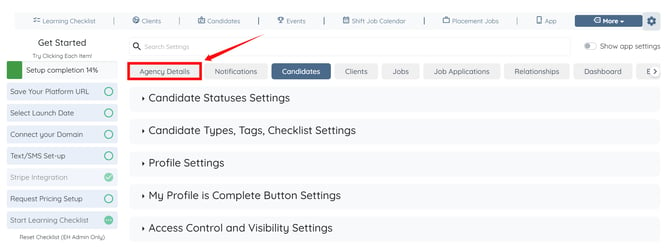
Step 2: Click the Agency Details tab from the available tabs.
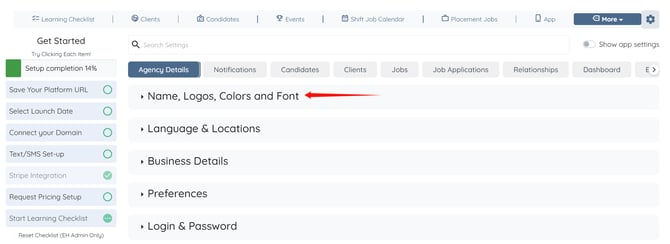
Step 3: Click the Name, Logos, Colors and Font option to expand and view its details.
Step 4: Scroll down to the Login Screen Background Color option.
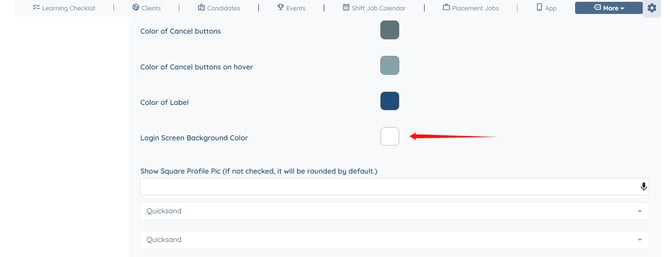
Step 5: Select the desired background color from the available options.
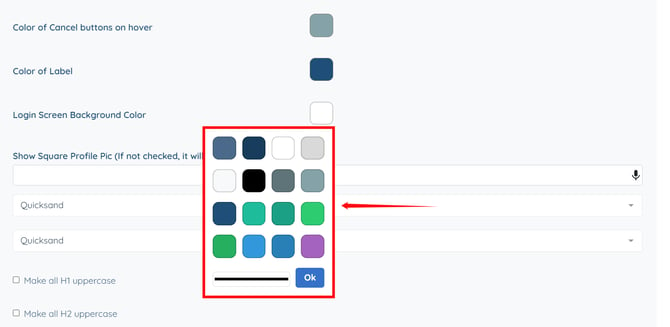
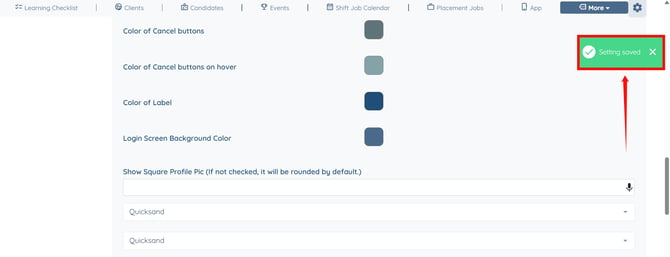
Step 6: Click on the line shown in the screenshot to customize the selected color as needed.
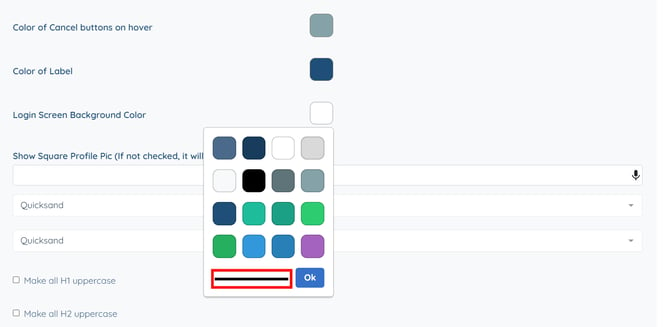
Step 7: Drag the pointer to make custom changes as needed. Then, click the Ok button to confirm the changes.
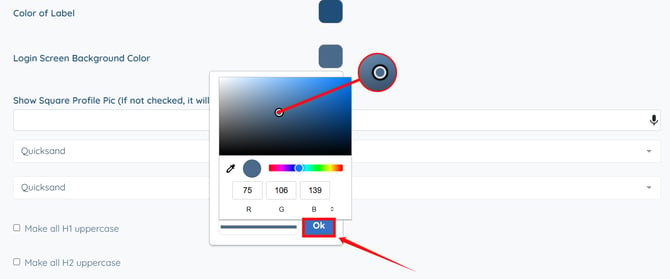
The settings will be saved automatically.
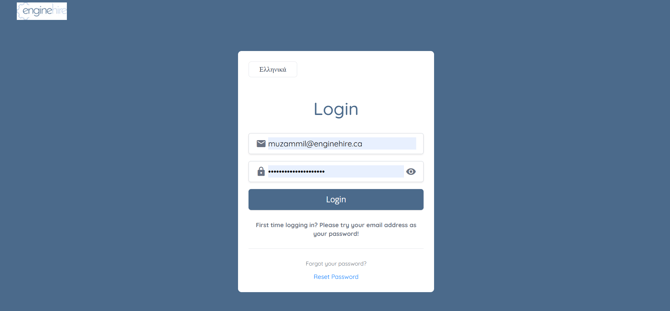
The login screen will display the updated background color.
Upload the Login Screen Background Image
Upload a custom background image to personalize the appearance of your agency's login screen.
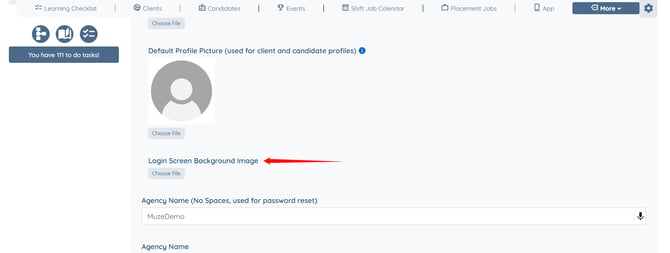
Step 1: In the Name, Logos, Colors and Font option, scroll down to the Login Screen Background Image option.
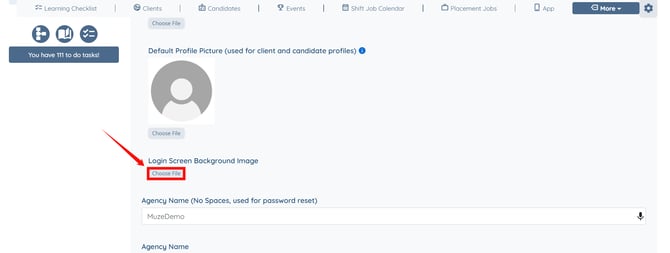
Step 2: Click the Choose File button to select the image that you want to upload.
Step 3: Drag and drop the image into the upload area, or click to browse and select the image from your system.
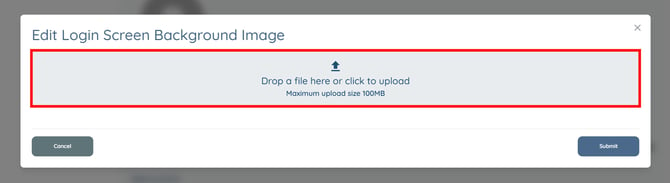
The maximum supported file size is 100 MB.
Step 4: Click the Submit button to apply the changes.
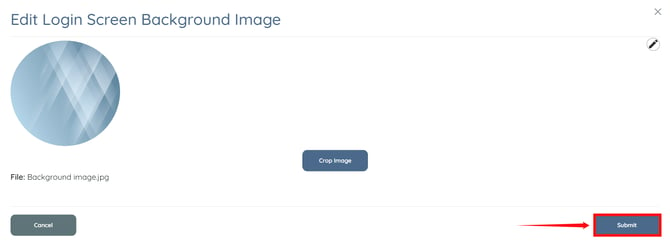
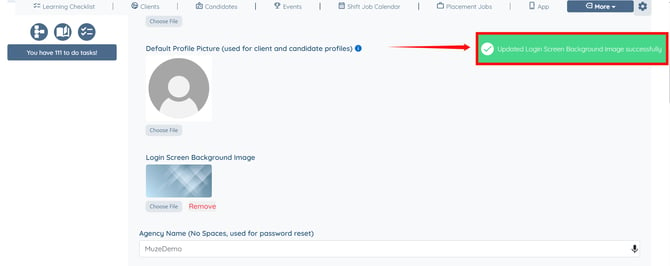
The settings will be saved automatically.
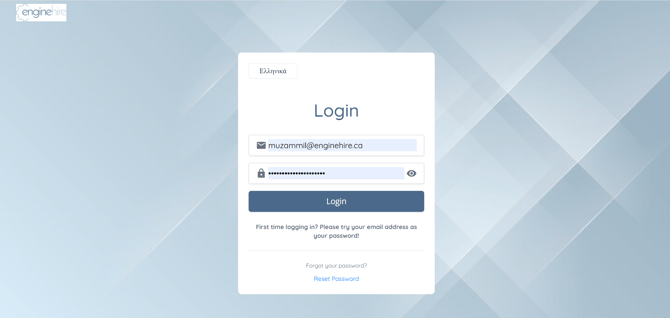
The login screen will display the uploaded background image.
Customize the Login Page
Customize an existing login page by updating its layout, formatting, or HTML content to match your agency's branding and preferences.
If you have not created a login page for your agency yet, refer to the Create a New Login Page Using AI article to create one using AI.
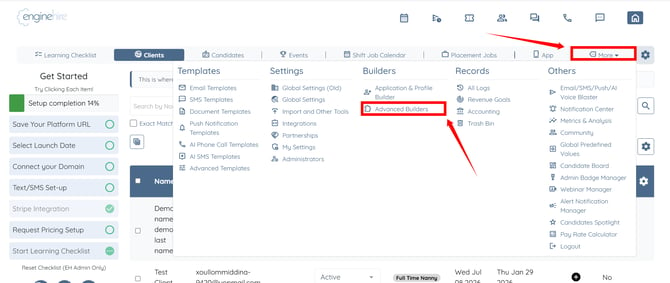
Step 1: Log in to your agent dashboard and click More > Advanced Builders as shown in the screenshot below.
Step 2: Click the Page Builder option.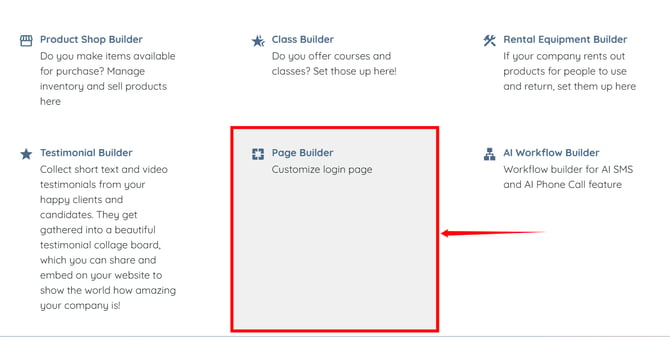
Step 3: Click the pencil icon corresponding to the login page that you want to customize. 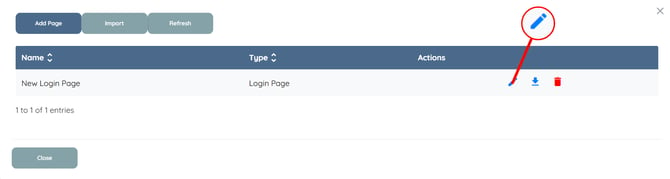
Use the editing tools available in the Page Content field to customize the login page as required.
For example, you can modify the font size, font family, text alignment, and other formatting options available in the Page Content field. 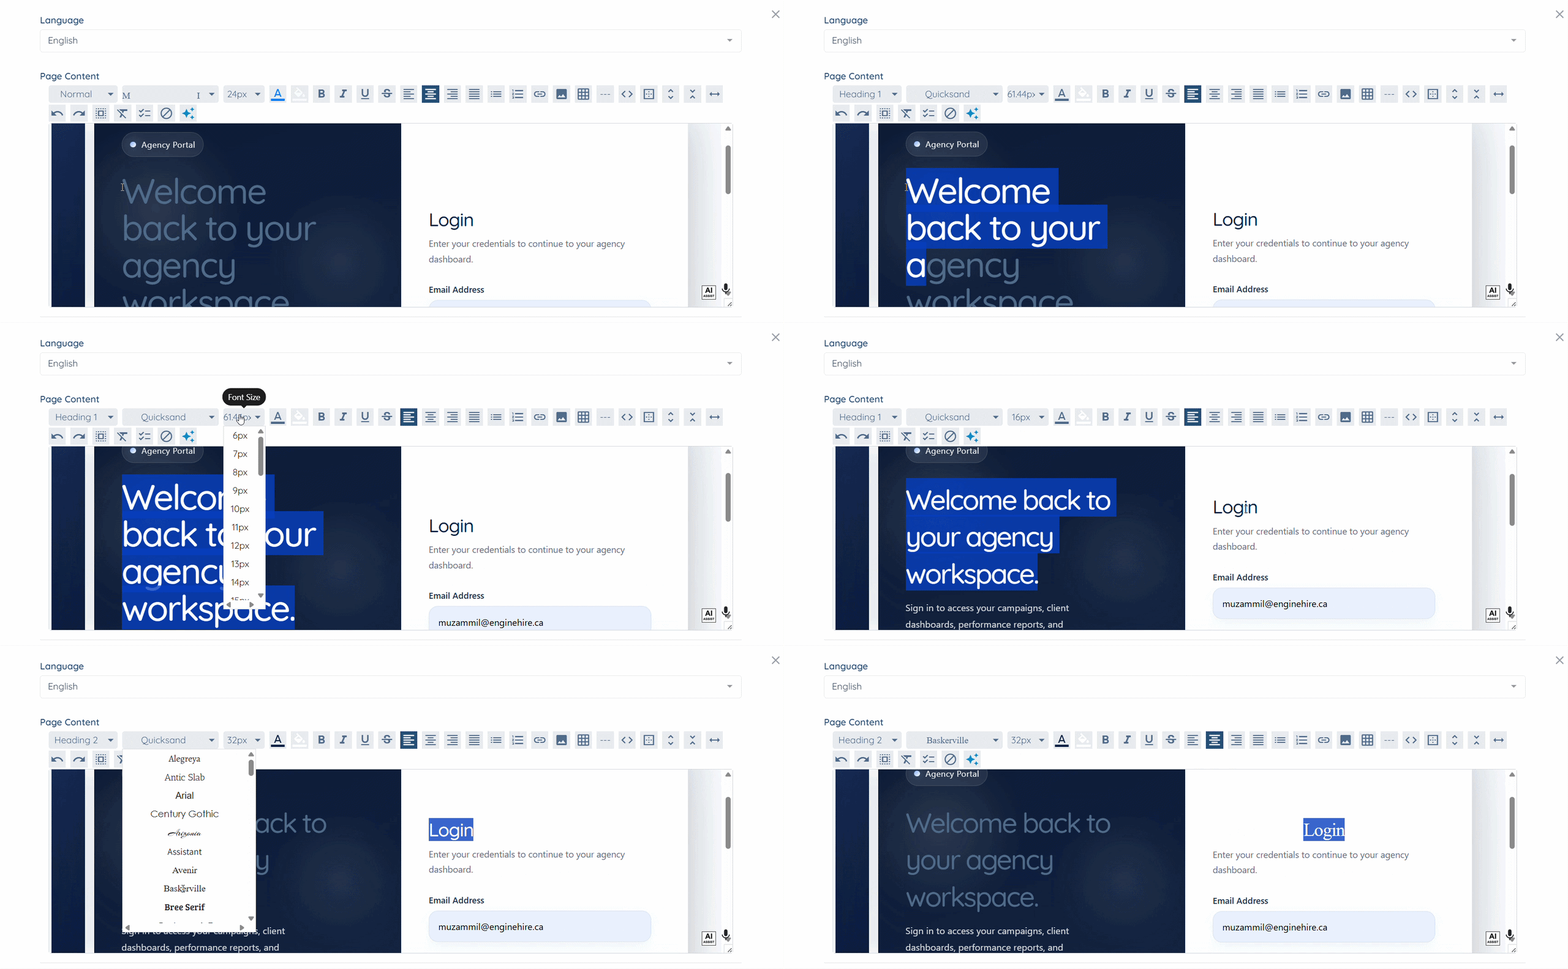
If you want to use AI to customize your login page, continue with Step 4. Otherwise, after making your manual changes in the Page Content field, skip to Step 8 to save and apply your changes.
Step 4: You can also use the Generate Login Page with AI feature by clicking it to customize the login page as you want.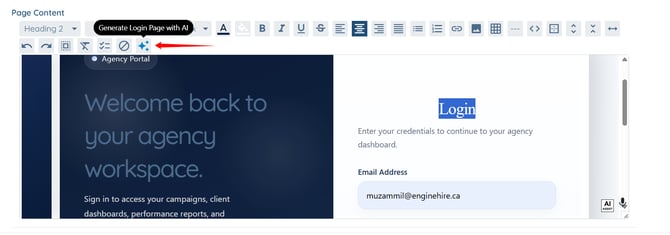
Step 5: Describe your preferred styling (for example, background colors, grids, fonts, and layout) in the text area to customize your login page. 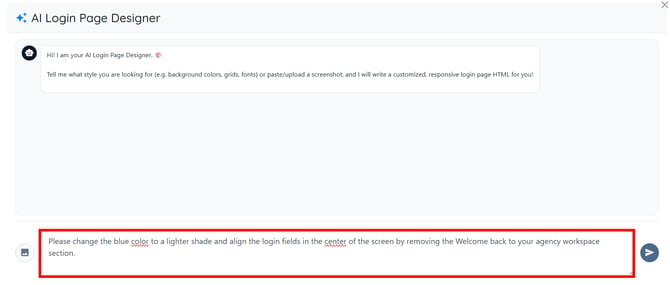
Step 6: Click the Send button.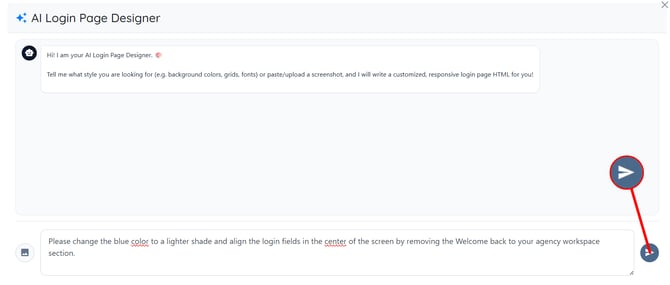
Step 7: The HTML for your custom login page will be generated successfully. Click the Apply Layout to Editor button to insert the generated HTML into the Page Content field. 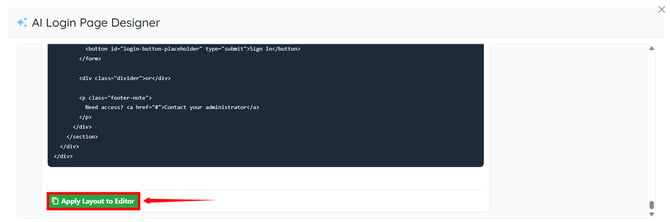
Step 8: Click the Update button to apply the changes.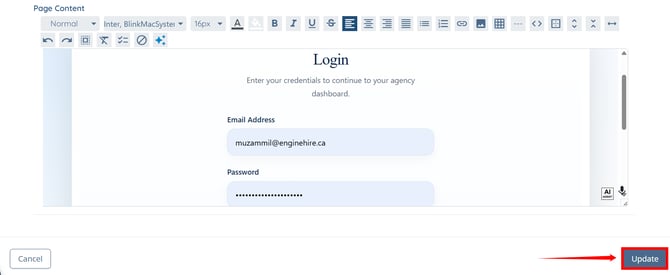
The changes will be applied successfully, and the updated login page will be available for your agency.