![enginehire logo thin dark 1.0.png]](https://learn.enginehire.io/hs-fs/hubfs/enginehire%20logo%20thin%20dark%201.0.png?height=40&name=enginehire%20logo%20thin%20dark%201.0.png)
Let’s get started 🚀
Configure Secondary Login Settings
Configure the required settings to allow clients and candidates to manage secondary logins and control how login notifications are handled.
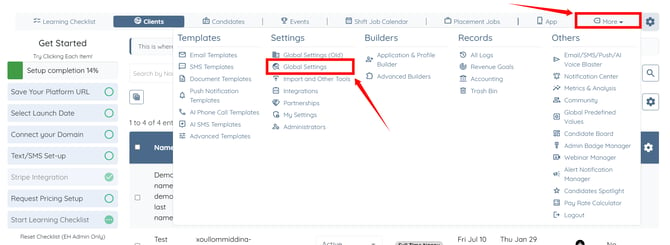
Step 1: Log in to your agent dashboard and click on More > Global Settings as shown in the screenshot below.
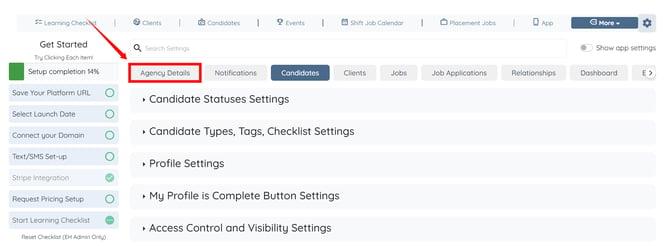
Step 2: Click the Agency Details tab from the available tabs.
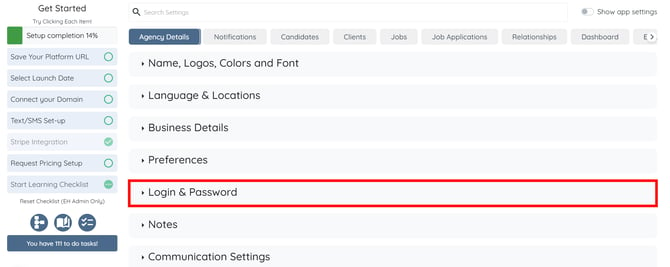
Step 3: Click the Login & Password option to view and expand its details.
Step 4: Check the following boxes:
- Clients can add and manage secondary logins themselves
- Candidates can add and manage secondary logins themselves
- Automatically copy secondary logins on emails sent to primary user
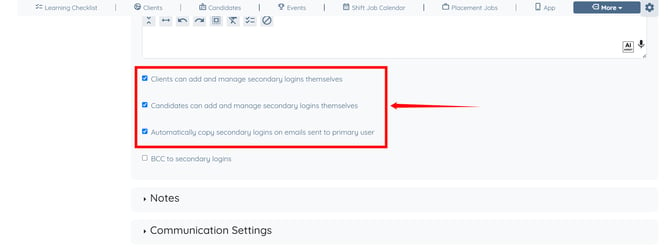
The settings will be saved automatically.
Add Secondary Logins and Manage Notification Emails
Secondary logins can be created for both clients and candidates. For demonstration purposes, this article shows how to add a secondary login to a candidate profile.
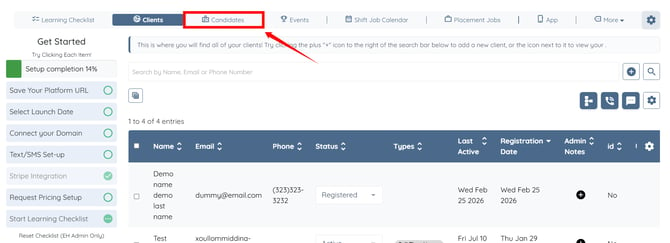
Step 1: On your agent dashboard, click Candidates in the navigation bar.
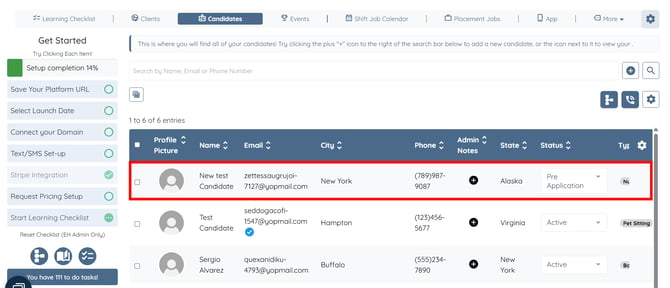
Step 2: Open the candidate profile where you want to create a secondary login account.
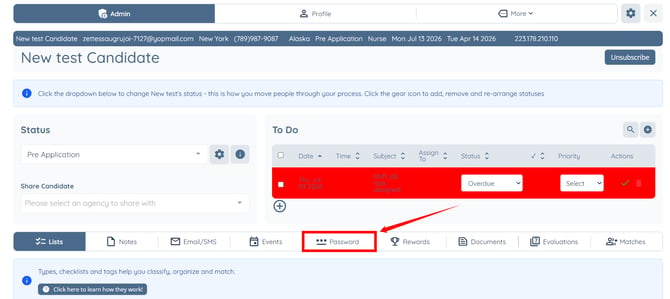
Step 3: Click the Password tab from the available tabs.
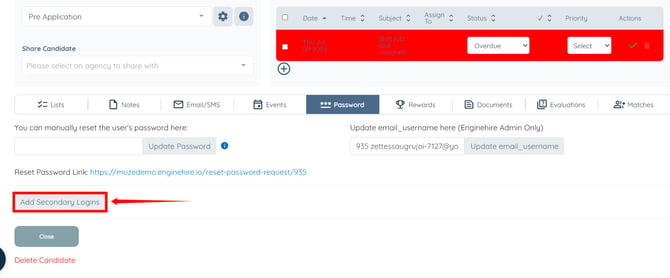
Step 4: Click the Add Secondary Logins button to add new secondary logins for the candidate.
Step 5: Enter the following details to create the secondary login account:
|
S. No. |
Field |
Description |
|
1 |
Name |
Enter the name of the secondary user. |
|
2 |
|
Enter the email address that will be associated with the secondary login. |
|
3 |
Password |
Enter a password for the secondary login account. |
|
4 |
Send login notification email to recipient |
Check this option to send the login details to the secondary user immediately after creating the account. Leave it unchecked if you want to create the account without sending the email and notify the user later. |
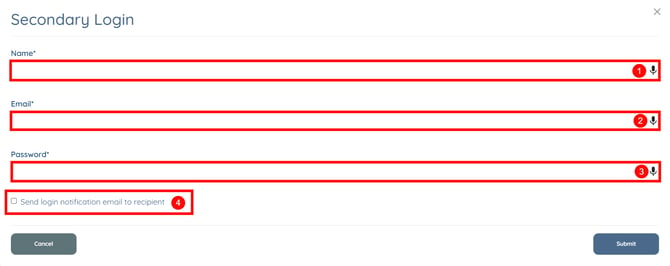
The recipient will receive the login notification email only if the Send login notification email to recipient checkbox is selected. If the checkbox is left unchecked, the secondary login account will still be created, but no notification email will be sent. You can send the notification later when required.
Step 6: Click the Submit button to add the new secondary login details for the candidate.
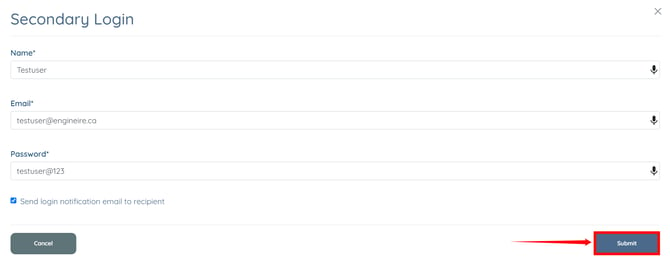
The recipient will receive an email containing their secondary login details and instructions for accessing the account If the notification option is enabled.
Send Email Notifications Later
If you did not send the login notification emails while creating the secondary login account, you can send it to the recipient at any time later.
Step 1: Click the Send Login Notification button next to the secondary login account.
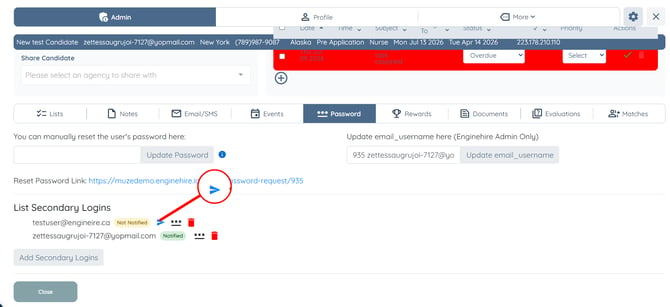
Step 2: Enter the password for the secondary login account, then click the Submit button.
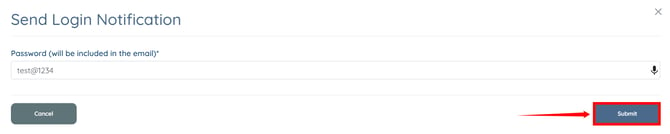
The login notification email containing the secondary login details will be sent successfully to the recipient.