![enginehire logo thin dark 1.0.png]](https://learn.enginehire.io/hs-fs/hubfs/enginehire%20logo%20thin%20dark%201.0.png?height=40&name=enginehire%20logo%20thin%20dark%201.0.png)
Let’s get started 🚀
For Candidates
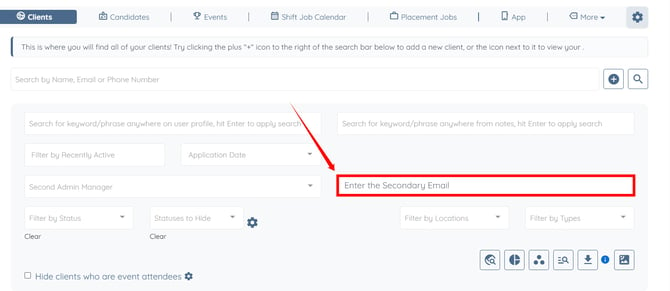
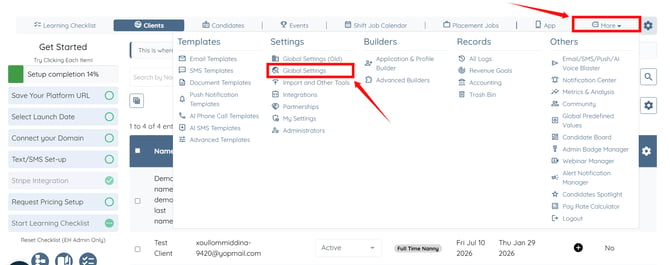
Step 1: Log in to your agent dashboard and click More > Global Settings, as shown in the screenshot below.
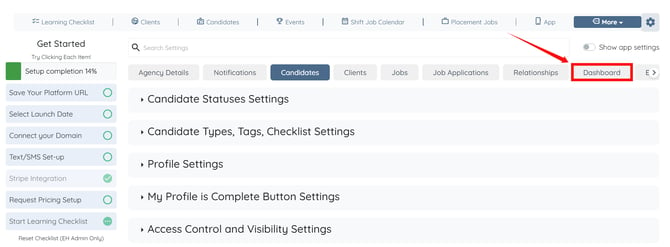
Step 2: Click the Dashboard tab from the available tabs.
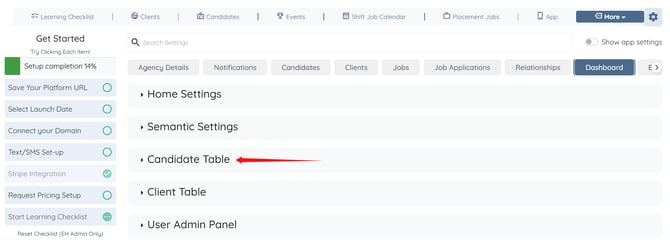
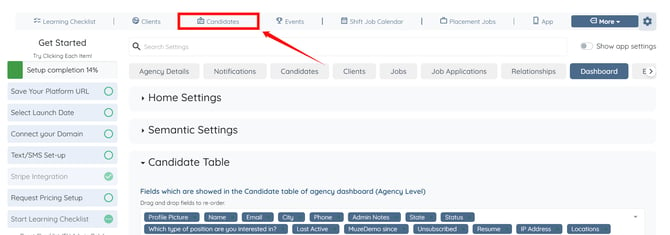
Step 3: Click the Candidate Table option to expand and view its details.
Step 4: Scroll down to the Quick search field for Candidate table of agency dashboard option.
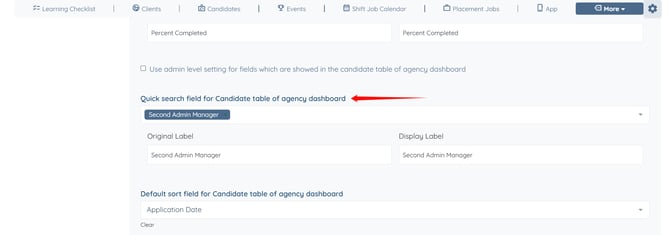
Step 5: Select the field(s) from the dropdown list that you want to add to the Search and Filter Tools.
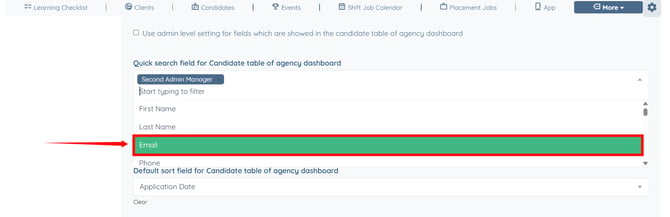
The settings will be saved automatically.
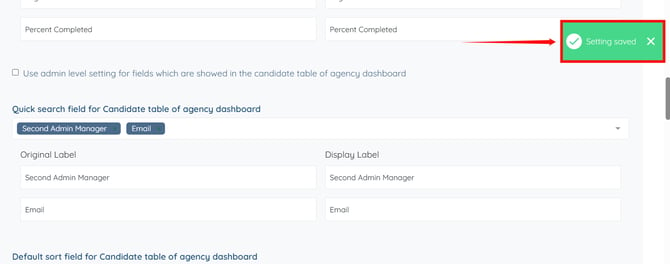
You can also customize the label displayed for each search field by entering the desired text in the Display Label field. By default, the original field label is displayed.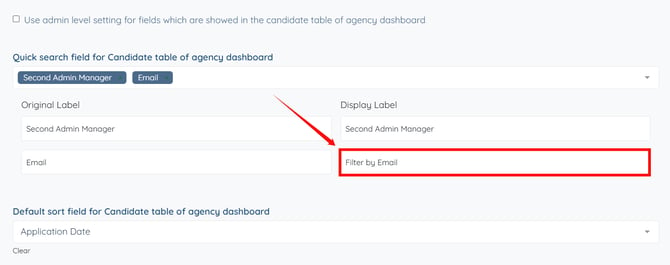
Step 6: Click the Candidates tab in the navigation bar.
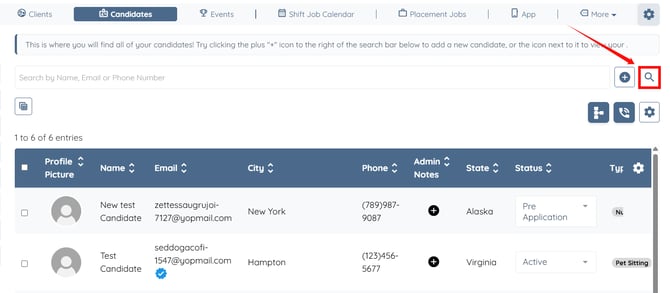
Step 7: Click the Search and Filter Tools icon.
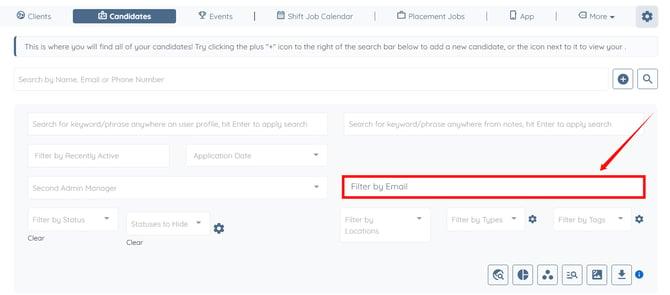
The added search field will appear in the Search and Filter Tools, enabling you to quickly locate and filter candidate records using the selected field.
For Clients
Step 1: Perform the same steps (step 1-2) as in the above section.
Step 2: Click the Client Table option to expand and view its details.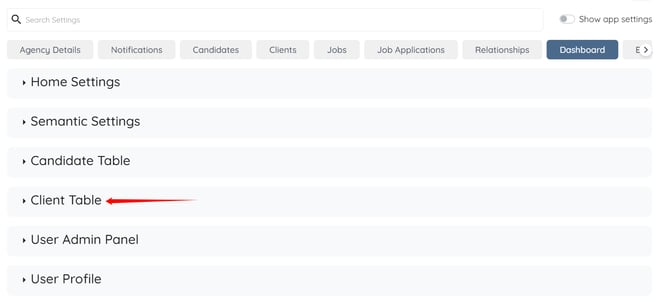
Step 3: Scroll down to the Quick search field for Client table of agency dashboard option.
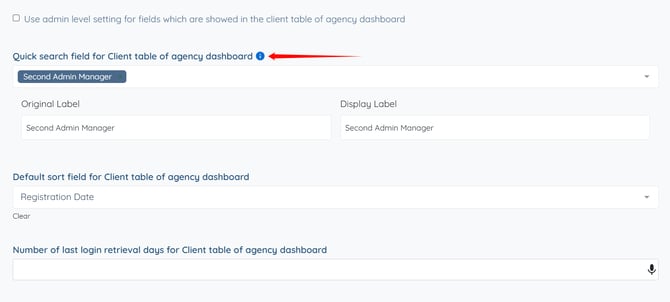
Step 4: Select the field(s) from the dropdown list that you want to add to the Search and Filter Tools. 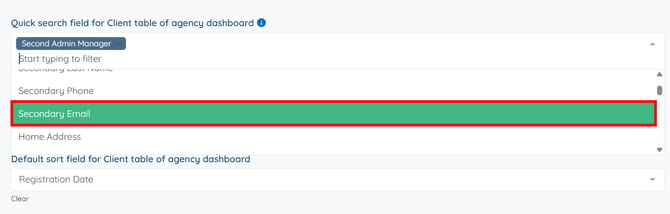
The settings will be saved automatically.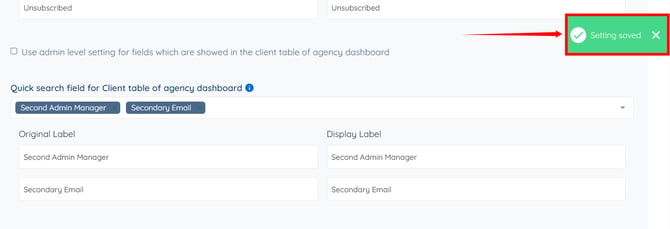
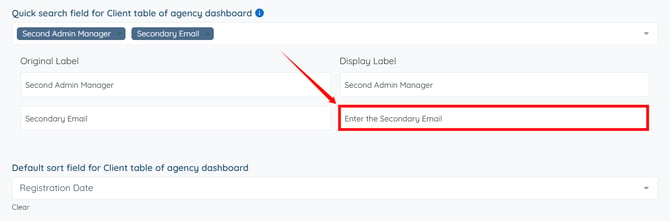
You can also customize the label displayed for each search field by entering the desired text in the Display Label field. By default, the original field label is displayed.
Step 5: Click the Clients tab in the navigation bar.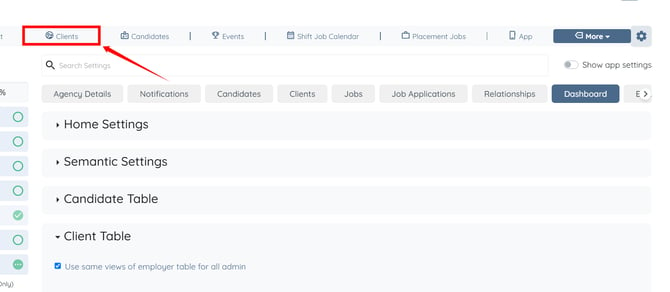
Step 6: Click the Search and Filter Tools icon.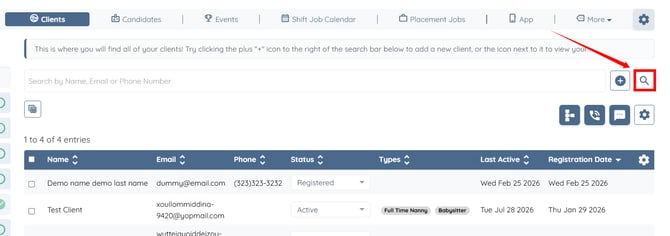
The added search field will appear in the Search and Filter Tools, enabling you to quickly locate and filter client records using the selected field.