Let’s get started 🚀
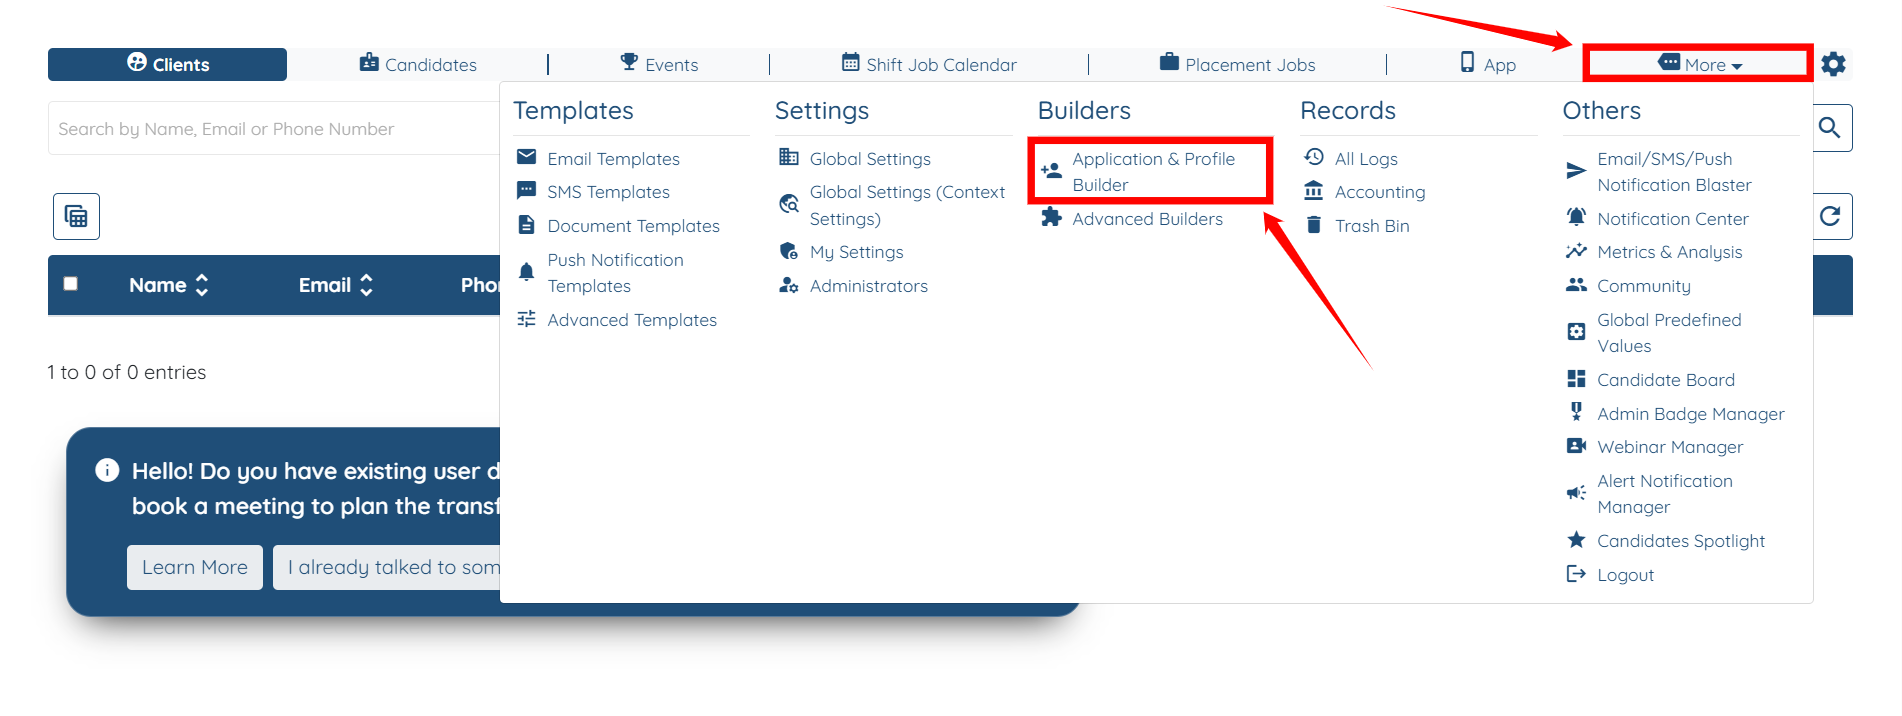
Step 1: Log in to your agent dashboard, then navigate to More > Application & Profile Builder, as shown in the screenshot below.
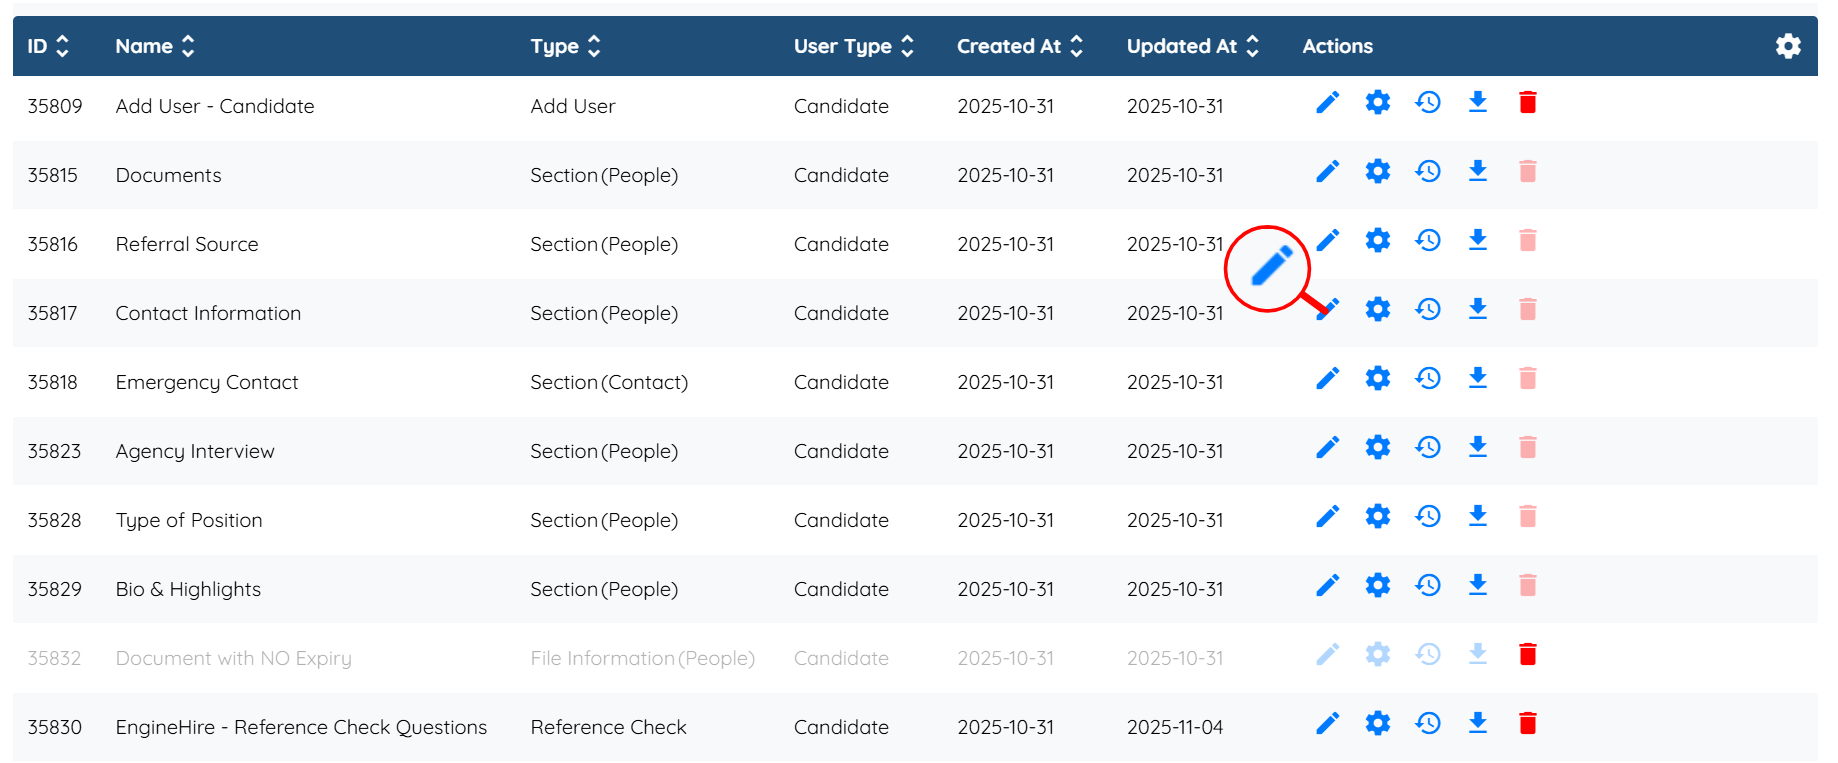
Step 2: Locate the section where you want to add a confirmation field, and then click the Pencil icon corresponding to that section in the Actions column.
Step 3: Select the field for which you want to add a corresponding confirmation field. For demonstration purposes, we are adding the confirmation field to the Email field.
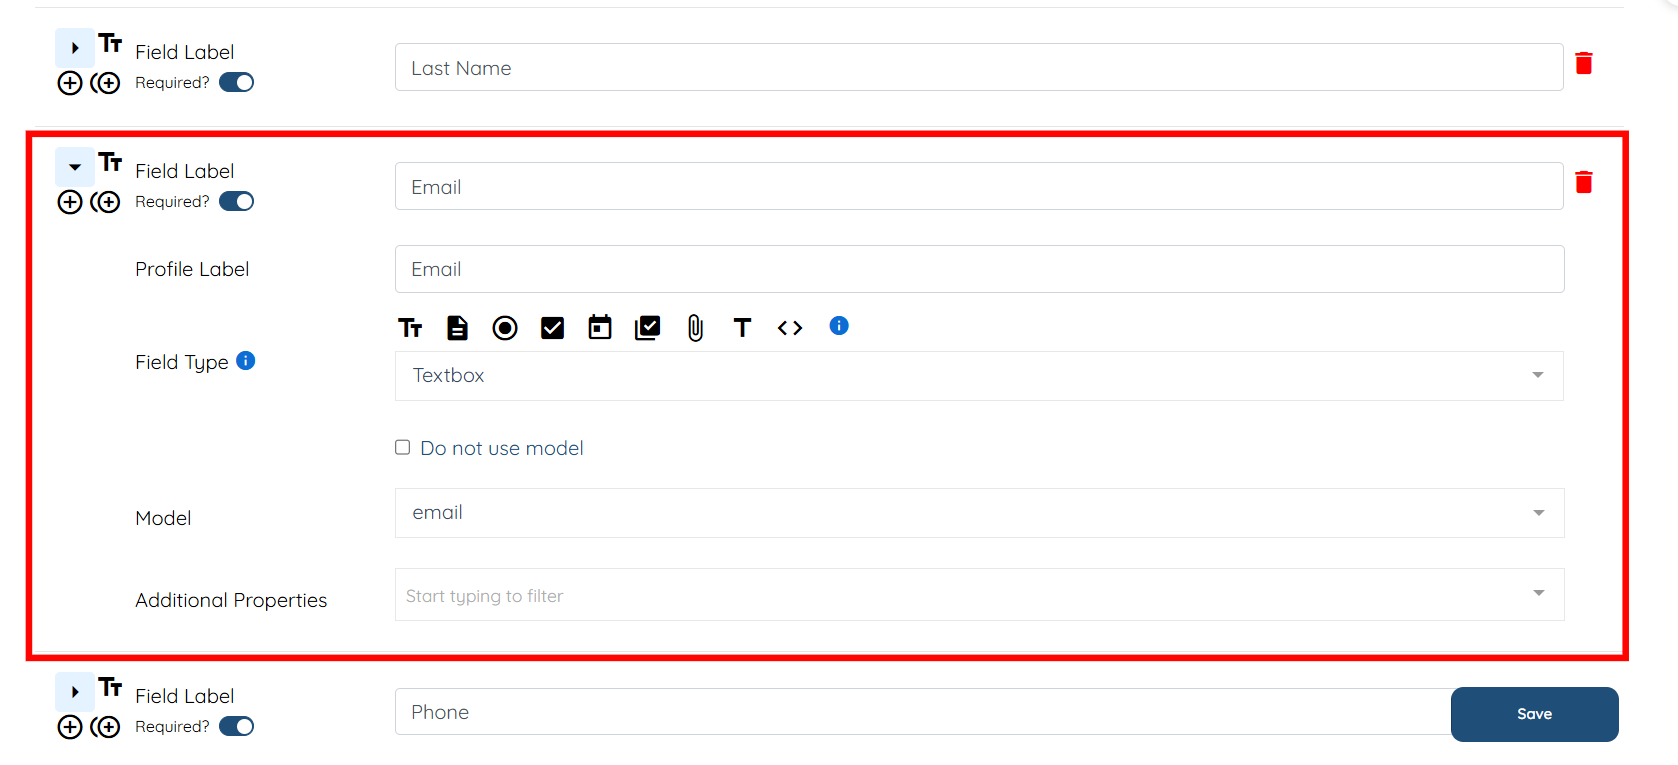
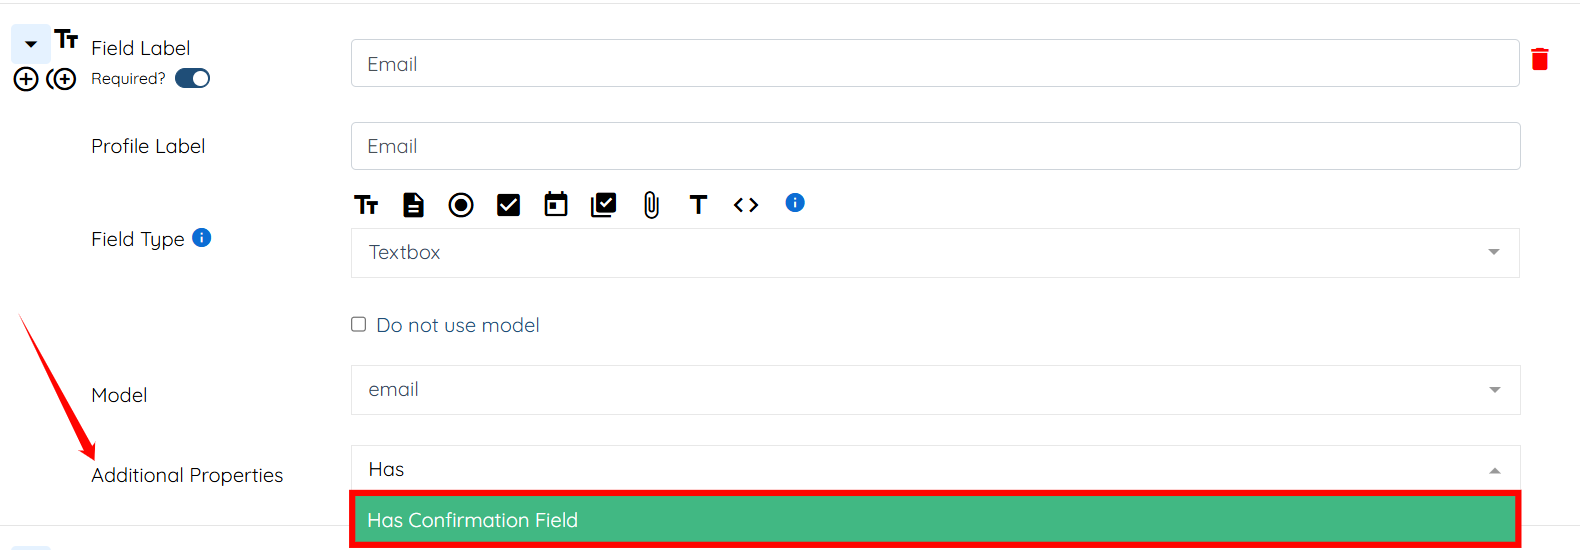
Step 4: In the Additional Properties field, select the Has Confirmation Field option.
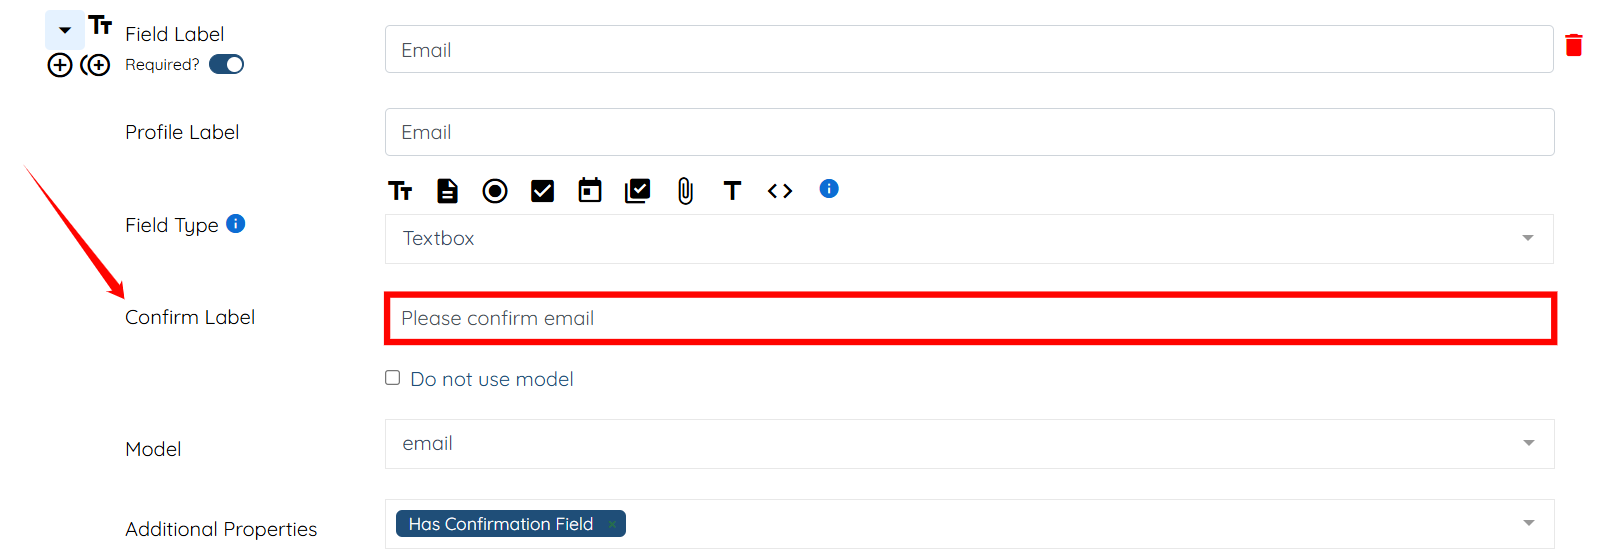
Step 5: Enter the text for the Confirm Label field, such as “Please confirm email.”
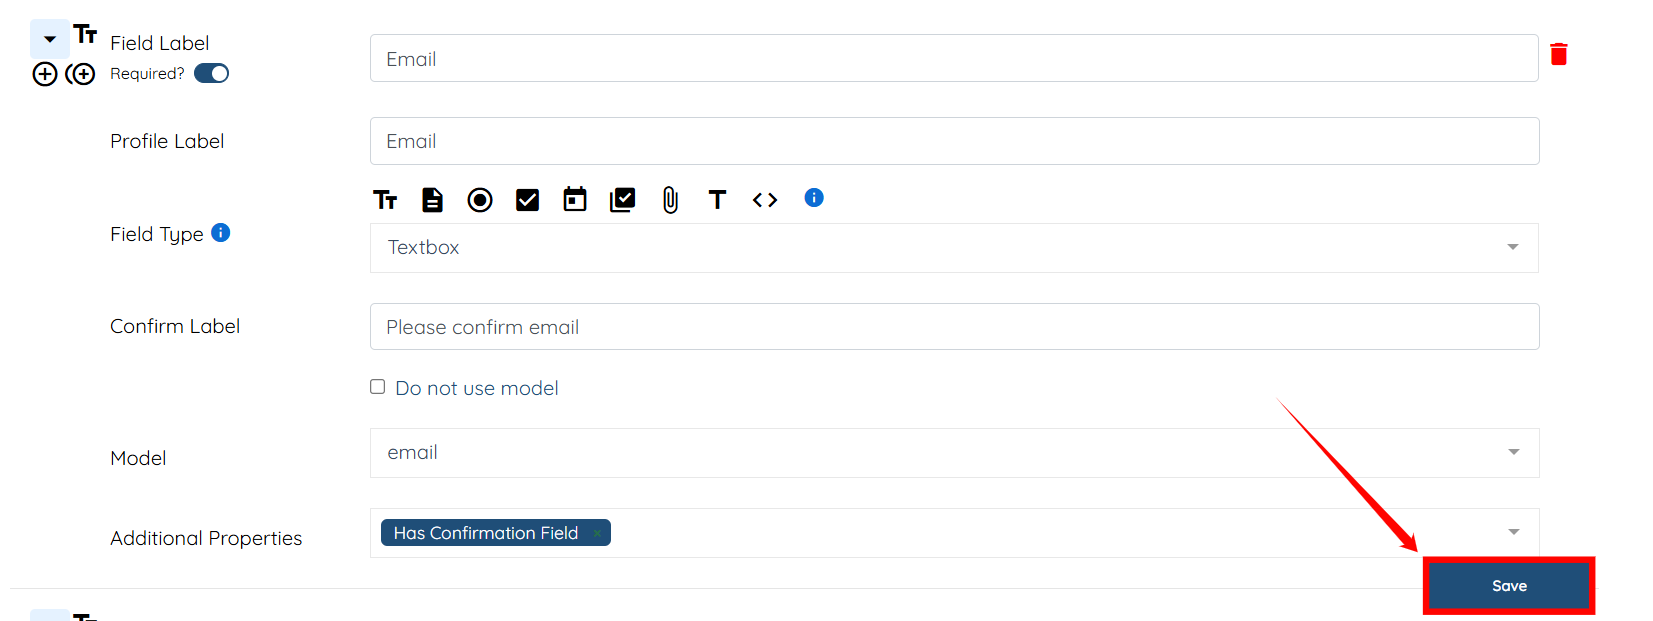
Step 6: Click on the Save button to confirm the changes.
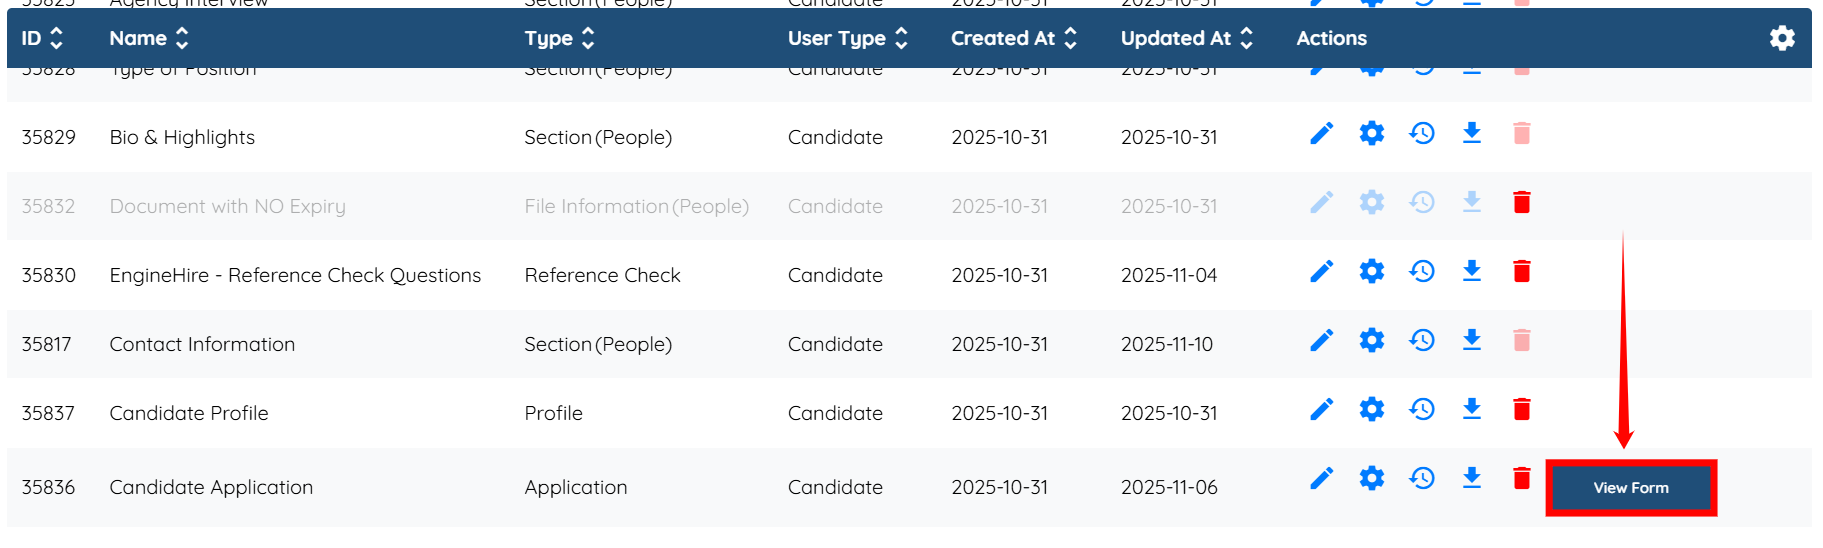
Step 7: Click the View Form button to see the newly added confirmation field in action.
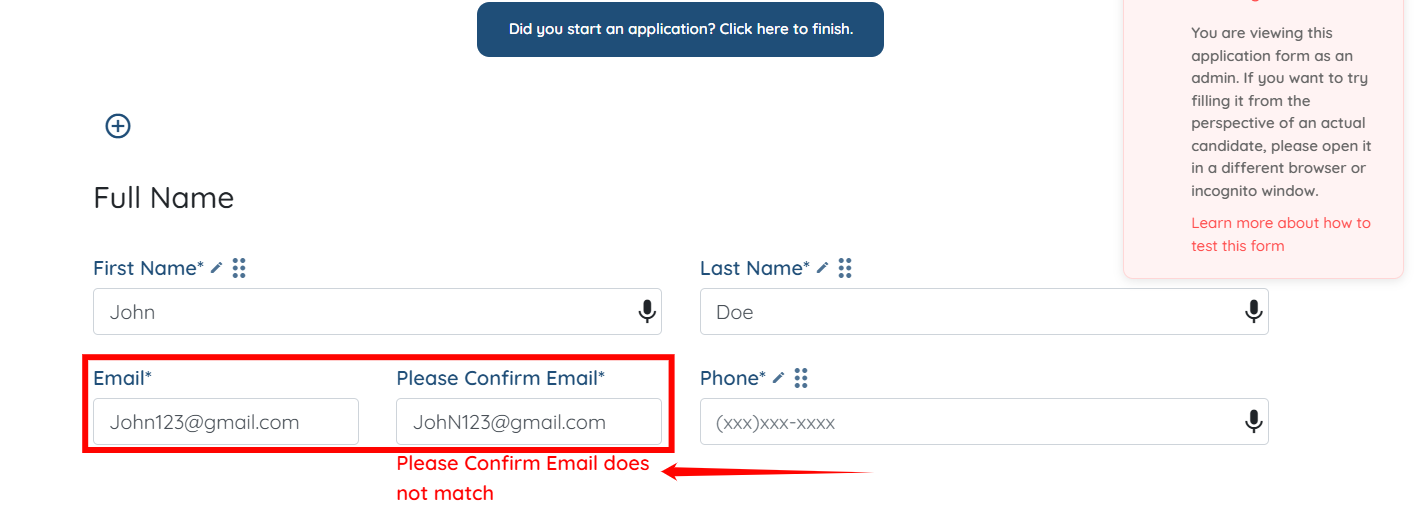
Once the confirmation field is added, an error will appear if the entered values do not match, as shown in the screenshot below.
To preview the form from the client or candidate’s perspective, you will need to open it in a different browser or in an incognito window.